11
©2008 Recordex USA, Inc. All rights reserved.
Version: 1.1
Installation Guide
Recordex Infinix SCM
®
TM
Ceiling Mounting Plate
Installation
1. Replace the ceiling tile, with the hole cut
for the extension column into in the ceiling
grid. Make sure you have the tile oriented
correctly.
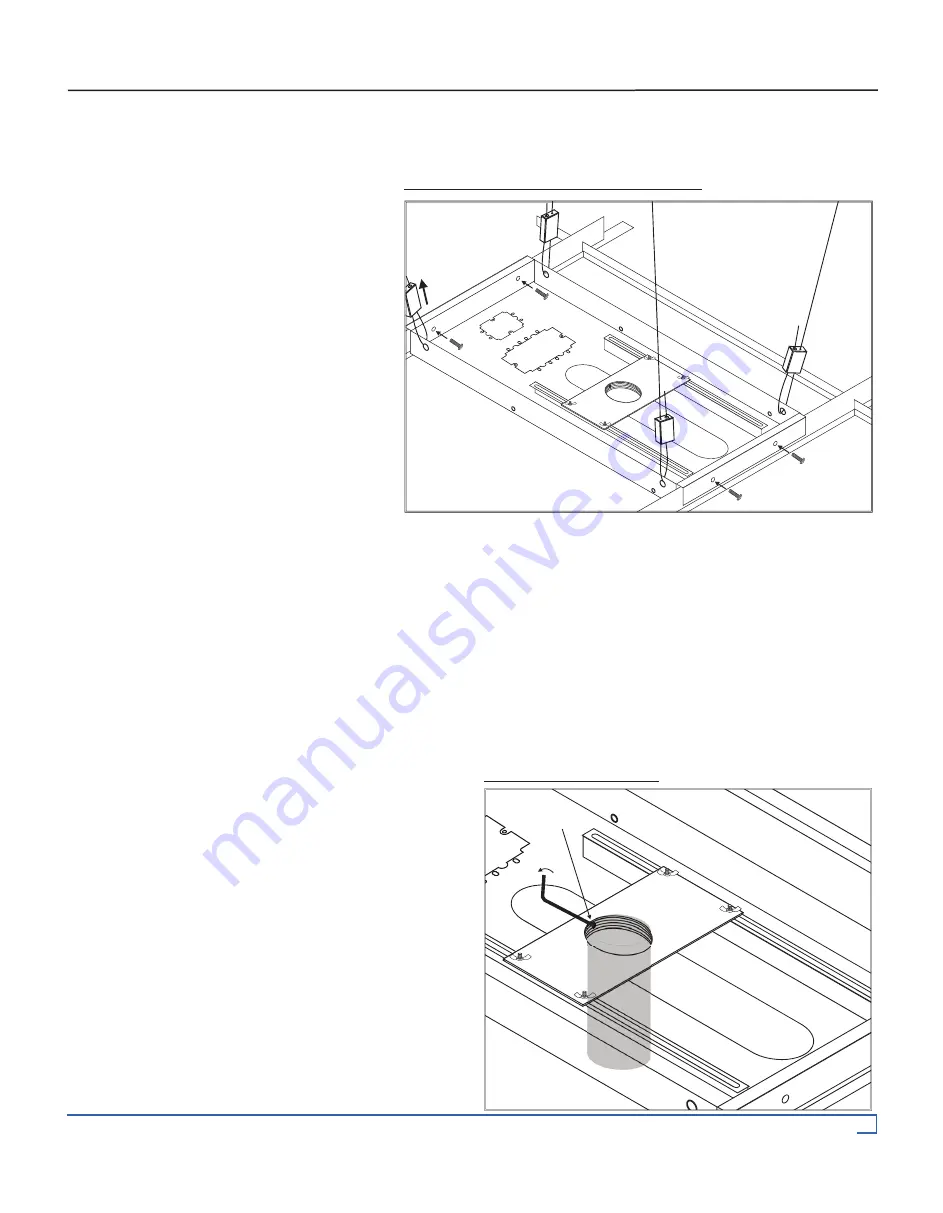
2. Install ceiling mounting plate (A1) on ceil-
ing grid above the tile.
3. Position the plate (A1) on the grid, and
position the pipe coupling to make sure
that it lines up with the hole cut from the
tile.
4. Secure plate to ceiling grid using the #10
x 5/8” screws (A6).
5. Thread the safety wires (that should be
hanging from the anchors that were in-
stalled in the last section) through the fast-
lok wire locks, through holes in the end of
the ceiling mounting plate, and then back
through the fastlok wirelock (See Figure 7).
6. Tighten the wires so that the full weight of
the ceiling mounting plate is supported by
the safety wires. The ceiling grid should
not be supporting the weight of the mount-
ing plate. DO NOTE OVER TIGHTEN the
safety wires, doing so could cause dam-
age to the ceiling grid.
Extension Column Installation
1. Thread the extension column through the hole in the ceil-
ing tile and into the pipe coupling of the ceiling mount
plate.
2. Thread the pipe as far as desired and then secure the
pipe with the 1/4” set screw (A7).
NOTE: You will need to loosen the set screw to adjust
column height if adjustment is necessary.
3. Install the finishing ring around the extension column to
cover the edges of tile where the hole was cut.
Set Screw
A7
Figure 8. Extension Column
Set Screw
A7
A6
A6
A6
A6
Figure 7. Install Plate & Tighten Safety Wires


