UNPACKING
Open the cardboard box, take off the machine in two persons and place on a plane support.
DIRECTIVE 2002/96/CEE
At the end of his working life the product must not be disposed as urban waste. It must be taken to a special local authority differentiated waste
collection center or to a dealer providing this service.
INSTALLATION
The surface where the machine has to be installed must take into consideration the support dimensions. Furthermore, it must be smooth, dry, strong
and with an height from the ground of about 80 cm. and with around the necessary space for use and maintenance.
The machine must be located on a plain surface and positions which can produce the falling of the machine must be avoided.
Environmental conditions :
Minimum tempe10° - Max. tempe 38°
Minimum moisture 30% - Max. moisture 80%
ELECTRICAL CONNECTION
Preliminary controls
Before connecting the machine to power supply, take care of the following:
Make sure the socket is provided with a suitable ground protection
Make sure that the voltage and frequency of supply correspond to those indicated on the data plate of the machine
To operate, the appliance must be connected to a power point that is always easily accessible during use
Make sure that the way how the power cord is placed will avoid the possibility of sliding and tripping
It is user's responsibility to ensure that the connection of the machine to the electric system is in compliance with the rules in force in the
country where the machine is installed, and to ensure that a correct installation is made by a qualified technician.
Once all preliminary controls done correctly, use the main power switch to start using your machine
DOUGH MIXER UNIT
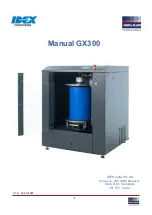
Dough mixer base in die-cast aluminum alloy; steel bevel reduction gear; mixing shaft in precision-cast stainless steel
AISI 316; mixer container and cover in highly resistant semitransparent polycarbonate, detachable for easy cleaning
(even in dishwasher). Safety switch preventing the mixer shaft from operating when the cover is open. Suitable for any
kind of dough: pasta, bread, pizza, cakes.
USING THE DOUGH MIXER
The unit is delivered ready for use, before operate, wash and carefully dry all the parts that have been exposed to the
food
The conical transmission of the dough mixer is lubricated with specific grease of Long Life type, which does not have
to be changed or added.
The Accessories start key (13) must be used to let the motor start using the accessories of the motor other than the
dough mixer.
Make sure that the switch is in the position OFF before changing the accessories and before introducing the blocking of
the safety switch.
When changing the accessories, please follow carefully the installation instructions supplied with the machine.
The machine is prepared for putting into practice:
-Remove the cap (7) rotating it counterclockwise.
-Fill in the tank (8) according to the quantities and ingredients mentioned in the paragraph called Recipes and Advice
for Usage.
-Place the cap (7) on the tank (8) (rotate the cap in such a way in order to fasten it, and rotate clockwise and block it at
the end in order to allow the putting into practice of the machine.
-During the functioning, if necessary, add liquid or flour through the slots of the cap (7) without turning off the
machine.
-After a period of functioning of approximately 2,5/3 min., if the dough is well mixed (if it is not, you may continue
with the functioning) turn off the dough machine, rotate the cap (7) counterclockwise in order to dismantle it and
remove the dough. If you have observed the dosages mentioned in the Recipes and Advice for Usage paragraph, the
dough must be compact and can be easily removed from the tank (8). The dough may be at this point manipulated in

