Realtone RT212 Quick Start Manual Download Page 6

3

Connect Unit to AC Power Source 

Plug the included AC adaptor into the AC adaptor jack on the back of the unit and the other end into a standard 120V AC wall 

socket. 

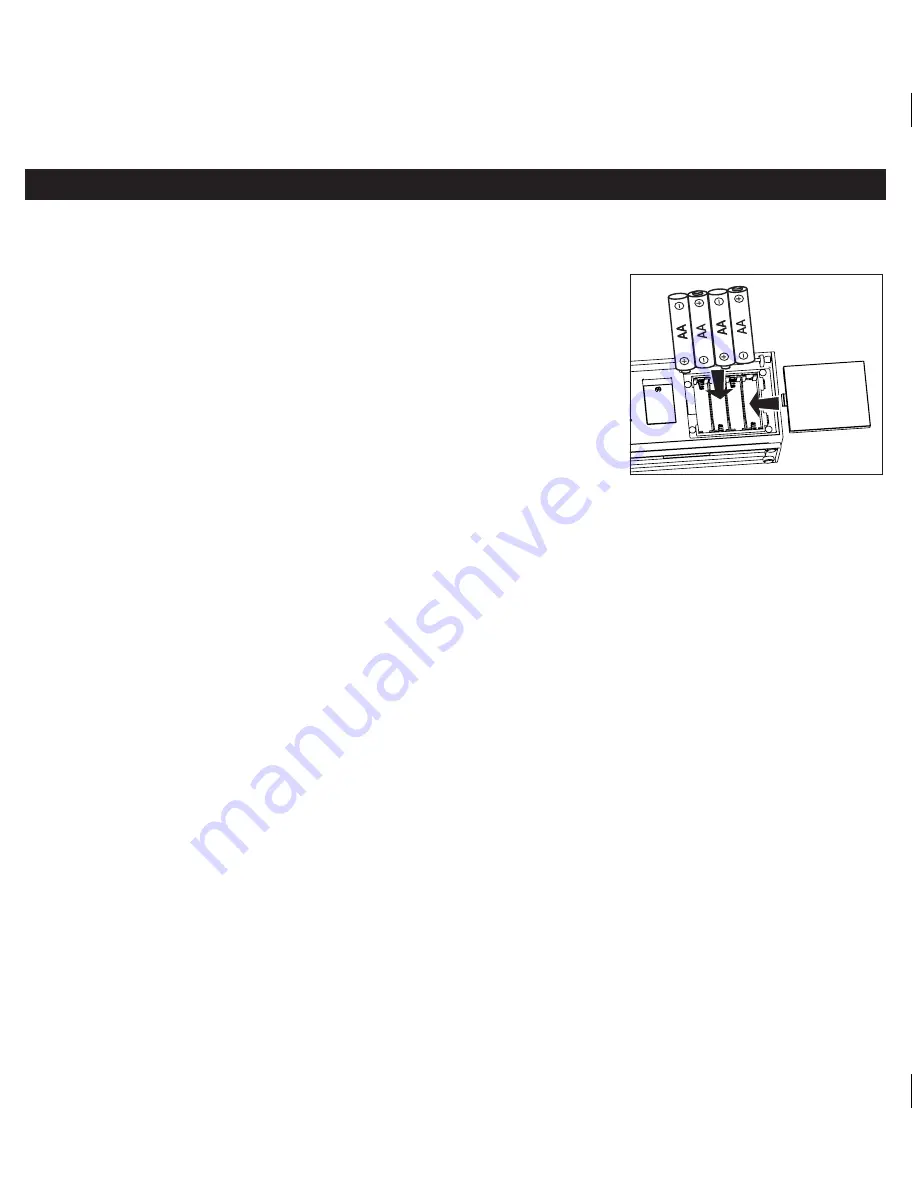
Installing/Replacing Batteries for Portable Operation

This unit requires 4 “AA” (R6) batteries, not included, for portable operation. We 

recommend using a well-known brand of alkaline batteries for longest life and best 

performance.

a)  Open the battery compartment door, located on the back panel

b)  Insert 4 “AA” (R6) batteries in the compartment according to the polarity  (+/ - ) 


markings engraved in the compartment. Note: If the batteries are inserted incorrectly


the unit will not work.

c)  Replace the battery compartment door.


Replace the batteries when the sound of the unit becomes weak or distorted.

Battery Information

•  Always replace all 4 batteries at the same time. Do not mix old and new.

•  Do not mix various types of batteries such as carbon-zinc, alkaline, lithium, etc.

•  Do not attempt to re-charge normal batteries.

•  Do not leave exhausted batteries in the unit for an extended period of time. They may eventually leak, causing possible 


damage to your unit and surrounding surfaces.

•  Dispose of exhausted batteries properly, in accordance with your local recycling regulations.

Setting the Clock

a)  If Daylight Saving Time is in effect, slide the 

DST switch 

on the back panel to the 

+1

 position.  If Standard Time is in effect  


slide the 

DST switch

 to the  

- 1

 position.

b)  Press and hold the 

Clock Set Button

 on the rear of the unit until the clock display flashes. 

c)  Press the 

+

 or 


Button

 as needed to adjust the display to the current time (hold for rapid setting).  AM and PM indicators  


appear at the bottom of the display. Make sure you set the clock to the correct AM or PM time.

d)  Press the 

Clock Set Button

 again to confirm the time setting. Two beeps will indicate clock setting is complete

Using the Alarms

The unit has two independent alarms. Each can be set to wake you at separate times to the current radio station or to a buzzer 

alarm. 

Note:

 Alarm 1 and Alarm 2 are set the same way; 

Alarm Button

 below means the button (Alarm 1 or Alarm 2) for whichever 

alarm you are setting.

Setting the Alarms 


a)  Press and hold the 

Alarm 1

 or 

Alarm 2 Button

 until the alarm time flashes.

b)  Press the 

+

 or 


Button

 as needed to adjust the display to the desired alarm time (hold for rapid setting). AM and PM    


indicators appear at the bottom of the display. Make sure you set the display to the correct AM or PM alarm time.

c)  During alarm setting, press the 

Mode Button

 to select Buzzer or Radio (last selected station) to wake to. Default  


mode is buzzer.

d)  Press the 

Alarm Button

 again to confirm alarm setting. To set another alarm, follow steps a - d. 


Using the RT212

Summary of Contents for RT212

Page 1: ...Instruction Manual Date Apr 3 2012 Print color Black text on white paper Size 125W x 125H mm Questions Visit www realtoneaudio com Model RT212 AM FM Dual Alarm Clock Radio ...

Page 2: ...f this equipment does cause harmful interference to radio or television reception which can be determined by turning the equipment off and on the user is encouraged to try to correct the interference by one or more of the following measures Reorient or relocate the receiving antenna Increase the separation between the equipment and receiver Connect the equipment into an outlet on a circuit differe...

Page 3: ... surface away from sources of direct sunlight or excessive heat Protect your furniture when placing your unit on a natural wood and lacquered finish A cloth or other protective material should be placed between it and the furniture Clean your unit with a soft cloth moistened only with mild soap and water Stronger cleaning agents such as Benzene thinner or similar materials can damage the surface o...

Page 4: ...ning Knob Right Side Clock Set Button Line in Jack Rear Side DST Switch Battery Pull Tab Battery Compartment 4 AA Backup Battery Compartment CR2450 FM Antenna AC Adaptor Jack DC 7 5V 500mA Alarm 2 Button Alarm 1 Button Mode Button Alarm 1 Alarm 2 Indicators Low Back up Battery Indicator Time Radio Frequency Display PM Indicator AM Indicator FM Indicator Sleep Indicator Line In Indicator Buzzer Ind...

Page 5: ... the or Buttons to adjust the time hold for rapid setting Press the Clock Set Button again 2 clock set Press and hold Alarm 1 or Alarm 2 Button until display flashes Press the or Buttons to adjust the alarm time hold for rapid setting Press the Mode Button to select buzzer or radio as alarm source Press the Alarm Button to confirm alarm setting 3 alarm Press the Power Button to turn unit ON Press ...

Page 6: ...lock a If Daylight Saving Time is in effect slide the DST switch on the back panel to the 1 position If Standard Time is in effect slide the DST switch to the 1 position b Press and hold the Clock Set Button on the rear of the unit until the clock display flashes c Press the or Button as needed to adjust the display to the current time hold for rapid setting AM and PM indicators appear at the bott...

Page 7: ... find the position that provides the best reception Tuning and Playing the Radio a Press the Mode Button as needed to select FM or AM radio band indicated by the FM or AM icon on the display b Turn the Tuning Knob on the right side of the unit to tune radio to a desired station The time display changes to radio frequency during tuning After five seconds the display returns to the current time c Tu...

Page 8: ...your local regulations WARNING Lithium batteries can explode or cause burns if disassembled shorted recharged exposed to water fire or high temperatures Do not place loose batteries in a pocket purse or other container containing metal objects mix with used or other battery types or store with hazardous or combustible materials Store in cool dry ventilated area Follow applicable laws and regulatio...

Page 9: ...it is plugged into an AC socket 6 Cleaning The unit should be cleaned only as recommended See the Maintenance section of this manual for cleaning instructions 7 Objects and Liquid Entry Care should be taken so that objects do not fall and liquids are not spilled into any openings or vents located on the product 8 Attachments Do not use attachments not recommended by the product manufacturer 9 Ligh...

Page 10: ... on unit Make sure volume is turned up Sound is distorted Volume level is set too high Decrease the volume Sound source is distorted If you are using an external sound source like older generation of iPod or iPod Shuffle try reducing the output volume on the device itself Move unit away from potential sources of external interference such as computers modems wireless devices routers or fluorescent...

Page 11: ...nd insured to the Factory Service Center listed below Consumer Repair Department SDI Technologies Inc 1330 Goodyear Dr El Paso TX 79936 6420 Disclaimer of Warranty NOTE This warranty is valid only if the product is used for the purpose for which it was designed It does not cover i products which have been damaged by negligence or willful actions misuse or accident or which have been modified or re...

Reviews: