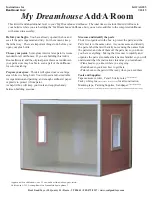


Assembly:
My Dreamhouse Instructions - Painting, sanding, and cleaning
page 4
□
1. Glue and tape the Floor to the Back
with the painted face to the inside.
e and tape the Floor to the Back
ainted face to the inside.
Use enough glue so some squeezes out of every joint.
Use enough glue so some squeezes out of every joint.
Keep a damp rag and a dry rag handy to clean up excess.
Keep a damp rag and a dry rag handy to clean up excess.
Floor
Floor
Back
Back
□
2. Glue and tape the Ceiling Liner to the Back.
The Electrifi cation Slots in the Ceiling Liner allow ceiling-light in-
stallation above the ceiling (which some builders prefer)... you can
decide where the slots go or ignore them if you aren’t going to wire.
Note: Many of these photos are of un-painted parts,
but you should have painted these parts at least one-
coat already, and have sanded thoroughly.
Inside
□
3. The Sides are Left or Right - pick the one for
the end of the assembly that is up.
Glue and tape a Side to the assembly, tight in the back groove.
Step 2
Step 1
Tight
Continue to step 5 without stopping
Electri
fi
cation Slots in the Floor make it easy to run tapewire through-
out your build, and multiple slots allow a choice in how you are wiring.
I usually put the slots forward to feed lights behind the Floor Trim but
your plan may be different. Plan ahead, then do it your way!
See page 9
Taping:
Use enough tape so you can stick it down and still
have length enough to stretch the tape on both sides of the
joint... then rub the tape down for good adhesion.
T
T
Ceiling Liner
Ceiling Liner
Floor
Floor
The narrow groove
The narrow groove
is the top
is the top
Side
Side
Pull the Side to the back to make
Pull the Side to the back to make
it tight in the groove as you tape
it tight in the groove as you tape
Step 3
Electri
fi
cation Slot
Electri
fi
cation Slot


