background image

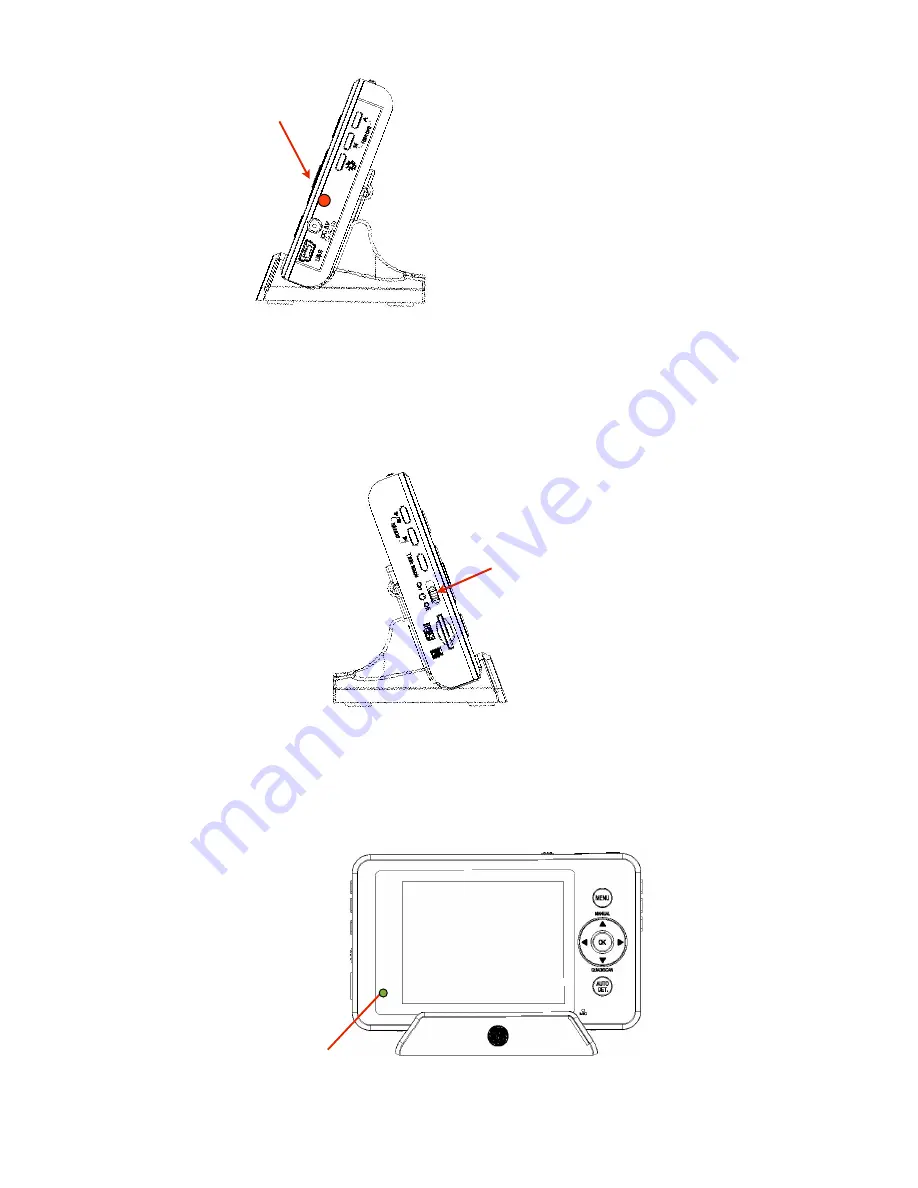
CHARGING(LIGHT

POWER&ON/OFF&SWITCH

POWER&LED&(low&battery&if&flashing)


NOTE:   Depending   on   the   current   state   of   these   battery,   it   can   take   up   
to   6   hours   to   fully   charge.      
   

4.


Locate   the   POWER   switch   on   the   left   side   of   the   monitor.   


5.


Slide   the   POWER   switch   to   the   ON   position.   THE   POWER   LED   will   

illuminate   green   near   the   bottom   left   of   the   display.   


Summary of Contents for M370QN

Page 1: ...Digital Wireless Camera and Lcd Monitor User Manual...

Page 2: ...Modes 2 Auto Detection 3 Auto Recording 4 Manual Recording 5 Playback ADITIONAL FEATURES 1 Setting the Date and Time 2 Talk Back 3 Night Light 4 Pairing Additional Cameras 5 Audio and Video Motion Det...

Page 3: ...15 Activating the Overwrite Feature 16 Lullabies 17 Mini USB Output TROUBLESHOOTING 1 Frequently Asked Questions WARRANTY FCC STATEMENT SPECIFICATIONS...

Page 4: ...otion or sound is detected Built in 4hr Li polymer rechargeable battery Room temperature display and alerts Chargeable using cradle or by directly plugging in to monitor Wireless Color Camera 2 4GHz d...

Page 5: ...ggles between the multiO screen and sequential viewing modes STOP when viewing recorded videos DOWN navigating the menu AUTO DETECTION puts monitor into standby mode until video motion or audio is det...

Page 6: ...ture POWER INPUT charging directly without using cradle MINI USB OUTPUT stream live video to your home computer and record to hard drive using supplied software CHARGING LIGHT green indicates fully ch...

Page 7: ...strength shown OVERWRITE ENABLED when the memory card is full old video will be overwritten DATE AND TIME STAMP YEAR P MONTH P DAY P TIME MEMORY CARD INSERTED FLASHING YELLOW new video saved to memory...

Page 8: ...N used to pair camera to monitor INITIAL SET UP Wireless Color Camera Power Using AC Adapter 1 Plug in the power adapter into an electrical outlet 2 Insert the other end of the power adapter into the...

Page 9: ...as shown FIGURE DISPLAYING BATTS BEING INSERTED Wireless Color Monitor 1 Plug in the power adapter into an electrical outlet 2 Insert the other end of the power adapter into one of the following a The...

Page 10: ...NOTE Depending on the current state of these battery it can take up to 6 hours to fully charge 4 Locate the POWER switch on the left side of the monitor 5 Slide the POWER switch to the ON position THE...

Page 11: ...he display shows OUT OF RANGE or you desire to add additional cameras follow the Pairing Additional Cameras procedure in the Additional Features section of this manual p XX 7 To determine the best loc...

Page 12: ...d by power wires or plumbing inside those walls Usually a slight adjustment to the position of the monitor and or camera will improve reception The Digital Wireless monitor system has a secure and pri...

Page 13: ...SCAN button repeatedly until multiple camera video streams appear if additional cameras are paired to monitor 2 FIGURE DISPLAYING QUAD MODE NOTE Recording the multi screen viewing quad mode video str...

Page 14: ...Medium Low or Off Press and release the OK button 7 5 Press and release the MENU button to exit 8 Activate 1 Press and release the AUTO DET button repeatedly until the display turns off 3 2 When video...

Page 15: ...ecording will begin and REC will appear flashing on top of the display 3 The name of the video recording is pre set and cannot be customized It appears in blue and also displays near the top of the di...

Page 16: ...and time settings Additional Features This will help locate recorded videos more easily during playback A Micro SD card is required not included When activated only the AUTO DET button is functional A...

Page 17: ...desired Press and release the OK button to select 25 NOTE If the date and time settings haven t been adjusted Additional Features the folder names may be inaccurate 4 A list of individual video files...

Page 18: ...ues displayed 5 Press and release the OK button to save 29 6 Press and release the MENU button to exit 30 Talk Back Allows the option to speak directly to currently selected camera channel 1 Locate th...

Page 19: ...itor In either single or sequential viewing mode press and release the NIGHT LIGHT button located on the right side of the monitor 33 The night light will illuminate on the camera currently shown on t...

Page 20: ...ppear on the display Audio and Video Motion Detection Alarm Sounds 4 beeps when audio or video motion is detected Can be triggered again after approximately 4 seconds Alarm can be triggered repeatedly...

Page 21: ...and Folders 1 In either single or sequential viewing mode press and release the OK button 53 A list of folders stored on the memory card will appear on the display 54 Use the directional keypad to sel...

Page 22: ...ypad highlight the Settings option 74 Press and release the OK button 75 3 Using the directional keypad highlight the Temp Alert Range option 76 Press and release the OK button 77 4 Use the directiona...

Page 23: ...onal keypad highlight the Format option 101 Press and release the OK button 102 4 A warning message will appear on the display requesting confirmation 103 Use the directional keypad to select Yes 104...

Page 24: ...25 3 Using the directional keypad highlight the Overwrite option 126 Press and release the OK button 127 4 Use the directional keypad to highlight Yes or No 128 Press and release the OK button 129 5 P...

Page 25: ...o ON again If camera is in close proximity to 2 Buttons on the monitor not responding Auto or Manual Record mode likely activated Check to see if red LED is illuminated or REC appears on the display P...

Page 26: ...ul interference to radio communications However there is no guarantee that interference will not occur in a particular installation If this equipment does cause harmful interference to radio or televi...

Reviews: