RCA RTD255 User Manual Download Page 28

42

Care and Maintenance

Disconnect the audio system from the power source before
performing any maintenance.

Cleaning

Clean the exterior of the system using a soft dust cloth.

The player

CAUTION!

This system operates with a laser. It must only

be opened by a qualified technician.
• Never move the player during playback.
• Never put more than one disc on a tray or put a disc 
slipping out of the guide area.
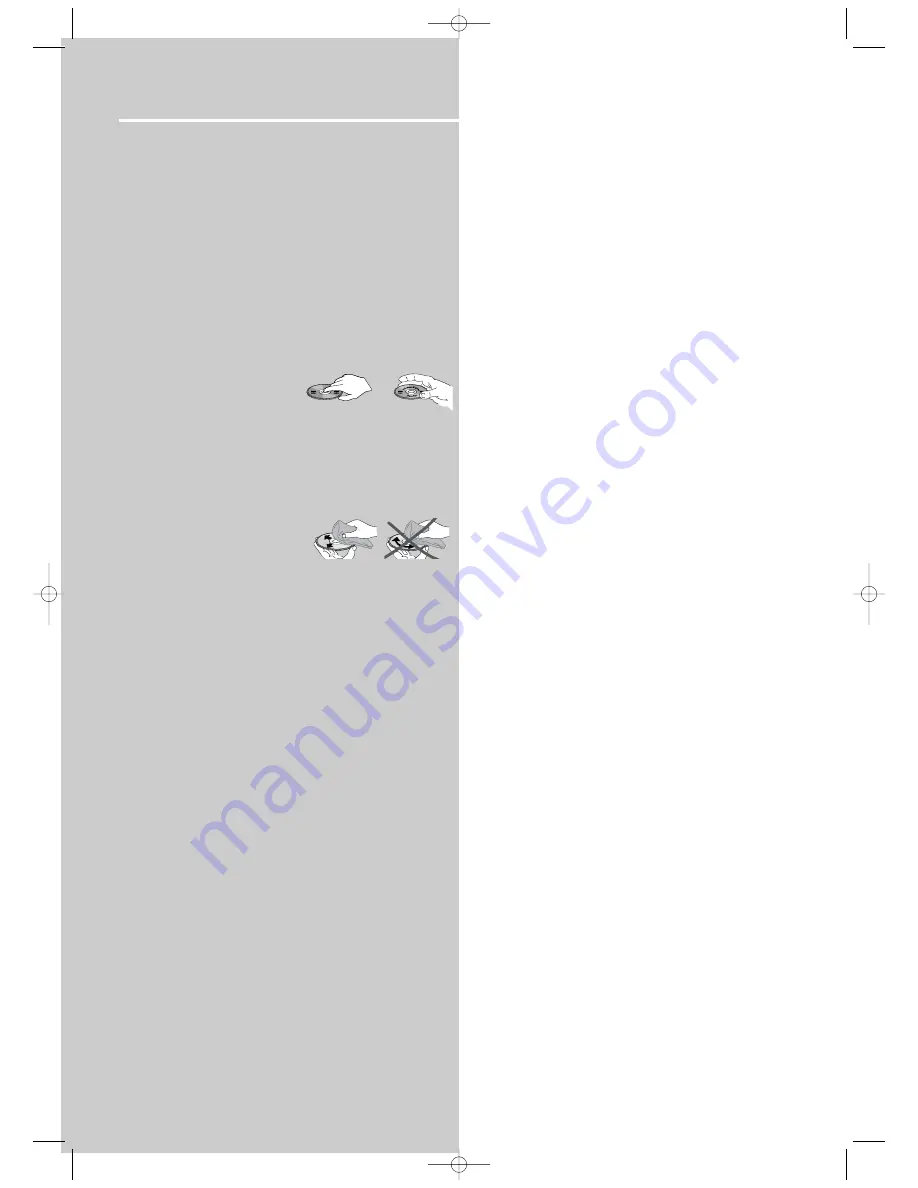
Handling discs

• Do not touch the signal sur-
faces. 
• Hold discs by the edges, or by
one edge and the hole. 
• Do not affix labels or adhesive tapes to the label surfaces. 
• Do not scratch or damage the label. Discs rotate at high
speeds inside the player. 
• Do not use damaged (cracked or warped) discs.

Cleaning discs

• Dirty discs can cause poor
sound and visual quality. Always
keep discs clean by wiping them
gently with a  soft cloth from
the inner edge toward the outer perimeter. Never wipe the
disc in a circular motion since circular scratches are likely to
occur and could cause noise during playback.
• If a disc becomes dirty, wet a soft cloth in water, wring it
out well, wipe the dirt away gently, and then remove any
water drops with a dry cloth.
• Do not use record cleaning sprays or antistatic agents on
discs. Also, never clean discs with benzene, thinner, or other
volatile solvents which may cause damage to disc surface

Disc lens care

• When your disc lens gets dirty it can also cause the system
to output poor sound and visual quality. To clean the lens
you will need to purchase a disc lens cleaner which can
maintain the output sound and visual quality of your 
system. For instructions on cleaning the disc lens, refer to
the ones accompanying the lens cleaner. 

Important battery information

• Remove the batteries to avoid leakage if you do not use
your remote control for more than one month.  
• Discard leaky batteries immediately as leaking batteries
may cause skin burns or other personal injuries. 
• Dispose of batteries in the proper manner, according to
provincial and local regulations.  
• Any battery may leak electrolyte if mixed with a different
battery type, if inserted incorrectly, if all batteries are not
replaced at the same time, if disposed of in fire, or if an
attempt is made to charge a battery not intended to be
recharged.

Safety precautions

• Never open the cabinet under any circumstances.  Any
repairs or internal adjustments should be made only by a
trained technician.
• Never operate this product with the cabinet removed.
• Do not touch the player with wet hands.  If any liquid
enters the player cabinet, take the player to a trained tech-
nician for inspection.
• This player uses a laser to read the data on the disc.  The
laser mechanism corresponds to the cartridge and stylus of
a record player.  Although this product incorporates a laser
pick-up lens, it is completely safe when operated according
to directions.
• Discs rotate at high speed inside the player.  Do not use
damaged, warped, or cracked discs.
• Do not touch the pick-up lens which is located inside the
disc compartment.  Also, to keep dust from collecting on
the pick-up lens do not leave the compartment door open
for an extended period of time.  If the lens becomes dirty,
clean it with a soft brush, or use an air blower brush
designed for camera lenses.
• The apparatus shall not be exposed to dripping or splashing and
that no objects filled with liquids, such as vases, shall be placed on
the apparatus.

Headset safety

• Do not play your headset while the sound is at high vol-
ume levels.  Hearing experts warn against extended high-
volume play. 
• If you experience a ringing in your ears, reduce volume or
discontinue use. 
• You should use extreme caution or temporarily discontin-
ue use in potentially hazardous situations.
• Even if your headset is an open-air type designed to let
you hear outside sounds, don’t turn up the volume so high
that you are unable to hear what is around you.

Don’t infringe

This product should only be used for the purposes for
which it is sold, that is, entertainment, violating no copy-
right law. Any attempts to use this product for which it is
not intended is unlawful and therefore not condoned by
Thomson. 

The descriptions and characteristics given in this document are given as a

general indication and not as a guarantee.  In order to provide the highest

quality product possible, we reserve the right to make any improvement or

modification without prior notice.  The English version serves as the final

reference  on all products and operational details should any discrepancies

arise in other languages.

Video Disc

Th

omson Digital

RTD255-EN  last  5/11/04  5:28 PM  Page 4

Summary of Contents for RTD255

Page 1: ...g Office Washington DC 20402 Please speci fy stock number 004 000 00345 4 when ordering copies This product complies with DHHS Rules 21 CFR Subchapter J Applicable at the date of manufacture For Your Safety The AC power plug is polarized one blade is wider than the other and only fits into AC power outlets one way If the plug won t go into the outlet com pletely turn the plug over and try to inser...

Page 2: ... IMPORTADOR Comercializadora Thomson de México S A de C V Álvaro Obregón No 151 Piso 13 Col Roma Delegación Cuauhtémoc C P 06700 México D F Telefono 52 55 11 020360 RFC CTM 980723 KS5 It is important to read this instruction book prior to using your new product for the first time Es importante leer este manual antes de usar por vez primera su euipo u s e r m a n u a l RTD255 EN receiver 5 17 04 9 ...

Page 3: ...ty EN Table of Content MusicMatch Software RCA is among the first Consumer Electronics companies to have adopted the MP3 format starting with the release of its mp3 player Lyra into the market www rca com and www lyrazone com RCA is proud of its initial success and has developed the competencies to enlarge its offering to other products like Discman and this System RCA thanks you for your purchase...

Page 4: ...OOFER AUX 2 VCR AUX 1 SAT CABLE one instruction book one safety leaflet one Quick Connection Guide One RCA Remote Control RCR311AC1 Unpacking The Speakers one set of speakers including 1 set of left and right front speakers 1 centre speaker 1 subwoofer and 1 set of left and right rear speakers FRONT SPEAKERS CENTER SPEAKER SUBWOOFER REAR SPEAKERS SURROUND SOUND 10cm 4 5cm 2 10cm 4 10cm 4 10cm 4 1 ...

Page 5: ...o connection to enjoy progressive scan Connect to a TV that has 480P input terminal or compatible with copy guard system else the image will not be displayed properly If progressive scan is ON there will be no video signal output at s video and composite video monitor output Please refer to page 20 for details of activating progressive scan function If available L R AUDIO IN COMPONENT VIDEO OUT Cr...

Page 6: ...rs should be as close as possible to the same height This often requires placing the center speaker directly atop A or beneath B the TV set EN 7 Getting Started Connecting the Speakers Speakers There are 6 speakers equipped with the unit 2 front 1 cen ter 2 rear 1 subwoofer In order to enjoy good surround effects all six speakers need to be connected to the receiver For better sound quality center...

Page 7: ...ntion to itself if it did it would soon become distracting Using Headphones To listen privately through your audio system use the PHONES jack on the receiver However make sure you turn down the volume before you put on the headphones Increase the volume to the desired level after headphones are in place Once headphones are connected HEADPHONE DOWNMIX 2 CHANNEL will scroll on display This feature a...

Page 8: ...UB WOOFER STRONG SUBWOOFER POWERFUL SUBWOOFER 7 Adjustment Buttons In all mode except DVD SAT VCR press OK will enter function setting mode for DVD SAT VCR mode press and hold OK is needed Press OK for dimmer mode not available in DVD mode and sleep function When the display shows the setup you want to change dimmer sleep etc press the LEFT and RIGHT buttons to choose and press UP and DOWN buttons...

Page 9: ... Display disc information Larger number refers to the current disc being played Switching on off To switch on the receiver press ON STANDBY on the receiver once to wake up from standby mode Press one of the source buttons or ON OFF on the remote control to turn on the receiver When the receiver is on press ON OFF on the remote or ON STANDBY on the receiver to return to the standby mode Selection o...

Page 10: ...ital 5 1 channel so that you can enjoy enhanced full digital surround sound Different from Dolby Pro Logic in that only four channels Front Left Front Right Centre and Rear are used the new system provides stereo separation of the rear speakers Rear Right Rear Left Adding the to the 5 channels the subwoofer channel for bass sounds counted as 0 1 channel results in 5 1 channels or 6 Channels that b...

Page 11: ...may need to delay the signal coming from some of the speak ers Channel delay compensates for center or surround speakers that are closer to the listening position than the front speakers You may setup the speakers channel by channel first press the MENU button while in stop mode to enter the setup menu then choose SOUND for speaker setup To change the speaker setting In the SPEAKERS menu press UP ...

Page 12: ... you have enabled See Fine Setting of the Speakers and the letters inside the speaker icons show which channel is present in the source information For example the diagram shown means you have all five speakers and subwoofer enabled and the digital sources you played have five channels plus LFE complemented Dolby Digital 5 1 Channels LFE stands for Low Frequency Effect The indication LFE appears i...

Page 13: ...aying a disc press REVERSE on the remote con trol to scan backward through the disc Press FORWARD on the remote to scan forward Press repeatedly to change the searching speed to 1 2 or 3 times for VCD and 1 2 3 or 4 for DVD 2 Press PLAY at any time to resume normal playback Time search 1 Press INFO on the remote info bar will appear 2 Press OK on the remote when time is highlighted 3 Use the numbe...

Page 14: ...a TV which accepts progressive scan signal To enable progres sive scan press and hold SUBWOOFER for 3 seconds in STOP mode 2 Press SUBWOOFER again to toggle progressive scan function between ON and OFF The green light will be on if the progressive scan function is active On screen banner display You can access the on screen banner display during play back to select many playback features Each feat...

Page 15: ...following steps 1 Refer to page 20 General use to open the bookmark menu 2 Use the arrows on the remote to move the cursor to the bookmarked scene you want to delete 3 Use the arrows on the remote to move the cursor to the trash icon 4 Press OK to delete the bookmarked scene Play mode 1 Refer to page 20 General use to open the playmode menu 2 Press UP DOWN to select among Standard Chapter Repeat T...

Page 16: ...e current set tings 2 Use the arrow buttons to highlight an option and press OK to open the selected menu 3 Press the LEFT arrow to go back to the previous menu or press CLEAR to exit the setup menu completely Audio language This step will define the default audio language Choosing an audio language from the on screen banner display will only overwrite this setting temporarily 1 Open the audio lan...

Page 17: ... not all movies and discs are rated In addition to the five stan dard MPAA rating symbols of G level 2 PG Parental Guidance level 4 PG13 Parental Guidance and 13 years old level 4 R Restricted level 6 and NC17 from 17 years old level 7 the player includes a total of 8 rating steps corresponding to the existing disc rating steps These additional steps allow for a better control the of program playb...

Page 18: ...Image menu 2 Use UP DOWN to select TV aspect and then press OK to select If you have a wide screen 16 9 TV choose 16 9 Widescreen For 16 9 movie you will get Do not select 16 9 widescreen setting if you are using a 4 3 TV set or the image may look distorted with some DVD disc For a 4 3 movie you will get If you have a conventional 4 3 TV if you select 4 3 letterbox for a 16 9 movie you will get if...

Page 19: ...ain unit or PLAY on the remote to resume normal playback SUBWOOFER mp3 recommendations Use mp3 as the extension when converting audio files into mp3 for saving onto CD R W or CD ROM e g Rocky08 mp3 Do not use any other extension e g doc pdf Do not use the mp3 extension for other text or non audio data files as this may result in serious malfunction and harmful noise interference Most commonly avai...

Page 20: ...ay menu 2 Press the arrow keys to move the cursor to the time dis play box then you can press UP to switch among Track Elapsed Track Remain Disc Elapsed and Disc Remain time during playback The selected mode is dis played on the banner SUBWOOFER SURROUND SUBWOOFER SURROUND On screen banner display for CD playback General use 1 Press INFO on the remote control to hide and show the on screen banner ...

Page 21: ... the remote to select the standard mode 2 In the file window use UP DOWN on the remote to select the file you wish to begin playing 3 Press OK to select a file to play then press PLAY PAUSE on the main unit or PLAY on the remote control to start playback You may press the OK button to selected the next file to be played Playback will stop when all the files have been played Playmode selection for ...

Page 22: ...and 3 to add additional tracks to the pro gram 4 Move to highlight Done return to normal playback with program saved and then press OK to confirm pro gram playback Cancel program Program will be cancelled when 1 the disc tray is opened 2 power is turned off Title1 Title 2 1 2 3 4 5 6 7 8 9 10 Done SUBWOOFER SURROUND SUBWOOFER SURROUND NOTE You can select a maximum of 24 items RTD255 EN CD_MP3 3 12...

Page 23: ...u can pan the screen at any direction by pressing the corresponding navigation key 5 To return to normal mode press ZOOM or STOP Note The zoom function will not be available if your image pixels count is too low Slide show mode 1 In JPEG mode Press PLAY PAUSE on the main unit or PLAY on the remote control to start the Slide show Pictures will be shown on screen for a while and fade play back will ...

Page 24: ...s and hold TUNER for 3 seconds to start the auto matic preset programming Radio frequencies will be browsed and radio stations stored automatically When all the available radio stations are stored or if all 40 memory locations are full the auto preset programming will stop Manual preset 1 Select the band by pressing TUNER repeatedly 2 Tune to a radio station see Manual tuning on page 38 above for ...

Page 25: ...40 BLANK PAGE RTD255 EN last 5 11 04 5 28 PM Page 1 ...

Page 26: ... in the menu Noise interference appears on the TV while watching a TV program and the DVD player is left on Turn off the DVD player The TV is too close to the audio system Volume level are different when playing different disc types DVDs audio video CDs Adjust the master volume No audio from one channel Check the speaker level setting Check the speaker wire or cable connections Remote control The ...

Page 27: ...enu Radio STEREO indicator is off Adjust the antenna The signal is Mono Severe hum or noise The signal is too weak Connect an external antenna Equipment Specifications AMPLIFIER SECTION RMS Output Power Dolby Digital Mode with 10 Total Harmonic Distortion Front and Rear Channels 55 Watts each Channel 1KHz 6 Ohm Center Channel 90 Watts 1KHz 3 Ohm Subwoofer Channel 90 Watts 100Hz 3 Ohm Total RMS Out...

Page 28: ...ade to charge a battery not intended to be recharged Safety precautions Never open the cabinet under any circumstances Any repairs or internal adjustments should be made only by a trained technician Never operate this product with the cabinet removed Do not touch the player with wet hands If any liquid enters the player cabinet take the player to a trained tech nician for inspection This player us...

Page 29: ... Registration Please complete and mail the Product Registration Card packed with your product It will make it easier to contact you should it ever be necessary The return of the card is not required for warranty coverage Limitation of Warranty THE WARRANTY STATED ABOVE IS THE ONLY WAR RANTY APPLICABLE TO THIS PRODUCT ALL OTHER WARRANTIES EXPRESS OR IMPLIED INCLUDING ALL IMPLIED WARRANTIES OF MERCH...

Page 30: ... Batteries A unit that has been modified or incorporated into other products or is used for institutional or other commercial purposes A unit purchased or serviced outside Canada Acts of nature such as but not limited to lightning dam age Product Registration Please complete and mail the Product Registration Card packed with your product It will make it easier to contact you should it ever be nece...

Reviews: