background image

1

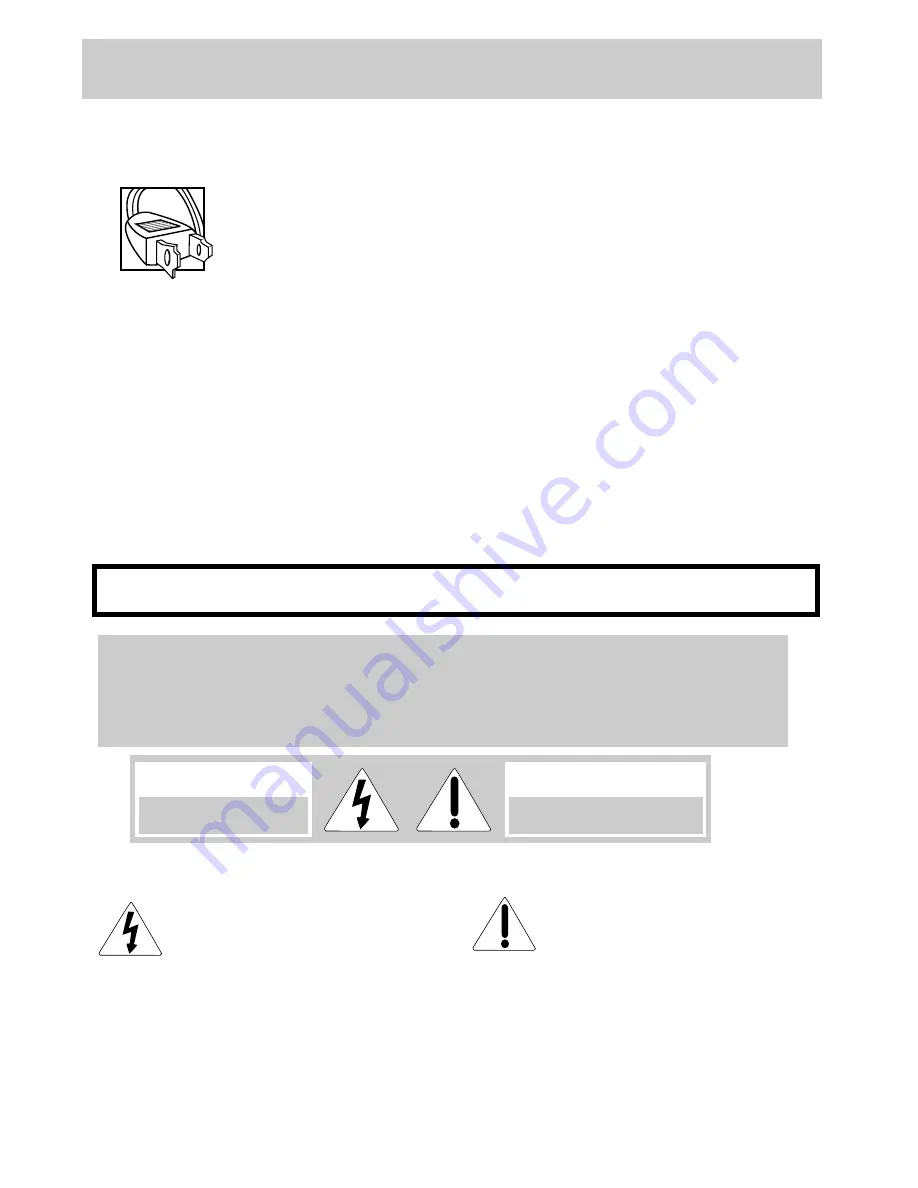
Your video camcorder’s AC adapter/charger will operate on 100-240 volts AC, 50/60 Hz, and has a
polarized plug.  Because one blade of the plug is wider than the other, the plug fits in the wall socket only
one way.  Do not defeat the safety feature of this plug.  If you need an extension cord, use a polarized
extension cord.

CAUTION:

TO REDUCE THE RISK OF ELECTRIC SHOCK, MATCH WIDE BLADE

OF PLUG TO WIDE SLOT, FULLY INSERT.

MISE EN GARDE:

POUR PRE

´

VENIR LES CHOCS E

´

LECTRIQUES

,

INTRODUIRE LA LAME LA PLUS LARGE DE LA FICHE DANS LA BORNE
CORRESPONDANTE DE LA PRISE ET POUSSER JUSQU

AU FOND

.

CAUTION: 

TO REDUCE THE RISK OF ELECTRIC SHOCK

DO NOT REMOVE THE COVER

(

OR

BACK

).  

NO USER

-

SERVICEABLE PARTS ARE INSIDE

.

IF YOU SPILL LIQUID ON THE CAMCORDER OR

ADAPTER

/

CHARGER

DISCONNECT THE AC ADAPTER

/

CHARGER

S POWER CORD TO PREVENT

POSSIBLE FIRE OR SHOCK HAZARD AND CONSULT AUTHORIZED SERVICE PERSONNEL

.  

MOISTURE

CAN DAMAGE INTERNAL PARTS

.  

REFER ALL SERVICE TO AUTHORIZED RCA CAMCORDER

SERVICENTER PERSONNEL ONLY

.

CAUTION:

READ

IMPORTANT SAFETY INSTRUCTIONS FOR AC ADAPTER

/

CHARGER

” 

ON THE

PREVIOUS PAGE BEFORE USING THE AC ADAPTER

/

CHARGER

.

CAUTION:

MAINTAIN ELECTRICAL SAFETY

.  

POWERLINE

-

OPERATED EQUIPMENT OR

ACCESSORIES CONNECTED TO THIS UNIT SHOULD BEAR THE UL LISTING MARK OR

IF

PURCHASED IN CANADA

THE CSA CERTIFICATION MARK ON THE ACCESSORIES THEMSELVES

AND SHOULD NOT HAVE BEEN MODIFIED SO AS TO DEFEAT THE SAFETY FEATURES

.  

THIS WILL

HELP AVOID ANY POTENTIAL HAZARD FROM ELECTRIC SHOCK OR FIRE

.  

IF IN DOUBT

CONTACT

QUALIFIED SERVICE PERSONNEL

.

CAUTION

RISK OF ELECTRIC SHOCK

DO NOT OPEN

AVIS

RISQUE DE CHOC ELECTRIQUE

NE PAS OUVRIR

The symbol of a lightning flash within
a triangle is intended to alert the user
to the presence of uninsulated
“dangerous voltage” within the
product’s enclosure and which may be
of sufficient magnitude to constitute a
risk of electric shock.

An exclamation point within a triangle is
intended to alert the user to the presence
of important operating and maintenance
(service) instructions in the literature
accompanying the product.

CAUTION: 

FCC REGULATIONS STATE THAT ANY UNAUTHORIZED CHANGES OR MODIFICATIONS

TO THIS EQUIPMENT MAY VOID THE USER

S AUTHORITY TO OPERATE IT

.

CAUTION:

AVOID OPERATING YOUR CAMCORDER IMMEDIATELY AFTER MOVING IT FROM

A COLD LOCATION TO A WARM LOCATION

.  

GIVE THE CAMCORDER 1-1/2 TO 2 HOURS TO

REACH A STABLE TEMPERATURE BEFORE INSERTING A VIDEO CASSETTE

.  

WHEN MOVED

FROM A COLD AREA TO A WARM LOCATION

MOISTURE MAY CONDENSE ON THE HEAD

DRUM INSIDE THE MACHINE

.  

THIS MOISTURE COULD CAUSE THE TAPE TO STICK TO THE

HEADWHEEL AND DAMAGE THE HEADWHEEL OR TAPE

.

WARNING:

TO REDUCE THE RISK OF FIRE OR SHOCK HAZARD

DO NOT EXPOSE

CAMCORDER OR AC ADAPTER

/

CHARGER TO RAIN OR MOISTURE

.

SAFETY PRECAUTIONS

Summary of Contents for Pro845

Page 1: ...CAMCORDER 8 C A M C O R D E R USER S GUIDE Pro845 Table of Contents 5 Optional Accessories 6 First Time Operation 10 Remote Control 16 Powering Your Camcorder 19 Recording Features23 ...

Page 2: ...f the plug on the adapter charger 2 Extension cord is properly wired and in good electrical condition and 3 Wire size below is met Minimum Length of Extension AWG Size Cord Feet 18 Equal to or less than 100 16 Equal to or less than 150 Do not operate adapter charger with a damaged cord or plug Replace it immediately Do not operate adapter charger if it has received a sharp blow been dropped or oth...

Page 3: ...SED IN CANADA THE CSA CERTIFICATION MARK ON THE ACCESSORIES THEMSELVES AND SHOULD NOT HAVE BEEN MODIFIED SO AS TO DEFEAT THE SAFETY FEATURES THIS WILL HELP AVOID ANY POTENTIAL HAZARD FROM ELECTRIC SHOCK OR FIRE IF IN DOUBT CONTACT QUALIFIED SERVICE PERSONNEL CAUTION RISK OF ELECTRIC SHOCK DO NOT OPEN AVIS RISQUE DE CHOC ELECTRIQUE NE PAS OUVRIR The symbol of a lightning flash within a triangle is ...

Page 4: ... product 8 Ventilation Slots and openings in the products are provided for ventilation to ensure reliable operation of the product and to protect them from overheating These openings must not be blocked or covered The openings should never be blocked by placing the product on a bed sofa rug or other similar surface This product should not be placed in a built in installation such as a bookcase or ...

Page 5: ...l servicing to qualified service personnel 18 Conditions Requiring Service Unplug this product from the wall outlet and refer servicing to qualified service personnel under the following conditions A When the power supply cord or plug is damaged B If liquid has been spilled or objects have fallen into the product C If the product has been exposed to rain or water D If the product does not operate ...

Page 6: ...ing a familiar or landmark scene from an unfamiliar vantage point for added interest Check the lighting before starting to record Try to make sure indoor scenes are well lit This improves picture quality and color reproduction Include close up shots of individuals when taping family outings or group functions 4 Holding The Camcorder To film at different angles raise the viewfinder 75 Standing agai...

Page 7: ...tte 23 Erase Protection Safety Tab 23 Recording and Playback Speeds and Times 23 Recording Features Date and Time Display Install Lithium Cell 24 Set and Record Time and Date 24 Viewfinder 25 Eyepiece Focus Control 25 Tilt Adjustment 25 Displays in Viewfinder 26 27 Quick Review 28 Camera Edit 28 Microphone 28 Tally Light 28 Automatic Head Cleaner 28 Auto Mode 29 Tape Positioning 29 MIC Microphone ...

Page 8: ... excellent soft lush fill light It uses one 15 watt VDC090 replacement bulb The recharge able battery BP1000 can be charged with the VDC085 battery charger VCC1000 Video Color Control Center The VCC1000 is two accessories in one The color control center lets you adjust the color intensity tint white balance and sharpness of tapes being dubbed This is especially helpful when the original tape was p...

Page 9: ...le 10 ft AH066G 8 99 Audio Video Cable 3 ft AH069G 5 99 Audio Video Cable 5 ft AH070G 7 99 Dubbing Cable 6 ft AH075G 10 99 Rechargeable Battery 1 Hour AV608 49 95 Rechargeable Battery 2 Hour AV8MM 59 95 AC Adapter Charger CPS801A 189 95 RF Output Adapter CRF800 49 95 Car Cord Adapter Charger DCC05 169 95 DC Cable for Adapter Charger DCC100 14 95 Video Control Center VCC1000 349 90 Color Enhancemen...

Page 10: ...andard Time Use this number only to place an order for accessory items listed on this order form 1 800 338 0376 Most times your order will be shipped UPS within 72 hours of receipt If ever it is not possible to ship within 30 days we will notify you with an update on your order and an option to cancel To place your order by mail detach and mail the completed order form with credit card information...

Page 11: ...ke sure it is stable enough to hold the camcorder without falling over When attaching your camcorder to a tripod be careful not to force its screw into the camcorder s mounting hole The tripod screw should not protrude into the camcorder more than approximately three eighth 3 8 inch Forcing the screw could damage the mounting hole on the bottom of the camcorder All specifications and descriptions ...

Page 12: ... X I K K V4 K I4 X f V X V4 6K I4 6K I4 6X I KgV X I 6X I4 6X I4 X V 6Xf V4 X V4 X I K I X V4 X f I 1 I K V4 6X V X I XgV V4 6K I X V4 K V K f V4 6K I 6X V4 K I 6X V 6K g 6X V X I 6X V4 X V g3 X V4 K V K I K V4 L fV4 X I 6X V4 6X V4 6X I4 KgI X V4 X I4 K I4 X I 6Kf V4 X I4 K I 6X I X N 6Xf I K I 6X V K V X X fV 6X V K V4 6X V4 X I4 Xf N X V4 6X I X I4 K I X f X I K V4 K I 6X V Kf I X V 6K I4 6X V ...

Page 13: ...ned before using it to support the camcorder D Repeat steps A C for the other end of the shoulder strap Shoulder Strap Rings A Adapter Charger 1 Connect one end of the DC power cord to the DC OUT jack on the adapter charger and the other end to the DC IN 6 5V jack on the camcorder 2 Plug in the adapter charger The adapter charger s POWER indicator will light Details are on page 19 B Charged Batter...

Page 14: ...6 2 0M 7 5 h J W M O2 0M H h 7 5 W 0Y he O2 0MI M J h H W M heO2 0M 7 5 h W Yh O2 0M J H h W Y g W2 0M 7 h J W YhO 0M 5 h 7 5 7 Y gW2 0M J H hJ H J Hg W M 7 5 h W 5 gW Y H h 7 Y f W Y J O2 6K h7 J 5 J HgW Y 7 5 O2 6K h 7 H 7 5 f W Y J H O2 6K h J H f 7 Y 7 5 O2 6K h 7 5gJ Y H O2 0M he I4 6X h J J Hf W H J O2 0M I4 X h 7 5 7 5 f 7 5 7 5 O2 0M I4 X h H H fJ H H O2 0M I K h J g7 5 J O2 0M V 6X O 2 6K...

Page 15: ... dew indicator appears in the viewfinder there is excessive moisture in the camcorder Remove the cassette from the camcorder and let it dry naturally 8 Adjust viewfinder and eyepiece focus control A Pull the viewfinder out and raise into a comfortable operating position B If the viewfinder picture is blurry adjust the eyepiece focus control for your vision Details are on page 25 9 Start and stop r...

Page 16: ...K 6 K 3 L 3 L I 4 6 K I 4 6 K O 2 6 K J 6 K 1 N 1 I 4 6 K I 4 6 K O 2 6 K O 6 K 7 I 4 6 K I 4 6 K W 2 6 X W 2 6 K 3 I 4 6 K I 4 6 K W X O 6 X N I 4 6 X I 4 6 K O K W 2 K 5 3 L I 4 K I 4 6 K W 2 6 K O 6 K H N X I 4 6 K I 4 6 K W 0 M e I 4 0 M e I 4 0 M e I 4 6 K W 2 6 K 1 I 4 6 K I 4 6 K W 0 M I 4 6 X O 6 X I 6 K I 4 6 K 7 M I 4 1 O 2 K L V 4 6 K I 4 6 K W Y I O 2 M g I 4 0 M g I 4 0 M I M I 4 0 M ...

Page 17: ...ent Ring Shoulder Strap Attachment Ring Hand Strap Lens Cap Holder AV IN OUT Switch Cassette Compartment Cover ON POWER SAVE Lever DISPLAY Button REC Record Button EJECT Button COUNTER RESET and MEMO Memory Buttons REC START STOP Button Thumb Trigger FF Button POWER CAM camera OFF VCR Switch REW Button Output Jacks Yellow VIDEO and White AUDIO Located behind AV TERMINAL cover PLAY Button STOP Butt...

Page 18: ... function as the corresponding controls on the camcorder You can use whichever are more convenient at the time Note Before using the remote for the first time remove the plastic film covering the battery cell REC REW PLAY F FWD STOP F ADV PAUSE SLOW ZOOM SCENE SEARCH COUNTER START DISPLAY RES MEM STOP 1 2 3 5 4 6 7 8 9 10 11 12 13 1 REC Record Button Press and release REC when POWER is in VCR to r...

Page 19: ...order s remote control sensor There cannot be any obstructions between them The remote should operate the camcorder up to approximately 13 feet away 1 Press on the remote sensor labeled IR to expose it Point the arrow on top of the sensor in the direction of the remote The sensor will face in any direction 2 Aim the remote at the remote sensor 3 When you are finished press the remote sensor back d...

Page 20: ...e This will prevent possible damage from leakage If leakage occurs wipe up the liquid inside the compartment and replace the cell with a new one Cautions Lithium cell battery Replace only with 3 Volt micro lithium cell Duracell No DL2025 Use of other cells present a risk of fire or explosion Must be disposed of properly Never handle punctured or leaking cells May cause burns or personal injury Kee...

Page 21: ...Remove the Adapter Charger 1 Unplug the adapter charger from the wall outlet 2 Disconnect the DC power cord from the camcorder and adapter charger Using an Optional Plug Adapter An optional plug adapter may be required in some countries Adapter Charger The adapter charger lets you power your camcorder directly from standard household power It operates on 100 240 volts 50 60 Hz so it can be used vi...

Page 22: ...s into place The CHARGE indicator will light 5 Press REFRESH to discharge the battery After a few seconds the CHARGE indicator will flash slowly It will stop flashing when the battery has been discharged The CHARGE indicator will light and the battery will automatically recharge To AC 100 240V 50 60 Hz POWER Indicator CHARGE Indicator REFRESH Marker Switch Note If the CHARGE indicator starts flash...

Page 23: ...er while sliding the battery to the left and off the camcorder Check Battery Power Battery Level Indicator ATTENTION THE PRODUCT THAT YOU HAVE PURCHASED USES A RECHARGEABLE BATTERY AT THE END OF ITS USEFUL LIFE UNDER VARIOUS STATE AND LOCAL LAWS IT MAY BE ILLEGAL TO DISPOSE OF THIS BATTERY INTO THE MUNICIPAL WASTE STREAM CHECK WITH YOUR LOCAL SOLID WASTE OFFICIALS FOR DETAILS IN YOUR AREA FOR RECY...

Page 24: ...you to power your camcorder from the cigarette lighter socket of a car truck or RV It converts 24 and 12 volts to a 6 5 volt output It can also charge the battery that came with your camcorder and the AV8MM long play battery Consult the instructions enclosed with the DCC05 for complete operation information Cautions The DCC05 is designed to be used only with vehicles having negative ground electri...

Page 25: ... Minutes P6 90 90 Minutes P6 120 2 Hours P6 150 2 1 2 Hours Cassette Recording Time Safety Tab To Prevent Erasure Close Safety Tab Expose Red To Record Again Open Safety Tab Red Disappears Caution Insert the cassette with the safety tab facing up and the tape window facing out The cassette should slide easily in the compartment Do not force the cassette EJECT Button Safety Tab Tape Window PUSH Her...

Page 26: ...J 3 1 J H 3 1 J H 7 V L 7 5 V L 7 5 N X J Y N 1 J H 3 3 X 7 H 3 L 7 5 N V 1 J 5 V 1 J Y V L 7 H N L 7 H N X J 3 X J 5 J 5 3 1 7 5 V 1 7 H 7 H V L H N L L V 1 3 1 J 5 1 N L hf 5 N L 7 H 3 1 hf H 3 X J 5 J 5 N Lhe J N 1 7 H 5 7 H 3 1he 7 3 L H V L h 5 N X J 5 L N 1 h 0Y 3 1 7 H 1 J 3 L N 5 5 7 5 N 1 3 L J H H H 3 V 1 7 V L N L 5 N 1 3 1 J H L J 5 3 L N L 7 7 H N 1e W 3 1 5 3 H eW N L H 3 L 7 3 1 J 7...

Page 27: ...er down This helps prevent possible damage to the viewfinder from bumping against your body as you move Eyepiece Focus Control The eyepiece focus control lets you set the focus of the viewfinder for your personal vision If you wear eyeglasses you can probably operate the camcorder without them The eyepiece focus control does not affect the focus of the picture actually recorded by the camcorder 1 ...

Page 28: ...r is not recorded on the tape Status Displays REC appears when the camcorder is recording PAUSE flashes when the camcorder is in record pause FF appears when the tape is fast forwarding and REW appears when the tape is rewinding STOP appears when the camcorder is stopped during playback PLAY appears when the camcorder is playing back a tape A larger REC or PAUSE briefly appears below the status di...

Page 29: ...ails are on page 33 7 6 8 9 4 5 Manual Focus Indicators Press FOCUS ON OFF to turn off auto focus and focus manually The MF indicator will appear in the viewfinder during manual focus Press FOCUS ON OFF again to return to auto focus No indicator appears when using auto focus This display is not recorded when it appears Dew and Cassette Indicators The dew indicator appears when excessive moisture i...

Page 30: ...e sound during a recording It is more sensitive to sounds coming from the direction the lens is pointed Tally Light The tally light flashes when the camcorder is in record pause The tally light will turn off if you start recording with the thumb trigger on the camcorder or place ON POWER SAVE in POWER SAVE The tally light will light continuously if you start recording with START STOP on the remote...

Page 31: ...d hold FF fast forward on camcorder or F FWD on remote or REW during tape positioning to visually search the tape Release the button to return to fast forward or rewind operation Press STOP to stop fast forward or rewind MIC Microphone Jack Plug an optional external microphone into the MIC jack located behind the AV TERMINAL cover When a microphone is plugged into this jack the camcorder s microph...

Page 32: ...elected when you place ON POWER SAVE in POWER SAVE and then restore power by placing it ON Auto Focus If you want the camcorder to focus for you automatically set the SCENE SELECT control to AUTO The camcorder will automatically focus on any subject three feet or more from the lens For a subject closer than three feet press W to change to wide angle where the subject will be in focus Manual Focus ...

Page 33: ...O 0M I 6X W2 0M V K O 0M V4 6K O2 0M I4 6K O2 0M I4 6K O2 0M I 6K W2 0M V4 6K O 0M I4 6X W2 0M I4 X O 0M L I4 K O2 0M 1 I4 6K O2 0M I4 6K O2 0M I4 6X O2 0M I4 K O2 0M I4 6K W2 0M I 6K O M V4 6K W2 0Y J I4 6X W 0M 7 L I4 X O M K I4 K O2 0Y 3 I 6K W2 0M N V4 6X O 0M I K O2 M V4 6K O2 Y I4 6X W2 0Y I K O M V4 6X W2 0Y W2 6KO K I4 K W 0M 7 6X I 6K O 0M 1 V4 6X W2 M L I4 K O 0Y K I4 6X O2 0M I X W2 0M ...

Page 34: ...e speed of the fade is automatically controlled by the camcorder Fading in 1 Place the camcorder in record pause 2 Press FADE FADE appears in the viewfinder 3 Press the thumb trigger START STOP on remote to start recording FADE will flash in the viewfinder and the picture and sound will gradually fade in Zoom Buttons W Wide Angle T Telephoto FADE Button Thumb Trigger Notes Image vibration is more ...

Page 35: ...ER RESET Button COUNTER MEMO Button REW Rewind Button REW Rewind Button START STOP Button STOP Button STOP Button POWER Switch Thumb Trigger REC REW PLAY F FWD STOP F ADV PAUSE SLOW ZOOM SCENE SEARCH COUNTER START DISPLAY RES MEM STOP COUNTER RES Button COUNTER MEM Button Memory Stop Feature The memory stop feature helps you locate a certain point on the tape during playback When memory stop is tu...

Page 36: ... you want to see what is being recorded turn on the TV and tune it to the channel that you normally use to see the signal from the VCR 2 Place the camcorder s AV IN OUT switch to IN 3 Attach a power supply and slide the camcorder s POWER switch to VCR Insert a blank cassette with the safety tab intact 4 Press the small red REC record button located under the viewfinder on the camcorder REC on remo...

Page 37: ...r REW rewind if you want to visually search the tape in forward or reverse Release the button to return to normal playback See Viewfinder s Displays on TV Press DISPLAY on the remote to see the viewfinder displays on the TV screen Press DISPLAY again to remove the displays 1 Slide POWER to VCR 2 Insert the cassette you want to play back Caution Pause is designed for momentary interruptions and sho...

Page 38: ...VIDEO IN Back of Mono VCR or TV Monitor White Audio Plug Yellow Video Plug Included Audio Video Cable AUDIO IN VIDEO IN L R Y Adapter available from electronics supply store OR Back of Stereo VCR or TV Monitor 1 2 White Audio Plug 1 Yellow Video Plug 2 Included Audio Video Cable Pull Here to Remove AV TERMINAL Cover Yellow VIDEO Jack White AUDIO Jack 1 2 Yellow VIDEO Jack White AUDIO Jack 2 1 Yell...

Page 39: ...amcorder Note If your TV or VCR has stereo AUDIO jacks attach the AUDIO plug to the one labeled MONO If one is not labeled MONO you may need a Y adapter to hear sound from both channels 2 Attach the yellow video plug on one end of the included audio video cable to the VIDEO IN jack on the TV or VCR and the other yellow plug to the yellow VIDEO jack located under the AV TERMINAL cover on the side o...

Page 40: ...dealer or electronics supply store Mail order form is on page 7 OR 2 Back of TV VHF Antenna CHANNEL 4CH 3CH Switch Optional 300 75 Ohm Transformer such as 193983 Output Jacks Located behind AV TERMINAL cover VHF Antenna OR VHF VHF IN FROM ANT 1 2 Back of TV Optional CRF800 RF Output Adapter Optional 75 300 Ohm Transformer such as AH011 3 Optional RF Coaxial Cable such as AH065G or AH066G MIC VIDEO...

Page 41: ...use the features on page 35 6 Press STOP when you are finished Note The corresponding buttons on the remote control will operate the camcorder you want to record on Make sure the ON POWER SAVE lever is ON 4 Place the IN OUT switch in OUT 5 Press thumb trigger on the camcorder START STOP on remote to start recording You can watch what you are recording on the TV screen Normal TV Viewing You can lea...

Page 42: ...xtremely humid environments Do not aim your camcorder at the sun or other bright objects Do not leave your camcorder in direct sunlight Doing so could permanently damage the camcorder s internal parts Cassette Care and Storage When you are finished with a cassette rewind it remove it from the camcorder and label it Do not touch or cover the small holes in the cas sette or use cassettes with damage...

Page 43: ...or use on camera lens Improper cleaning may scratch the lens Caution Use of strong cleaning products such as those containing alcohol or benzine may damage the camcorder Caution Do not touch the lens with your fingers The oil from your skin can damage the lens AUTO S C E N E S E A R C H IR Cleaning the Camcorder s Viewfinder To clean the viewfinder follow the steps below AUTO S C E N E S E A R C H...

Page 44: ...If using AC adapter charger make sure it is plugged into a working outlet If dew indicator appears in the viewfinder there is moisture in the camcorder Remove the cassette from the camcorder and let it dry naturally There may be no cassette in the camcorder Try ejecting and reinserting the cassette The cassette tape may be broken try another cassette You may have reached the end of the cassette tr...

Page 45: ...em from viewfinder when recording Clock cell may need replacing See page 24 Date and or time may need to be set See page 24 Press on remote sensor to expose it and aim arrow on top toward remote Aim remote at remote sensor on camcorder See page 17 Remote must be within 13 feet from the camcorder to operate it Remote control cell may need replacing See page 18 If POWER switch is in CAM the ON POWER...

Page 46: ...ructions may cause harmful interference to radio communications However there is no guarantee that interference will not occur in a particular installation If this equipment does cause harmful interference to radio or television reception which can be determined by turning the equipment off and on the user is encouraged to try to correct the interference by one or more of the following measures Re...

Page 47: ...anything Obtain a Return Authorization RA number from the telephone representative before returning your equipment to avoid delays accounting errors or even loss of your unit The Thomson representative who authorized the return of your equipment will give you an RA number over the phone They will also provide you with instructions on where and how to return your camcorder Write the number in large...

Page 48: ...ing your camcorder problem Your name address and phone number Return transportation storage and handling costs including insurance are your sole responsibility We accept no liability in case of damage or loss Limited Warranty Pro845 Camcorder What your warranty covers Any defect in materials or workmanship For how long after your purchase 90 days for labor charges One year for parts What we will d...

Page 49: ...redit card 5 Upon receipt of your product a new or refurbished unit will be shipped to you next day delivery What your warranty does not cover Adjustment of customer controls Damage from misuse or neglect A unit that has been modified or incorporated into other products or is used for institutional or other commercial purposes Battery for clock and other features Cleaning of video audio heads Camc...

Page 50: ...ce 45 Contents Table of 5 Controls Camcorder 14 15 Copying Tapes 34 37 COUNTER MEM Memory Button 16 17 27 33 COUNTER MEMO Memory Button 15 27 33 COUNTER RES Reset Button 16 17 27 33 COUNTER RESET Button 15 27 33 DATE Button 15 24 27 Date and Time Display 24 26 27 Date and Time Setting 24 DC Car Cord Optional 22 DC IN 6 5 V Jack 11 15 19 22 DC Power Cord 11 19 Design Specifications 44 Dew Indicator...

Page 51: ...uttons 14 16 28 35 SCENE SELECT Control 13 14 26 29 30 31 SCENE SELECT Indicators 26 31 SCENE SELECT Modes 31 Searching Visual 35 Sensor Remote Control 17 Service and Assistance 45 Setting the Time and Date 24 Shoulder Strap Attachment Rings 11 15 Shoulder Strap Attaching 11 SLOW Button 16 17 35 Slow Motion Playback 35 Solving Problems 42 43 Specifications 44 Speed Recording and Playback 23 Sports...

Page 52: ...Electronics Inc Trademark s Registered Marca s Registrada s Printed in Japan Part Number 94 Pro845 1 For your nearest Home Entertainment Dealer or Authorized Servicenter call toll free in the U S A 1 800 336 1900 Canadian Consumers Your toll free numbers are English 1 800 522 0338 French 1 800 522 0445 ...

Reviews: