background image

Other Information


Chapter 

Service Model Number Numéro de Modéle-Service

SERIAL  SERIE                  LAMP

HDLP50XXXXXX
000000000   X

EXAMPLE: Service 
Model Number 
sticker with lamp 
type listed. 

Lamp replacement Information

replacing the Lamp Unit

Your TV’s source of  light comes from a lamp – similar to lamps used in film or front projectors. Although this lamp is long-
lasting, it may need to be replaced eventually. 

When to replace the lamp

You probably need a new lamp if  there’s no picture, but you still can hear the audio and the power light on the front of  the 
TV does the following: blinks 5 times, pauses, blinks 5 times again. If  the TV doesn’t turn on after 5 minutes and then the 
light blinks steadily for one minute, the lamp may be dead. If  you have any concerns, please contact us at 1-866-723-6486 
or call an authorized servicer in your area.

Note: 

The same symptoms occur if the lamp unit isn’t seated correctly or lamp access door is ajar. If you 

have recently accessed the lamp, make sure the lamp access door is completely closed and the lamp unit is 
seated correctly. 

What to do


The lamp has been designed to make installation as easy as possible, but if  you don’t follow the directions, there is a risk of  
injury.
•  You can easily replace the lamp yourself  by following the instructions that come packed with the new lamp. If  your TV 

is still covered by the warranty, call 1-866-723-6486 to receive troubleshooting assistance and a lamp replacement.

•  If  your TV’s warranty has expired, call 1-800-338-0376 to purchase a lamp replacement. If  you are not comfortable 

replacing the lamp yourself, call 1-866-723-6486 and we will refer you to a service person who will replace the lamp for 
you. There will be a service fee.

Service Model number 
Sticker location with 
Lamp Type 

This symbol indicates that the lamp in the HDTV contains mercury. Special disposal of  the lamp for 
environmental reasons may be required under the laws applicable to your jurisdiction. For disposal or recycling 
information, please contact your local authorities or the Electronic Industries Alliance: www.eiae.org or call  
1-800-338-0376 for more details.

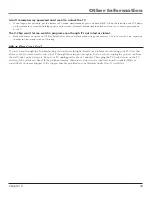
What you’ll need to get started:

•  To order the correct lamp, you’ll need to know your TV’s model number, serial number, 

and lamp type—this information is listed on the Service Model Number sticker (example 
of  the sticker is shown at left). Face the back of  the TV. The sticker is located on the 
right side of  the TV (see picture below for sticker location). 

•  Follow the replacement instructions that come packed with the new lamp.

Summary of Contents for M50WH186

Page 1: ...a com television Changing Entertainment Again Find Inside The DLP Experience page 1 Connections page 5 Remote page 19 Features page 29 Menus page 37 FAQs page 49 Troubleshooting page 50 HDTV User s Guide ...

Page 2: ...____________________________ Important Information Refer to the identification rating label located on the back panel of your product for its proper operating voltage FCC Regulations state that unauthorized changes or modifications to this equipment may void the user s authority to operate it Cable TV Installer This reminder is provided to call your attention to Article 820 40 of the National Elec...

Page 3: ...h means the picture is a little wider than it is tall a screen that is 20 inches wide is about 15 inches tall As TVs dropped in price and people prospered in the 1950s the movie industry created the 16 x 9 aspect ratio also called widescreen format to get people back to seeing movies When the standards for HDTV were being developed by the ATSC Advanced Television Standards Committee the 16 x 9 asp...

Page 4: ...ports You can adjust each input jack to a different setting and the TV will automatically adjust the picture when you change inputs Help Text The on screen help text describes your TV s features and explains how to use them Picture Settings Picture Preset Mode Go Back 1 2 0 Screen Adjust Advanced Picture Screen Format 5 4 3 Press 5 or 6 to point to an option then press OK to select it Press 3 to r...

Page 5: ...etup 13 Complete the Assisted Setup 13 Set the Menu Language 14 Complete the Channel Search 14 Choose Setup Options 14 What to Expect 15 Watching TV 15 Changing Channels 15 Next Steps 15 Explanation of Jacks 16 The Front of Your TV 18 Front Side Input Jacks 18 Front Panel 18 Chapter 2 Using the Remote Control The Buttons on the Remote Control 19 Programming the Remote to Operate Other Devices 21 F...

Page 6: ...icture Preset Mode 40 Picture Settings 40 Screen Format 41 Advanced Picture Menu 41 Screen Adjust Menu 42 Audio Menu 43 Sound Preset Mode 43 Sound Logic 43 Balance 43 Advanced Audio 43 Channel Setup Menu 45 Channel Search 46 Advanced Settings 46 Setup Options Menu 47 Closed Captioning 47 Quick Startup 47 Time Menu 49 Assisted Setup 49 Menu Preferences 49 Advanced Options 49 Chapter 5 Other Informa...

Page 7: ... you allow adequate ventilation If you connect an audio receiver or amplifier place it on the top shelf so the heated air from it won t flow around other components Position Cables Properly to Avoid Audio Interference Insert each cable firmly into the designated jack Use Indirect Light Don t place the TV where sunlight or room lighting will be directed toward the screen Use soft or indirect lighti...

Page 8: ... channel search now go to page 14 When you are ready to watch channels make sure you are tuned to the Cable Input Press the ANT CABLE button to tune to the Cable Input Look for Cable Input to appear on the channel banner Go to page 15 for more information Getting Digital Channels Connect a coaxial cable from an off air antenna to the ANTENNA INPUT to receive free local off air digital and analog c...

Page 9: ...ected to the CABLE INPUT jack so the digital cable card can get a signal and receive channel information Once the digital cable card is authorized for a particular TV the card can t be used with any other TV unless it is re authorized to it You won t receive digital cable channels if you connect your cable to the ANTENNA INPUT Make sure you connect your cable to the CABLE INPUT Once inserted it is...

Page 10: ...io Audio Choose Your Connection There are several ways to connect your HDTV depending on the components you want to connect and the quality of the signal you want to achieve The HDMI and component jacks are considered excellent S Video is very good composite jacks are good while connecting components to the Antenna or Cable input is fair Please use the following chart to determine which connection...

Page 11: ...e connecting also has S Video or composite video we recommend you use the component video input for better quality Using the example of a DVD player 1 If necessary connect your cable and or off air antenna as described on page 6 2 Connect your Y Pb Pr component video cables Connect three video cables or component video cables to the INPUT 1 Y VIDEO PB PR jacks on the back of the TV and to the Y PB...

Page 12: ...to Tuning See Chapter 3 for more information on Auto Tuning Audio Video Connection COMPONENT VIDEO Y Pb Pr VIDEO INPUT L R AUDIO VIDEO OUTPUT S VIDEO OUT S VIDEO IN L R AUDIO L R AUDIO SVGA INPUT AUDIO VGA SVGA XGA WIRED REMOTE CONTROL IR INPUT 1 COMPONENT COMPOSITE Y VIDEO P B P R L R L R DIGITAL AUDIO OUTPUT FIXED VARIABLE AUDIO OUTPUT HDMI 1 INPUT HDMI 2 INPUT For Factory use only CABLE INPUT A...

Page 13: ...cable Since HDMI is based on Digital Visual Interface DVI the jack on the back of your TV is also compatible with devices that have a DVI jack Using the example of a set top box If your set top box has a DVI jack connect an HDMI cable and an HDMI DVI adapter A Connect an HDMI cable to the HDMI INPUT jack on the back of the TV B Attach an HDMI DVI adapter to the end of the HDMI cable then connect t...

Page 14: ...VIDEO DIGITAL AUDIO OUTPUT FIXED VARIABLE AUDIO OUTPUT HDMI 1 INPUT HDMI 2 INPUT For Factory use only CABLE INPUT ANTENNA INPUT INPUT 2 COMPOSITE VIDEO L R Y VIDEO PB PR L R S VIDEO INPUT 3 COMPONENT COMPOSITE INPUT 4 COMPOSITE DIGITAL AUDIO OUTPUT FIXED VARIABLE FIXED VARIABLE AUDIO OUTPUT HD White Red Audio cables are color coded Red right audio white left audio OR If your set top box has an HDM...

Page 15: ...gged back in The TV can only be turned on after the Power indicator goes off Put batteries in the remote Turn on the TV Remote Control Buttons Used for the Assisted Setup To use the TV s menus first press the TV button on the remote control to put the remote in TV mode When the Assisted Setup screen appears use the arrow buttons to highlight one of the items listed in the menu Use the up or down a...

Page 16: ... use it Check fewer boxes to make the search faster but less complete and vice versa A complete search takes about 50 minutes To add a channel that Channel Search didn t find clear all menus and tune to the channel with the number keys Start Search Cable Input Antenna Input Detect antenna or cable signal Search channels already in my channel list s Remove scrambled digital cable channels Select ot...

Page 17: ...0 AM 00 30 Program Title Acquiring Channel D Channel format and resolution Channel number Changing Channels Depending upon the type of signals you have connected to your HDTV you might notice that the channels change slower than you re used to This is perfectly normal Digital cable channels sometimes take longer to tune Some channels might be found during the channel search that aren t available S...

Page 18: ...es connection to an additional optional video device such as a DVD player or satellite receiver The jacks are the same as described above for INPUT 1 INPUT 2 and 4 COMPOSITE INPUTS Connect an NTSC analog device These jacks are used for most audio video connections between devices The audio video jacks are often color coded yellow for video red for right audio and white for left audio R Audio provi...

Page 19: ...age 11 Then go to the Advanced Audio menu and select DVI Audio Input to choose the input you re using to receive audio WIRED REMOTE CONTROL IR available on some models This jack is for connecting a wired remote control system which is primarily for professional installers If you re using the remote that was included with your TV don t plug anything into this jack or the TV won t respond to the rem...

Page 20: ...P O W E R HEADPHONE L MONO R IN AUDIO IN VIDEO CH CH VOL MENU OK VOL S VIDEO Power Indicator Light Status On TV is on Off TV is off standby mode Blinks Light blinks 5 times pauses and blinks again 5 times Lamp is trying to turn on If the TV doesn t turn on after 5 minutes and then the light blinks steadily for one minute one of the following options is possible Lamp door may be open Face the back ...

Page 21: ...you ve programmed to work with this button For remote R602A1 AUX by default is programmed to an RCA HD tuner For remote R401A1 AUX by default is programmed to an RCA VCR This button lights when you press a valid button in AUX mode see Modes of Operation on page 23 for more details CC only available on remote R602A1 In TV mode toggles closed captioning on and off if available for the channel you re...

Page 22: ...ellite receivers etc The RECORD button has a safety feature which means you must press the button two times to record SAT CABLE Satellite Cable Places the remote in SAT CABLE box mode If Auto Tuning is enabled turns on the TV and tunes it to the satellite or cable box Video Input Channel for RCA devices This button lights when you press a valid button in SAT CABLE mode see Modes of Operation on pa...

Page 23: ...anual Code Search and Automatic Code Search If you have recently purchased the device you want to control or if the device has many codes you might want to try the manual code search first Using Direct Entry 1 Turn on the device you want to control 2 Look up the brand and code number s for the device in the code list at the end of this section 3 On your remote control simultaneously press and hold...

Page 24: ...rward through the codes again When all codes have been searched the device button flashes 3 times then the remote exits manual code search and returns to normal operation Using Automatic Code Search 1 Turn on the device you want to control 2 On your remote control simultaneously press and hold ON OFF and MUTE approximately 3 seconds until a device button remains lit Then release the buttons 3 Pres...

Page 25: ... operate the DVD player The Volume Punchthrough feature eliminates the need for you to use two remote controls and saves a button press when you re using the TV remote to adjust the volume In effect you are telling the TV remote to retrieve and send volume commands from the audio system whenever the TV remote is in DVD mode Therefore after you ve successfully set up the Volume Punchthrough feature...

Page 26: ...mmable to any of the device buttons SAT CABLE VCR DVD AUDIO or AUX on the remote Audio Codes AIWA 839 842 851 860 APEX 436 BOSE 672 CARVER 825 CITIZEN 826 CRITERION 448 DENON 803 817 852 DELPHI 708 FISHER 814 821 GOLDSTAR 766 HARMAN KARDON 804 818 JVC 790 813 819 KENWOOD 683 808 816 828 832 869 KOSS 415 MAGNAVOX 796 814 915 756 MARANTZ 688 824 MITSUBISHI 877 NAD 721 739 743 NEO 725 NORCENT 907 ONK...

Page 27: ...VENT 922 AFREEY 417 AIWA 414 AKAI 395 435 AMES 431 AMW 917 918 ANABA 961 APEX 386 390 391 392 424 430 436 439 445 457 459 938 949 913 401 ASPIRE 933 A TREND 393 AUDIOVOX 921 AXION 921 B K 978 BLAUPUNKT 430 BODYSONIC 417 BOSE 672 BROKSONIC 394 932 967 CENTRIOS 951 CHANGHONG 401 CINEVISION 405 CLASSIC 401 431 COBY 926 946 947 916 445 928 894 CONCEPT 430 CRITERION 448 CURTIS INTERNATIONAL 929 928 CYB...

Page 28: ...vice or brand AMPLICA 575 BELL EXPRESSVU 654 647 655 628 CHANNEL MASTER 577 578 579 CHAPPARAL 560 561 CHEYENNE 561 DRAKE 562 574 587 DREAMBOX 620 DIRECTV 622 632 629 621 623 576 586 616 613 630 634 636 638641 652 653 657 659 607 619 641 DISH NETWORK 655 647 628 612 654 588 589 590 DISHPRO 588 589 590 654 DX ANTENNA 568 582 ECHOSPHERE 628 ECHOSTAR 655 647 628 612 654 588 589 590 EXPRESSVU 654 647 6...

Page 29: ... 376 377 343 PORTLAND 242 244 PROSCAN 225 308 PROTEC 356 PULSAR 329 QUARTER 268 QUARTZ 268 QUASAR 363 374 225 381 292 RADIO SHACK 225 226 227 239 245 268 342 354 361 363 248 251 254 274 292 300 337 RADIX 245 RANDEX 245 RCA 225 245 308 309 311 312 313 314 315 316 335 342 354 369 228 278 292 332 REALISTIC 225 226 227 245 268 354 361 363 248 251 254 274 292 300 337 REPLAYTV 373 RICOH 353 RUNCO 329 SA...

Page 30: ...This page left intentionally blank ...

Page 31: ...the TV station call letters if available Antenna Cable Displays the type of input you ve currently tuned English For a digital channel displays the currently playing Audio Language Mode For an analog channel displays when SAP is playing SAP or Audio Language Mode changes with SOUND button 16x9 Normal 1080i HDTV Displays the aspect ratio original resolution of the broadcast not the resolution of th...

Page 32: ...layed for digital an A is displayed for analog Direct Tuning to a Channel 1 Make sure the remote is in TV mode by pressing TV on the remote control 2 Enter the primary channel number This number appears in the primary channel entry box Press OK or wait a few seconds If you don t enter a subchannel the TV tunes to the lowest digital subchannel 3 If the primary channel number has fewer than six digi...

Page 33: ...OK button on the front panel and VOL button on the remote for three seconds This resets the password only and unlocks the TV all other settings in Parental Controls are not changed Channel Search Lock TV Go Back 2 1 0 Video Input List Antenna Ch List Cable Channel List 5 4 3 Advanced Settings 6 Parental Controls 7 Locking the TV puts into effect the rating limits the Locked List and blocking featu...

Page 34: ...ove you would highlight TV PG since the highest rating you want the child to watch is TV G 3 Press the OK button to toggle between Viewable and Blocked The status for the rating listed to the right and all higher ratings automatically change to Blocked and B 4 Select Lock TV from the Parental Controls menu Enter a password and re enter password a second time to confirm the password To view age bas...

Page 35: ...content status from V Viewable to B Blocked All higher ratings content themes change to Blocked Notes Broadcasters are not required to provide content themes or age based ratings You must remember to lock the TV as described above for rating limits to take effect To view content themes after you ve blocked them follow the same steps as above to make the content Viewable V Note that if you unblock ...

Page 36: ...a V Chip Canadian TV V Chip supports two different Canadian rating systems English and French The English or French Canada V Chip TV Rating lets you decide which TV programs can and cannot be viewed To set TV programming limits 1 Choose Channel Setup from the Main menu 2 If Channel Setup has previously been locked you must enter your password 3 Choose Parental Controls 4 Highlight Canada V Chip an...

Page 37: ... listed in Cable Channel List and Antenna Ch List for off air or cable sources are based on the Channel Search results If a channel is not found by Channel Search then it is not listed Editing Channels in the Channel Lists Channels can be edited through the Favorite Ch List and Children s Ch List in the Cable and Antenna Channel List menus Use the Favorite Ch List to remove a channel if you no lon...

Page 38: ...Pb Pr on the back of the TV and you want the TV to tune to the composite component video input when you press the corresponding button Input 2 Input4 Device is connected to the Input 2 Video V or S VIDEO jack on the back of the TV and you want the TV to tune to the Video Input Channel when you press the corresponding button Front Input Device is connected to the VIDEO IN jack on the front of the T...

Page 39: ...he first menu you see when you press the MENU button on the remote is called the Main Menu To use the Main Menu 1 Press the MENU button the Main Menu appears 2 Use the arrow buttons left right up down to move through the menu and highlight different options 3 Press the OK button to select a highlighted item Note Press the number button on the remote that matches the number next to the on screen me...

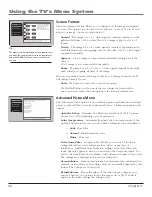
Page 40: ...field 2 To enter time values such as the Wake Up Timer highlight the or field and press OK to change the time or simply use the number buttons To enter passwords you must use the number buttons On screen Menu Items The on screen menu items are used to access the information and or change the settings of the specific item highlighted Highlight the item with the up and down arrow buttons Then press ...

Page 41: ... Picture Settings menu are Contrast Difference between the light and dark areas of the picture Color The richness of the color Tint The balance between the red and green levels Brightness The brightness of the picture Sharpness The crispness of the edges in the picture To create picture settings for the video inputs 1 Press the INPUT button while in the Picture Settings menu until the correct Vide...

Page 42: ...expands horizontally Squeeze A 4 x 3 image is compressed horizontally adding bars to the sides A 16 x 9 image is also compressed horizontally Zoom The image of a 4 x 3 or 16 x 9 video signal expands horizontally and vertically cropping all sides of the image Turn on Automatic Format Switching so that as you change channels the TV will change formats for you Notes The format of some video cannot be...

Page 43: ... Settings menu select Reset Controls and then select Reset to reset the settings for the currently tuned input Picture Setting Picture Preset Mode Go Back 2 1 0 Advanced Picture Screen Format 4 5 3 Screen Adjust Main Menu4Picture Menu Press OK or4to access the Screen Adjust menu The Screen Adjust Menu has features that let you position and adjust the picture on the screen Horizontal Position Verti...

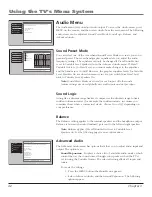
Page 44: ...amic range to limit sudden volume increases for example the sudden increase in volume you sometimes hear when a commercial starts Choose On or Off depending on your preference Balance The Balance setting applies to the internal speakers and the headphone output Balance is how much audio loudness gets sent to the left and right speakers Note Balance applies if Fixed Variable Out is set to Variable ...

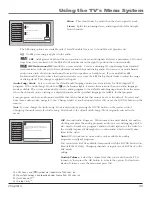
Page 45: ...e icon Track 1 of 10 in the banner lights it means there is more than one audio language mode available The system automatically sets the audio program to the default audio language mode from the menu when the channel you are viewing is a digital channel and the specified language is available for that program Some programs can have audio mode available that can be heard but that cannot be set as ...

Page 46: ...o receiver or amplifier and the volume is controlled by the TV Fixed Level Speakers Off Turns the TV s front speakers Off and provides fixed output from the TV s FIXED VARIABLE AUDIO OUTPUT jack to a receiver or amplifier With the Fixed Output the TV s volume control graphic equalizer and mute are disabled This output is ideal when connecting to an audio receiver or amplifier that has its own remo...

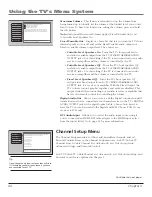
Page 47: ... t check the Cable Input box Channel Search Lock TV Go Back 2 1 0 Video Input List Antenna Ch List 5 4 Advanced Settings 6 Parental Controls 7 Cable Channel Lists 3 Press OK or4to access the Advanced Settings menu Main Menu4Channel Setup Auto Tuning Startup Channel Diagnostic Info CableCARD Tools CableCARD Reset The Advanced Settings menu has screens that let you set up channel input features and ...

Page 48: ...g a CableCARD make your settings for Quick Startup first Once a CableCARD has been inserted Quick Startup settings cannot be changed Caption Display The Caption Display menu displays a choice list that lets you choose when closed captioning information is shown on the screen HDMI and SVGA inputs aren t supported by Closed Captioning CC try the device s menu system for CC options On Captioning info...

Page 49: ...the same language as the program s dialog CC3 and Text 3 serve as the preferred data channels The captioning or text is often a secondary language translation simplified English or displayed at a slower rate CC2 and CC4 and Text 2 and Text 4 are rarely available and broadcasters use them only in special conditions such as when CC1 and CC3 are not available or Text 1 and Text 3 are not available Di...

Page 50: ...tal channel Make sure you check the time acquired is correct Note If you enter the time manually you must remember to set your TV s time when the time changes to Daylight Saving Time Sleep Timer and Wake Up Timer will not function as you expect if you forget to change the TV s time Assisted Setup The Assisted Setup menus were covered in Chapter 1 Go to page 13 for more information Menu Preferences...

Page 51: ... t carry programming such as video on demand When channels are unavailable your TV s screen displays Weak or No Signal You probably want to get rid of these so they no longer appear in your channel list Remove these in the Channel Setup menu Go to page 45 for more information Why does the first channel search take a long time If you ve checked each box in the channel search menu the TV is looking ...

Page 52: ... TV doesn t turn on after 5 minutes and then the light blinks steadily for one minute one of the following options is possible Lamp door may be open Face the back of the TV Locate the door at the bottom of the TV and close it Turn off the TV and turn back on The lamp should turn on Lamp may be dead Go to page 55 for lamp replacement information Buttons don t work If you re using the remote control...

Page 53: ...onal noise during these cycles Maybe the speakers are turned off Check the FIXED VARIABLE OUT control panel in the Audio menu No picture sound okay If the indicator on the front of the TV is blinking for one minute the lamp inside of your TV may need to be changed Refer to the Power indicator is blinking or flashing section on the previous page for more information You might have tried to turn on ...

Page 54: ...Signal message on screen press the INFO button on the remote If Acquiring Channel appears in the channel banner the HDMI or DVI device isn t responding Contact the manufacturer of the HDMI or DVI device for further assistance If you tune to the HDMI input and you see snow the video goes in and out or the video takes a long time to appear your HDMI or DVI device is having trouble sending video info...

Page 55: ...movie ratings you must set V Chip Unrated to View separately in order to view movies with an NR rating What Else Can I Do If you ve been through the Troubleshooting section and nothing has fixed your problem try rebooting your TV Note that after a reboot you may need to run your TV through the setup process again To do a reboot unplug the power cord from the wall outlet power strip etc Keep your T...

Page 56: ...ow the directions there is a risk of injury You can easily replace the lamp yourself by following the instructions that come packed with the new lamp If your TV is still covered by the warranty call 1 866 723 6486 to receive troubleshooting assistance and a lamp replacement If your TV s warranty has expired call 1 800 338 0376 to purchase a lamp replacement If you are not comfortable replacing the...

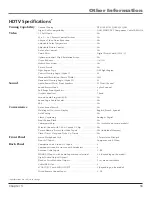
Page 57: ...akers 2 Graphic Equalizer 7 band Second Audio Program SAP Yes Sound Logic Audio Leveler Yes SRS Yes Convenience Auto Channel Search Yes Multilingual On screen Display English French Spanish Auto Tuning Yes Closed Captioning Analog Digital Front Button Block Yes Commercial Skip Yes available on certain models Parental Control with USA Canada V Chip Yes Picture Memory Presets for Video Inputs Yes In...

Page 58: ... into other products or is used for institutional or other commercial purposes A unit purchased or serviced outside the U S A Acts of nature such as but not limited to lightning damage How you get service Call 1 877 RCA HDTV and have your unit s date of purchase and model serial number ready A representative will troubleshoot your problem over the phone If the representative determines that you sh...

Page 59: ...rrect the interference by one or more of the following measures Reorient or relocate the receiving antenna Increase the separation between the equipment and receiver Connect the equipment into an outlet on a circuit different from that to which the receiver is connected Consult the dealer or an experienced radio TV technician for help This Class B digital apparatus complies with Canadian ICES 003 ...

Page 60: ...This page left intentionally blank ...

Page 61: ...This page left intentionally blank ...

Page 62: ...This page left intentionally blank ...

Page 63: ...This page left intentionally blank ...

Page 64: ...d marks are trademarks of THOMSON S A used under license to TTE Corporation Printed in USA TOCOM 1666047A Please do not send any products to the Indianapolis address listed in this manual or on the carton This will only add delays in service for your product Visit the RCA website at www rca com television ...

Reviews: