


6
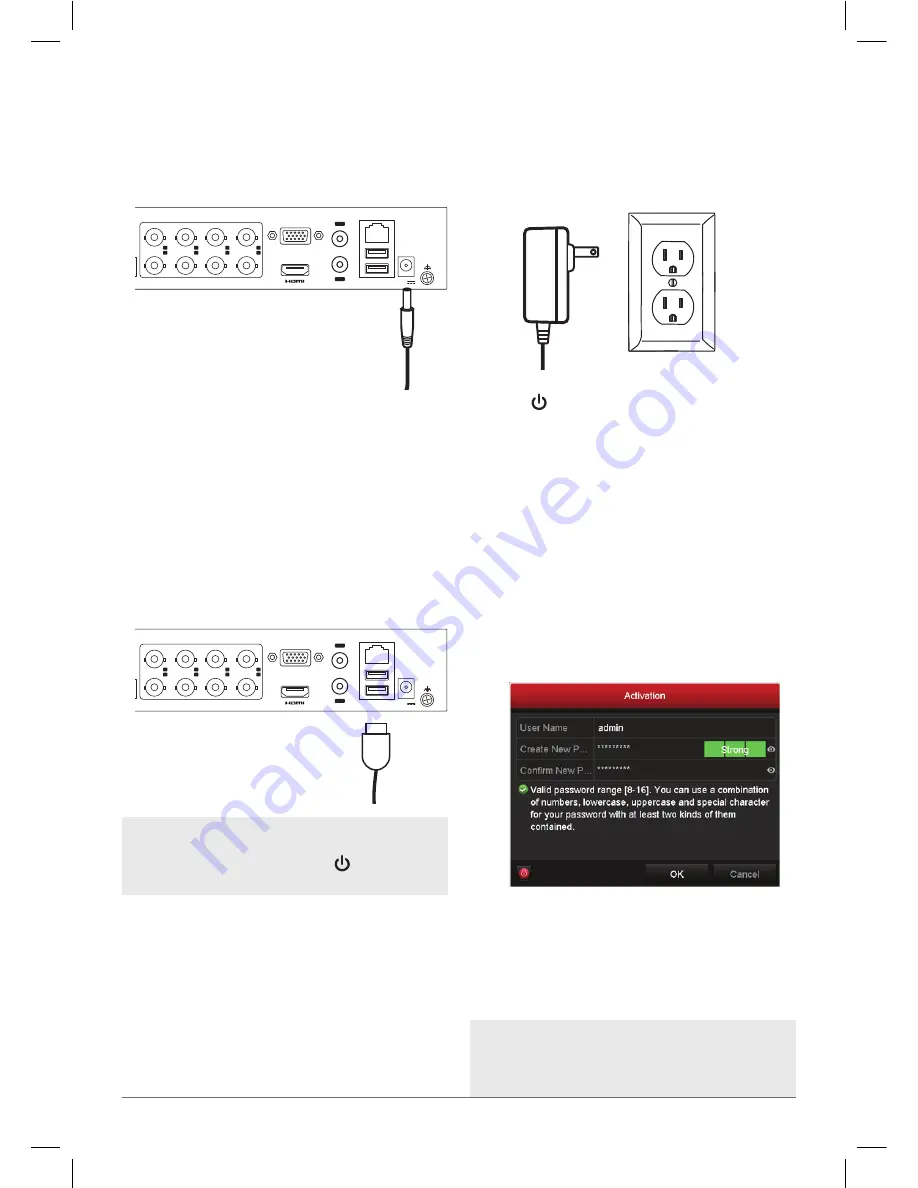
Step 6: Power and turn on the DVR
Step 7: Activate your DVR
1. Plug the AC adapter into the 12V jack
on the back of the DVR.
2. The first time you turn it on, the DVR asks
you to activate the system by creating
an admin password. You must create a
password in the step in order to use the
system.
Click on each field and use the
on-screen keyboard to enter your
password in the Create New Password
and Confirm New Password fields. Then
click OK to save the password and
activate the device.
1
2
3
4
5
6
7
8
VIDEO IN
D+ D-
RS-485
VGA
IN
OUT
AUDIO
LAN&USB
12V
2. Plug the other end of the adapter into a
working outlet or surge protector.
The indicator on the front panel
of the DVR is green when the unit is
plugged in. This means the DVR is on!
1. Plug the included mouse into one of the
USB ports on the back of the DVR.
1
2
3
4
5
6
7
8
VIDEO IN
D+ D-
RS-485
VGA
IN
OUT
AUDIO
LAN&USB
12V
IMPORTANT: Make sure your TV or monitor is
tuned to the correct input to view the signal from
the DVR. Also make sure that the indicator on
the front of the DVR is lit.
IMPORTANT: Make sure you remember your
password! You might want to save it to a USB
drive in the next step, as a physical key in case you
forget.
Summary of Contents for HSKIT482
Page 15: ...15 ...


