


12
Everyday Use
The viewing screen on your monitor or App is the gateway to everyday use of the RCA Security
System. This section gives you a tour of the viewing screen and menus.
Monitor Live View
Each channel offers a live view, with alert/status icons that notify you of what’s going on.
Alarm (video loss, tampering, motion detection, VCA or sensor alarm)
Recording (manual record, continuous record, motion detection, VCA or alarm triggered
record)
Event/Exception (event and exception information, appears at the lower-left corner of the
screen.)
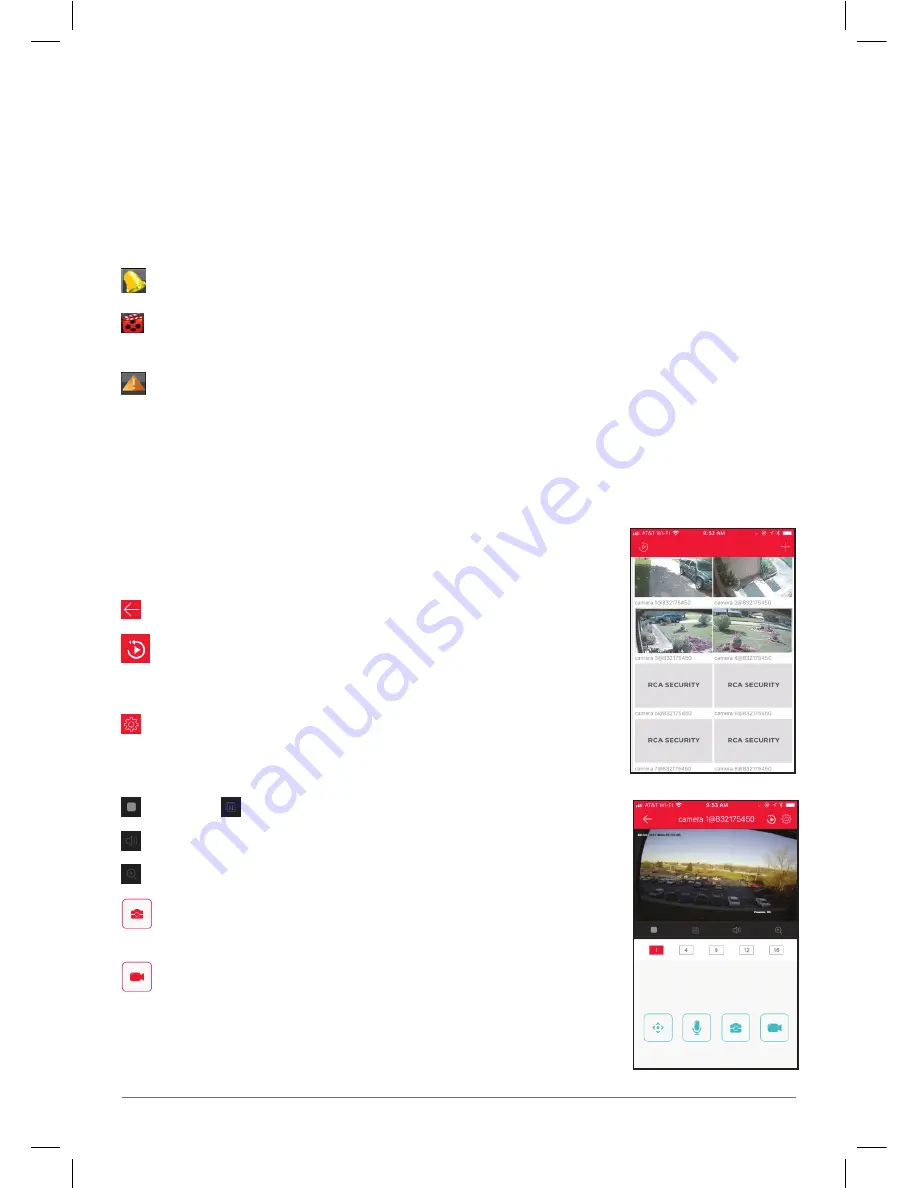
App Live View
The App shows you views for all your active cameras. Press on one
to go to a live view of that camera.
(Back) goes back to the device list screen.
(Timeline / Playback) accesses any content stored on the DVR.
Press this icon to start viewing or downloading motion/sound-
activated videos or images.
(Settings) accesses the Settings menu.
Camera view shows you the image from this camera. Turn your
phone/tablet sideways to take over the entire screen.
(Stop) and (Pause) stops/starts or pauses the live video.
(Sound On/Off) turns the sound from the camera on and off.
(Zoom) zooms in on the live view.
(Snapshot) takes a still photo of the camera video. The
snapshot file is saved to your smartphone or tablet.
(Record) starts/stops recording video. The video file is saved to
your smartphone or tablet.
1 / 4 / 9 / 12 / 16 (Multi-Camera View) lets you see multiple cameras
at once on a single screen. Press the number you want to access a
multi-camera view screen.
Summary of Contents for HSKIT482
Page 15: ...15 ...


