27
USING THE menu SYSTEM
the MENU SYSTEM
This section explores the menus of your TV—beginning with
some information on using menus and control panels.
Each menu is then outlined and special features are detailed to
help you get the most from your TV.
➣
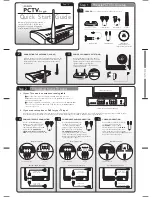
Setup and connections
Interactive Setup
1
2
➣➣
Using the Menu System
Using the remote
3
4
➣
Features and Controls
5
➣
Reference
6