Graphics contained within this publication are for representation only.
52
Chapter 5: Menu System
Languages
Display:
the language that appears when you access this menu the fi rst time refl ects the option you
chose during the interactive setup. To change the language of the on-screen displays (menus), use the
arrow buttons to highlight a language and press OK to select it.
Disc Menu:
many discs have their own menu that appears on the screen. You can select the language in
which you want the disc menu displayed. In order for your setting to take effect, the disc’s menu must
have been created with the corresponding language option.
Audio:
the language that appears when you access this menu the fi rst time refl ects the option you chose
during the interactive setup. You can change the audio language by highlighting an option and pressing the
OK button. The language selected will only apply when it is available on the disc.
Subtitles:
some movies on DVD discs have subtitles. Set up your default settings in this menu. You
can quickly override these settings while playing a disc by using the Info Display (go to page 42 for
information).
Automatic:
if the language you selected in the interactive setup isn’t available for the title you’re
playing, but subtitles are available in that language—the subtitles for that language will appear
automatically during playback.
Off:
subtitles won’t appear on the screen.
On:
if the title (movie) has subtitles available, they will appear automatically.
Original:
subtitle language will match the original audio (dialogue) language of the title (movie).
Installation
The submenus contained in the Installation menu pertain to the type of signal that is connected to your DVD
recorder (cable or off-air antenna). If you move, or change any of the information you entered when you fi rst set
up your DVD recorder, you need to change the information in the following menus.
Interactive Setup:
the fi rst time you turned on your DVD recorder, you had to complete an interactive
setup so your DVD recorder could have the information it needs to function properly. For details about
the Interactive Setup, go to page 16. To go through this procedure again to change settings, highlight
Interactive Setup
and press the OK button.
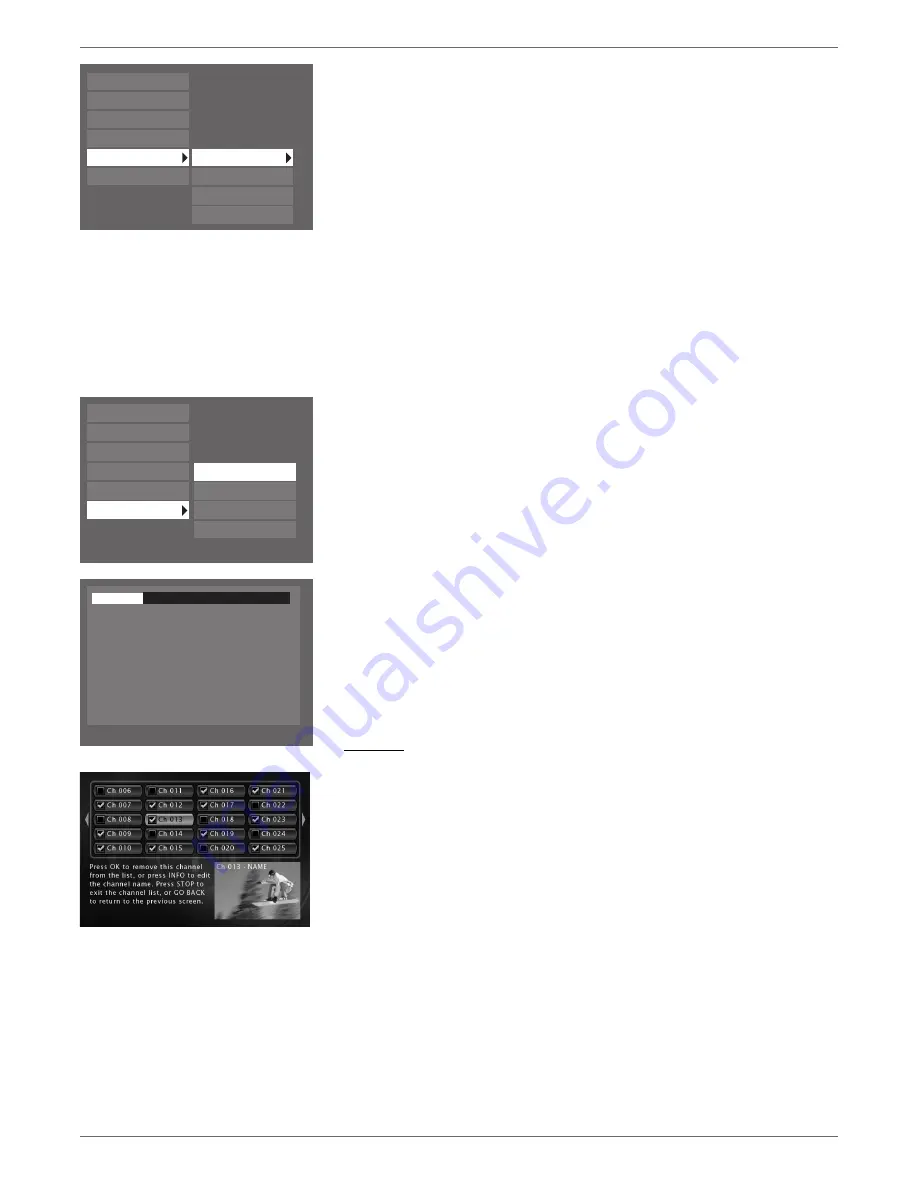
Channel Search:
if you’ve changed program providers (cable and/or satellite), the Channel Search will
automatically search the signal and put the latest channels in the DVD recorder’s channel list. Use the
arrow buttons to highlight
Channel Search
, and press OK to begin (a progress indicator appears to let you
know how quickly the search is being completed).
Clock Setup:
if the clock is incorrectly set or you skipped this step during the interactive setup, you
can set the DVD recorder’s clock using the number buttons on the remote and the arrow buttons to
navigate. Follow the on-screen instructions.
Note: In order for Timer Recordings to work, you must set the clock to the correct time and date.
Channel List:
enables you to change what channels are accessed when you press the DVD Recorder’s
channel up and down buttons (if you delete a channel from the channel list, you can still access it by using
the number buttons on the remote). For more explanation, go to page 17.
DV-CAM
The DV-CAM menu allows you to see video from a DV camcorder, connected through the DV IN Firewire jack
on the front of the DVD recorder. For more information, go to page 36.
Parental Control
Disc Options
Recording Options
System Options
Languages
Installation
Interactive Setup
Channel Search
Channel List
Clock Setup
Searching channels...
35% complete
2 channels found
Please wait....
Edit the list of channels found
Parental Control
Disc Options
Recording Options
System Options
Languages
Installation
Display
Disc Menu
Audio
Subtitles
Summary of Contents for DRC8060N
Page 64: ...This page intentionally left blank ...
Page 65: ...This page intentionally left blank ...
Page 66: ...This page intentionally left blank ...
Page 67: ......


