background image

Important Information

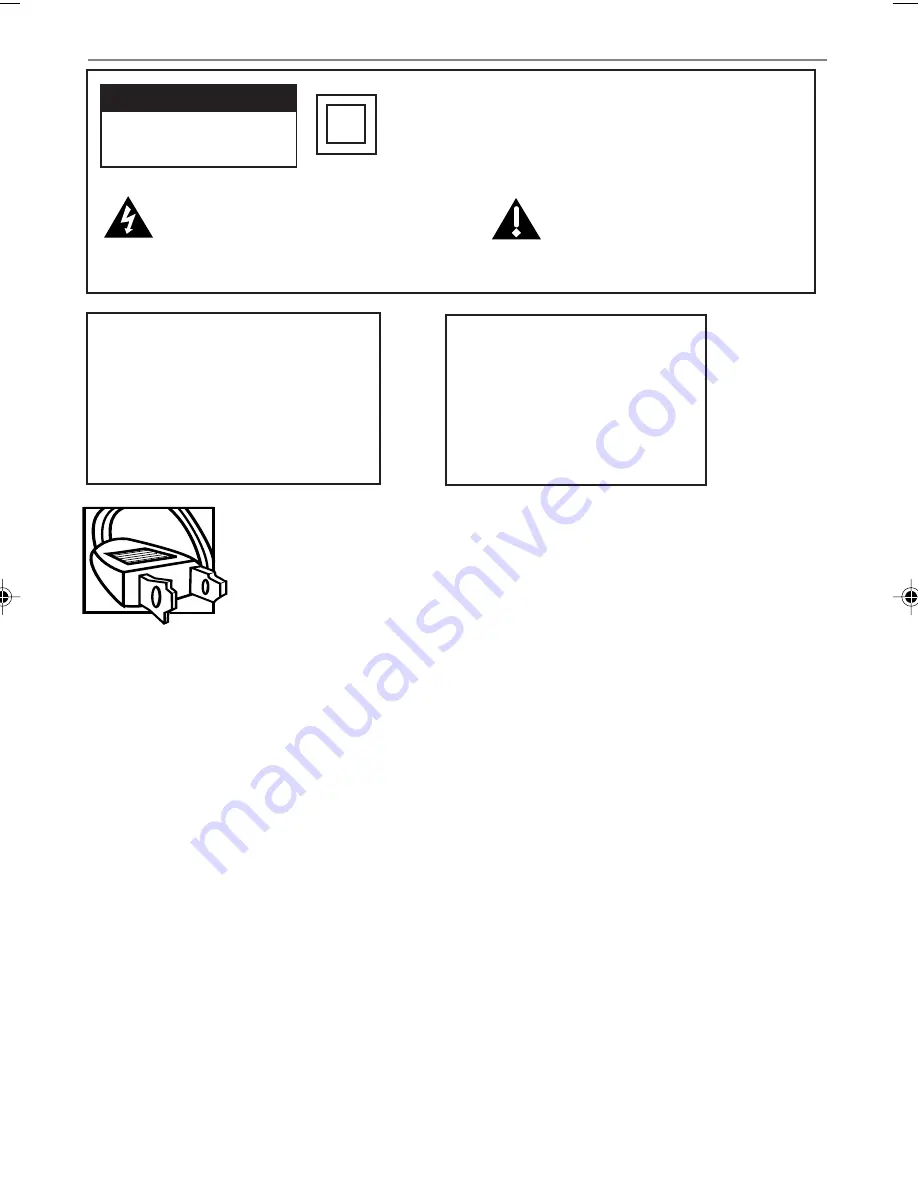
This symbol indicates "dangerous voltage"
inside the product that presents a risk of
electric shock or personal injury.

WARNING

To reduce the risk of fire or electric
shock, do not expose this product to
rain or moisture. No objects filled with
liquids, such as vases, shall be placed
on the apparatus.

This symbol indicates important
instructions accompanying the
product.

CAUTION

RISK OF ELECTRIC SHOCK DO

NOT OPEN

Caution: 

To prevent electric shock, match wide blade of plug to wide slot, fully insert.

Attention:

 Pour éviter les chocs électriques, introduire la lame la plus large de la fiche

dans la borne correspondante de la prise et pousser jusqú au fond.

Refer to the identification/rating label located on the back panel of your product for its

proper operating voltage.

This symbol indicates that this product incorporates double
insulation between hazardous mains voltage and user
accessible parts. When servicing use only identical
replacement parts.

Product Registration

Please fill out the product registration card (packed separately) and return it immediately.  For U.S. customers: You
RCA Consumer Electronics product may also be registered at www.rca.com/productregistration. Registering this
product allows us to contact you if needed.

Product Information

Keep your sales receipt to obtain warranty parts and service and for proof of purchase. Attach it here and record the
serial and model numbers in case you need them. The numbers are located on the back of the product.

Model No. _______________________________________________________________________

Serial No. ________________________________________________________________________

Purchase Date: ___________________________________________________________________

Dealer/Address/Phone: _____________________________________________________________

CAUTION

FCC Regulations state that
unauthorized changes or
modifications to this equipment
may void the user’s authority to
operate it.

Cable TV Installer:

 This reminder is provided to call your attention to Article 820-40 of the National Electrical Code

(Section 54 of the Canadian Electrical Code, Part 1) which provides guidelines for proper grounding and, in
particular, specifies that the cable ground shall be connected to the grounding system of the building as close to
the point of cable entry as practical.

 DRC6200N. Cover

7/28/03, 9:30 AM

2

Summary of Contents for DRC6200N

Page 1: ...DVD VCR User s Guide Changing Entertainment Again DRC6200N ...

Page 2: ...n it immediately For U S customers You RCA Consumer Electronics product may also be registered at www rca com productregistration Registering this product allows us to contact you if needed Product Information Keep your sales receipt to obtain warranty parts and service and for proof of purchase Attach it here and record the serial and model numbers in case you need them The numbers are located on...

Page 3: ...t numbers 4 631 603 and 4 577 216 and 4 819 098 and other intellectual property rights The use of Macrovision s copy protection technology in the device must be authorized by Macrovision and is intended for home and other limited pay per view uses only unless otherwise authorized in writing by Macrovision Reverse engineering or disassembly is prohibited This product incorporates copyright protecti...

Page 4: ...nergy and if not installed and used in accordance with the instructions may cause harmful interference to radio communications However there is no guarantee that interference will not occur in a particular installation If this equipment does cause harmful interference to radio or television reception which can be determined by turning the equipment off and on the user is encouraged to try to corre...

Page 5: ...in DVD or VCR Mode 9 Turn on the TV and DVD VCR 9 Using the Remote Control to Choose On screen Menu Items 10 Complete the VCR Setup 10 Language Select 10 Auto Channel Search 10 Cable Box Setup 11 Clock Set 11 Next Steps 12 What to Expect 12 DVD and VCR Modes 12 Menu Systems 12 User s Guide 12 Chapter 2 Remote Control Button Descriptions for DVD and VCR Modes 13 DVD and VCR function buttons listed ...

Page 6: ...udio Language Icon DVD Info Display 21 Play Mode 22 Repeat 22 AB Repeat 22 Random Audio CD and mp3 23 Program Play DVD and Audio CD Info Displays 23 Changing the Camera Angle DVD Info Display 23 PBC Playback Control Video CD Info Display 24 Playing mp3 and WMA music files and displaying JPEG files 24 Displaying JPEG files or playing mp3 or WMA files 24 Chapter 4 VCR Features VCR Basics 26 Playing ...

Page 7: ...pect 36 Video Out 37 Scan Mode 37 Audio Menu 37 Digital Out 37 Dynamic Range 38 Others Menu 38 OSD 38 Screen Saver 38 Defaults 38 Parental 39 Changing Parental Controls 39 Changing Your Password 39 Resetting Your Password 40 Pro Tect Plus Locking Feature 40 Chapter 6 Additional Information Troubleshooting 41 Handling Cautions 48 Maintenance of Cabinet 48 Formation of Condensation 48 Handling Discs...

Page 8: ...planation of Input Jacks and Cables 52 Component Video Y Pb Pr Jacks and Cables 52 S Video Jacks and Cables 52 Audio Video Jacks and Cables RCA type 52 Limited Warranty 53 How to find your TV s Video Input Channel 55 Video Input Channel Variations 55 Accessory Information 56 How to Order 56 ...

Page 9: ...freely Don t stack components When you place components in a stand make sure you allow adequate ventilation If you connect an audio receiver or amplifier place it on the top shelf so the heated air from it won t flow around other components Position Cables Properly to Avoid Audio Interference Insert each cable firmly into the designated jack If you place components above the TV route all cables do...

Page 10: ...io cable Audio Video cables Component Video cables Compatible Discs This DVD player is capable of playing the following types of discs DVDs audio CDs Video CDs CDs with mp3 files WMA files Windows Media Audio and CDs with JPEG files on them Before you put a disc in the player make sure it is compatible You can t play the following types of discs Laserdiscs CD I CD ROM computer only discs DVD ROM d...

Page 11: ... cable not provided to the S VIDEO OUT jack on the back of your DVD VCR and to the S VIDEO IN jack on your TV This connection is only for DVD signal For the VCR signal you must also connect the standard video cable C Component video optional connection not pictured If your TV has component video jacks Y Pb Pr connect component video cables not provided to the COMPONENT OUT jacks on the DVD VCR for...

Page 12: ...gital Audio Input jack and some have both Under most conditions optical and coaxial connections work equally well the only difference is the type of cable you connect to the jack If you want to use a less expensive cable connect a coaxial cable to the COAXIAL jack Rarely but sometimes coaxial cables especially long ones pick up radio frequency RF interference from household appliances nearby power...

Page 13: ...n DVD or VCR Mode When you want the remote to operate the DVD VCR point the remote at the DVD VCR not the TV The remote has to be pointed in the correct direction and toward the correct component in order for the remote control s signal to communicate with the sensor on the component Make sure there is a clear path between the remote control and the component you want to operate so the signal isn ...

Page 14: ...ult is English If you want to choose a different language follow the steps below 1 Make sure the remote is in VCR mode by pressing the VCR button 2 Press MENU to display the VCR SETUP MENU 3 Press the down arrow button until LANGUAGE SELECT is highlighted and press OK the LANGUAGE SELECT menu appears 4 Press the down arrow button until the desired language is selected then press OK 5 When finished...

Page 15: ...ighted and press OK the CHANNEL SET menu appears 4 Press the down arrow button until Cable Box Setup is highlighted and press OK the CABLE BOX SETUP menu appears 5 Enter the output channel of the cable box usually 03 or 04 or if A V jacks connect the VCR to the cable box press the INPUT button on the VCR s remote control Clock Set Time and Date Set Time and Date Set allows you to manually set the ...

Page 16: ... and VCR Modes As you familiarize yourself with this product keep in mind that you need to tell the remote which part of the unit you want to operate the DVD part of the unit or the VCR part To operate the DVD part of the DVD VCR press the DVD button on the remote To operate the VCR part press the VCR button You can also change modes on the front of the unit by pressing the DVD VCR button Menu Sys...

Page 17: ...el list and adjusts tracking In DVD mode selects the next preceding chapter or track when playing a disc CLEAR Removes on screen menus and displays or clears menus In VCR mode resets the time counter DVD Turns on the DVD VCR and puts the remote in DVD mode Likewise you can change to the VCR mode by pressing the VCR button FORWARD Fast forwards the tape when the VCR is in stop mode In DVD and VCR m...

Page 18: ...CR mode selects tape speed STOP Stops the current DVD VCR function record playback rewind etc SUBTITLE In DVD mode accesses the Subtitle part of the on screen Info Display and turns Subtitles on and off if subtitles are available on the disc you are playing TIMER In VCR mode accesses the timer recording menu TITLE GUIDE In DVD mode accesses the DVD disc guide if available TV VCR Functions as a TV ...

Page 19: ...TLE TIMER REVERSE PLAY FORWARD PAUSE STOP RECORD AGAIN SPEED OPEN CLOSE ZOOM SEARCH 4 Turn on your TV and tune it to the correct Video Input Channel If you used a coaxial cable to connect your DVD VCR to your TV tune the TV to channel 3 Your TV must be set to channel 3 the first time you set up the DVD VCR See page 32 for instructions on how to change the output channel once you have started setup...

Page 20: ...U button on the remote The DVD player s Info Display The Info Display appears as icons across the top of the screen when a disc is playing It can only be accessed while you are playing a disc It s turned on and off with the INFO button on the remote The DVD player menu The DVD player s menu system is accessed only when a disc isn t playing It appears automatically when you press STOP and then MENU...

Page 21: ...disc is removed or the unit is unplugged or if you press the STOP button twice C an t Catch Up C an t Catch Up C a n t C a t c h Up Widescreen V e r s i o n This is an example of a one sided disc This is an example of a two sided disc the title is usually in the center of the disc Search Options To search a disc you can use the FORWARD button or the REVERSE button You can also utilize the followin...

Page 22: ... with some discs you can access playback features directly from the remote control Chapter Advance While a disc is playing you can skip forward or backward a chapter or track at a time by pressing the CH and or CH buttons also labeled and Zoom 1 While you re playing a disc press ZOOM the player zooms in on the image Each time you press ZOOM the picture is magnified even more until you get to the m...

Page 23: ... only available if the disc was created with that particular feature The invalid symbol appears on the screen when you press a button that doesn t have any function To make the Info Display disappear from the screen press INFO on the remote Time display Title Chapter Subtitles Audio Repeat Mode Angle DVD Disc Info Display Audio CD Info Display Video CD VCD Disc Info Display T C DISPLAY DISPLAY 0 0...

Page 24: ...s into the title Note For Audio CDs the time displayed refers to the track that s playing Title Track Icon all Info Displays Some DVD discs contain more than one title Each title is divided into chapters CDs are divided into separate tracks To select a title track Highlight the Title Track icon and use the number buttons on the remote to enter the title number or track number and press OK or press...

Page 25: ...e discs are programmed to only allow you to access the subtitle feature through the disc s menu During playback press MENU to access the disc s menu Audio Language Icon DVD Info Display If the disc was created with different language tracks recorded in different languages you can change the language while you re playing the disc Highlight the Audio icon and press the left or right arrow buttons to...

Page 26: ...ters or Tracks While a disc is playing press the PLAY MODE button to toggle through the available play mode options To return to normal play press PLAY MODE repeatedly until OFF appears AB Repeat AB Repeat lets you define a specific segment on the disc that you want to repeat For example you might want to watch the dogfight in the movie Top Gun To watch this scene over and over 1 While a disc is p...

Page 27: ...e next or previous tracks in your playlist use the CH buttons To stop program play press PLAY MODE until OFF appears Changing the Camera Angle DVD Info Display Some discs contain multiple angles of a particular scene or sequence If the disc only has one angle this feature won t work Currently very few discs have this feature 1 While a disc is playing press ANGLE on the remote If the disc wasn t cr...

Page 28: ...according to the size and number of JPEG files actually on the disc If nothing is displayed after a few minutes it is likely that certain files are too large Try reducing the files resolution and write another disc Displaying JPEG files or playing mp3 or WMA files Before inserting a disc check that it is compatible with the player 1 Open the tray by pressing the OPEN CLOSE button 2 Place the disc ...

Page 29: ...ith the JPEG file you have selected and proceeds to display all the JPEG files in the same folder then all the JPEG files in the subfolders located in the same folder Note During the slide show you can use the ZOOM button to magnify the picture the or buttons to go back to the previous picture or go on to the next one and the MENU button to interrupt the slide show and display the disc s contents ...

Page 30: ...Press CHANNEL or CH on the remote to remove any streaks from the picture if necessary Press STOP to stop playback Automatic Rewind The DVD VCR automatically rewinds the tape if it reaches the end of the tape during playback While rewinding you can press the ON OFF button the DVD VCR will turn off after it rewinds the tape If the tape has no safety tab it will be ejected Tape Eject Press the EJECT ...

Page 31: ...rride the preferred tape speed setting press the SPEED button on the remote control repeatedly to toggle between SP and SLP choices 3 Press the RECORD to start recording 4 Repeatedly press RECORD to set up the recording duration Press RECORD until RECORD TIME 0 00 appears Each time you press the RECORD button 30 minutes is added The DVD VCR automatically turns off after it has recorded the set amo...

Page 32: ... Express Recording Press and hold the STOP button for several seconds until STOP appears in the on screen display Reviewing and Clearing Programs To review programs that you have already set up 1 Press the MENU button to display the VCR SETUP MENU 2 Press the down arrow button until TIMER RECORDINGS is highlighted and press OK the TIMER RECORDINGS menu appears 3 Press the down arrow button until R...

Page 33: ... program you may want to press the PLAY button to verify When the tape is cued correctly you can begin recording 5 Press the INFO button to remove the time counter from the screen and return to the normal display mode 0 30 00 Minutes Seconds Hours 1 Press the INFO button to show the on screen displays The current time is also displayed in the VCR s front panel Info Display To find out the status o...

Page 34: ...temporarily SETUP CLOCK SET TIMER RECORDINGS CHANNEL SET FUNCTIONS LANGUAGE SELECT Move Select End MENU OK CLOCK SET Time and Date Set Auto DST ON Move Select End MENU OK 3 Press INFO again to have no displays appear on the TV screen The time counter remains in the VCR s display panel This is useful for dubbing tapes 4 Press the INFO button again to return to the normal display The current time is...

Page 35: ...ly Note With Detect Automatically a strong cable or antenna signal in your area may cause channels to be detected inaccurately If this should happen you will need to select either Cable TV or Antenna manually When scanning is complete the VCR tunes to the lowest channel available After completing Auto Channel Search press the remote control s CH or buttons to select active channels Add Remove Chan...

Page 36: ...tail on page 11 Channel Change VCR Output Channel Use this option to change the VCR s output channel The default is channel 3 Press the OK button to toggle between CH3 or CH4 If you change the output channel to 4 you must tune your TV to channel 4 to watch channels or play a tape Functions The settings in this menu let you customize your VCR features Auto Play With Auto Play turned on the factory ...

Page 37: ... and press OK the INDEX SEARCH screen appears 5 If you want to search through a certain number of index marks press two number buttons to enter the number of marks you want to search Press the CLEAR button on the remote control to correct an entry 6 Press the FORWARD button to search forward or the REVERSE button to search in reverse The VCR will locate your index mark and begin playback If you di...

Page 38: ...s the down arrow button until Index Search is highlighted and press OK the INDEX SEARCH screen appears Set Auto Repeat You can set the DVD VCR to play the same segment of a tape over and over in a repeating loop The Set Auto Repeat menu will ask for a loop end time to be specified To turn off Set Auto Repeat press the CLEAR button Language Select Select your preferred language to determine how the...

Page 39: ...ENGLISH DISC MENU ENGLISH LANGUAGE VIDEO AUDIO OTHERS MOVE SELECT OK EXIT MENU Language Menu The Languages menu enables you to set preferred language options for OSD Language the DVD Player s menu system Audio the dialogue of DVD titles Subtitle Disc Menu The way you choose languages is the same for each of the Language submenus 1 With no disc playing press MENU the Languages menu appears 2 Use th...

Page 40: ...w 4 3 LB 4 x 3 Letterbox Choose this setting if you want to see movies in their original aspect ratio height to width ratio You ll see the entire frame of the movie but it will take up a smaller portion of the screen vertically The movie might appear with black bars at the top and bottom of the screen TV ASPECT 4 3 LB 4 3 LB VIDEO OUT COMPONENT SCAN MODE INTERLACED LANGUAGE VIDEO AUDIO OTHERS MOVE...

Page 41: ...until SCAN MODE is highlighted then press OK to toggle the available options Important If you lose the picture signal when connected to your TV with component video cables toggle the progressive scan interlace mode as mentioned above Note If VIDEO OUT is set to S Video SCAN MODE is not available Audio Menu The AUDIO menu lets you adjust the player s settings to match the equipment you connected to...

Page 42: ...NTAL 8 ADULT LANGUAGE VIDEO AUDIO OTHERS MOVE SELECT OK EXIT MENU OSD This feature lets you choose whether the on screen displays OSDs e g PLAY PAUSE etc appear when accessing certain functions of a disc 1 With no disc playing press MENU the LANGUAGE menu appears 2 Press the right arrow button until OTHERS is highlighted the OTHERS menu appears 3 OSD is already highlighted so press OK to toggle th...

Page 43: ...ssword required to play discs Changing Parental Controls 1 From the OTHERS menu press the down arrow button until the current PARENTAL setting is highlighted then press OK INPUT PASSWORD appears 2 Use the number buttons on the remote control to enter your password CHANGE PASSWORD appears Press OK repeatedly until the desired rating appears the parental control will now be set to that setting Notes...

Page 44: ...ton to highlight the CHANGE PASSWORD entry 4 Enter your new password and press OK CHANGE OK appears Pro Tect Plus Locking Feature To disable DVD VCR usage the unit can be locked so that the buttons on the front of the unit or remote control don t work To Lock Press and hold the remote control s ON OFF button until LOCK appears on the front of the DVD VCR LOCK flashes if a button is pressed while t...

Page 45: ...t switch Player turns off automatically The power automatically turns off after the player has been in stop mode for approximately 30 minutes Turn power back on No picture Turn your TV to its Video Input Channel go to page 55 Turn on the TV Make sure your player is connected properly If you re using component video cables to connect to your TV toggle the progressive scan interlace mode see page 37...

Page 46: ...of the AC power cord are securely plugged into the player and into an AC outlet Make sure the DVD VCR isn t plugged into an outlet controlled by a light switch Remote control won t work You might be in the wrong mode To operate the DVD functions of your DVD VCR press DVD on the remote before you press any other buttons For other remote troubleshooting see above section Disc won t play Insert a dis...

Page 47: ...ial settings will not be seen heard The disc s priority language is selected instead Set the subtitle and or audio language manually through the Info Display or the player menu The menu is displayed in a foreign language The Language menu OSD LANGUAGE is set to that language Go to LANGUAGE In Spanish shown as Idioma in French as Langue in the main DVD player menu and select the OSD LANGUAGE option...

Page 48: ...g RF coaxial cables to connect the DVD VCR to the TV make sure the VCR indicator is not displayed on the DVD VCR s front panel press the remote control s TV VCR button to toggle between VCR and TV viewing modes If using A V jacks and cables to connect the DVD VCR to the TV press the remote control s INPUT button when in TV mode to access the TV s Video Input Channel Tune the TV to an active channe...

Page 49: ...ct your local cable company for more information On screen menus appear in a foreign language Check the LANGUAGE menu to choose a preferred on screen language Recording Problems Will not record Make sure there is a recordable tape in the DVD VCR Eject then reinsert the tape Make sure the tape is not broken Make sure the DVD VCR player is not in pause mode Press PAUSE or PLAY to return to normal pl...

Page 50: ...ons on the front of the unit or CH on the remote to move streaks up or down for the best picture Make sure the tape is of good quality and not worn out Time counter not working or time counter not working in search modes The time counter does not advance during unrecorded portions of tape When an unrecorded segment of tape is encountered the time counter will hold its count until recorded material...

Page 51: ...unit or CH on the remote to minimize picture noise Cannot copy discs to video tape You can t record DVD discs onto videocassettes because the discs are encoded with anti copy protection Disc won t eject When you put a disc into the player the player may take up to 15 seconds to read the disc You won t be able to eject the disc during this time Wait 15 seconds and try again I get an Incompatible fi...

Page 52: ...ndensation Due to sharp changes in temperature and humidity condensation may form if warm air comes in contact with any cold parts inside the player When condensation forms inside the player the player may not operate correctly If this occurs leave the player at room temperature until the inside of the player becomes dry and operational If condensation forms on a disc wipe the disc with a soft dry...

Page 53: ... connect digital cable to this jack and to the Digital Audio Coaxial Input jack on your receiver The cable is not a black coaxial cable but an RCA type cable AUDIO OUT Use these jacks to connect your DVD VCR to an audio video receiver COMPONENT VIDEO OUT Y Pb Pr Use these jacks to connect to a TV with component video input jacks Unlike a single video input component video maintains the video signa...

Page 54: ...hes between DVD and VCR modes STOP Stops disc or tape play REV Reverse Searches backward on a disc or tape PLAY PAUSE Press to begin playback During playback press to pause FWD Fast forward Searches forward on a disc or tape OPEN Opens and closes the disc tray Description of Jacks continued DVD VCR OUT AUDIO VIDEO If you are using color coded red yellow and white RCA cables connect these jacks to ...

Page 55: ...VCR status PLAY REC etc 11 DVD The DVD mode is selected 12 Disc icon A disc is loaded Flashes when no disc is loaded 13 3D icon 3D sound is on 1 4 10 5 11 12 13 Display Messages The following are some messages you might see in the DVD VCR display CLOSE Disc tray is closing CUE Tape is searching forward during playback NO DISC with Disc icon flashing No disc is loaded EJECT Tape is ejecting ER DISC...

Page 56: ...tal Televisions HDTV Note Also remember to connect the left and right audio cables because the Y Pb Pr jacks and cables carry only the picture signal not the sound S Video Jacks and Cables The S Video separate video jack provides better picture quality than a composite video jack sometimes labeled VIDEO and color coded yellow because S Video keeps the color chrominance also called chroma part of t...

Page 57: ...oduct s warranty period We will bill you a flat exchange charge to replace a defective unit This charge covers the labor cost for its repair How to make a warranty claim Properly pack your unit Include any cables etc which were originally provided with the product We recommend using the original carton and packing materials Proof of purchase in the form of a bill of sale or receipted invoice which...

Page 58: ...VERBAL OR WRITTEN INFORMATION GIVEN BY THOMSON INC ITS AGENTS OR EMPLOYEES SHALL CREATE A GUARANTY OR IN ANY WAY INCREASE THE SCOPE OF THIS WARRANTY REPAIR OR REPLACEMENT AS PROVIDED UNDER THIS WARRANTY IS THE EXCLUSIVE REMEDY OF THE CONSUMER THOMSON INC SHALL NOT BE LIABLE FOR INCIDENTAL OR CONSEQUENTIAL DAMAGES RESULTING FROM THE USE OF THIS PRODUCT OR ARISING OUT OF ANY BREACH OF ANY EXPRESS OR...

Page 59: ...the manual review the following list of ways to access Video Input Channels on TVs There might be a button on the TV s remote control that accesses the Video Input Channel see table below for examples You might select the Video Input Channel from the TV s menu system You might tune to it by pressing a specific channel number see table below Press the Channel up and or down buttons on the TV s remo...

Page 60: ...al without disconnecting the antenna ANT200 49 95 Accessory Information Below are accessories available to compliment your product Prices are subject to change without notice All accessories are subject to availability A shipping and handling fee will be charged upon ordering and we are required by law to collect the appropriate sales tax for each individual state county and locality to which the ...

Page 61: ...This page left intentionally blank ...

Page 62: ...This page left intentionally blank ...

Page 63: ......

Page 64: ... not send any products to the Indianapolis address listed in this manual or on the carton This will only add delays in service for your product 2003 Thomson Inc Trademark s Registered Marca s Registrada s Printed in Korea TOCOM 16293410 Visit the RCA website at www rca com ...

Reviews: