13
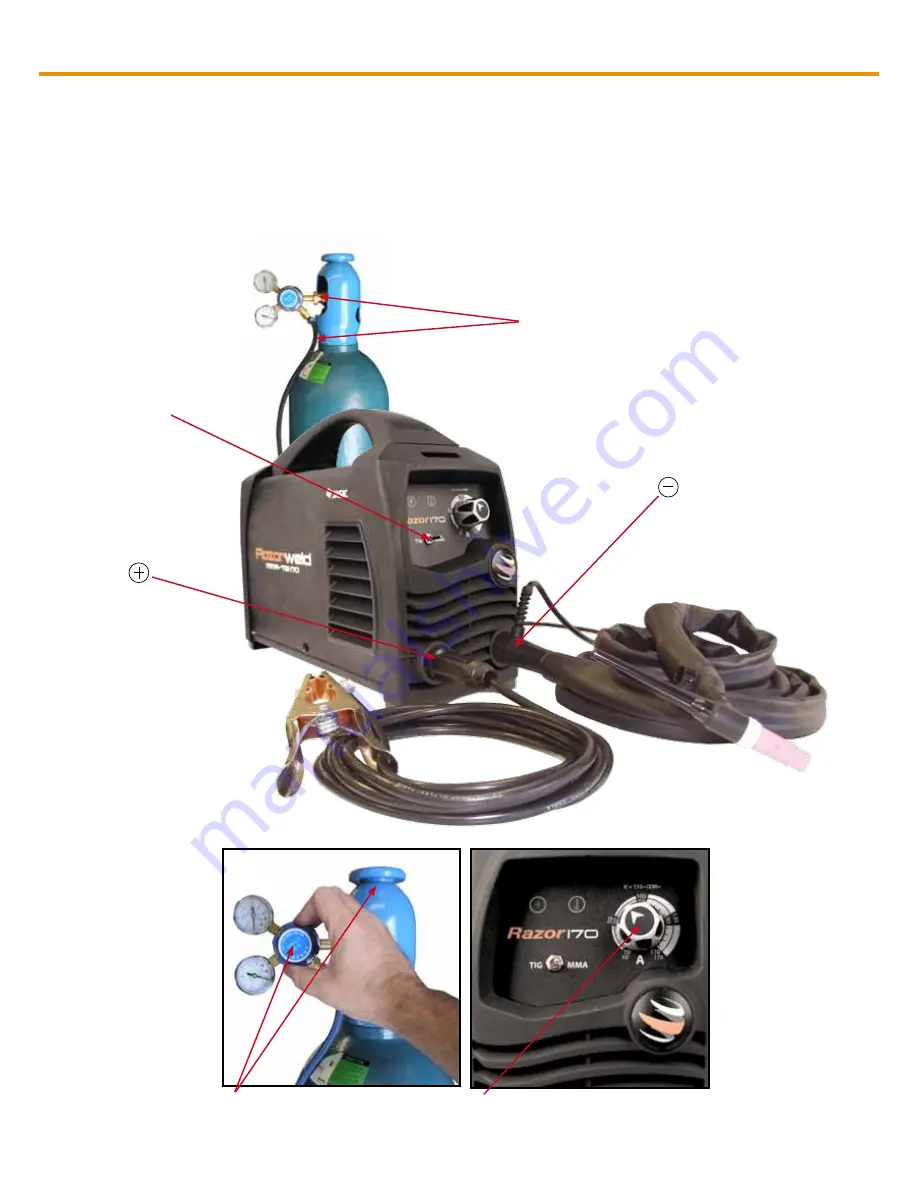
INSTALLATION AND SET UP FOR DC TIG WELDING FOR RAZOR 110-170
(1) Switch on the machine, select the TIG function with the TIG/MMA selector switch.
(2) Insert the power cable plug of the TIG torch into the Negative socket on the front of the machine and
tighten it.
(3 Insert the earth cable plug into the Positive socket on the front of the machine and tighten it.
(4) Connect the gas line of the TIG torch to regulator and connect the regulator to the gas cylinder.
Carefully open the gas cylinder valve and set the flow rate to between 15-25 CFH.
(5) Set the welding current using the amperage control dial
Note: Photos show tig torch with Pro-Grip Lite option
(5) Set the welding current using the
amperage control dial
(4) Carefully open the valve of the gas
cylinder, set the flow to
15-25
CFH
(4) Connect the gas line to the regulator
and connect to the gas cylinder
(2) Connect the TIG torch cable connector to
(3) Connect earth lead
to
(1) Set TIG/MMA selector
switch to TIG


