


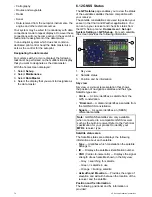


Numeric menu items
Numeric menu items display numeric data and
enables you to either select a predefined value or to
increase and decrease the value as required.
Editing numerical settings
To edit numerical values you can use either the
onscreen numeric adjust control, onscreen numeric
keypad or the
Rotary Control
on a non-touch or
HybridTouch display to increase or decrease numeric
values.
D12567-2
1
2
3
4
1. Select the numeric data field you want to edit.
The numeric adjust control is displayed.
2. Adjust the setting to the required value using:
i.
The
Rotary control
— Non-touchscreen or
HybridTouch displays, or
ii. The onscreen
Up
and
Down
arrows —
Touchscreen displays.
3. To access the on-screen numeric keypad:
• Touch operation — Select the onscreen keypad
icon from the numeric adjust control.
• Non-Touch operation — Press and hold the
Ok
button.
The onscreen numeric keypad is displayed.
4. Enter the required value.
5. Select
Ok
to exit the numeric keypad and return
to the menu.
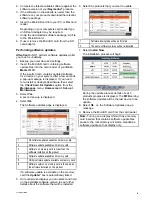
Using slider bar controls
Slider bar controls provide a graphical representation
of numeric data and enables you to quickly change
setting values.
1
2
3
D12570-1
Item
Descrip-
tion
Non—Touch
operation
Touch operation
1
Current
value
N/A
N/A
2
Slider
control
Use the
Rotary
control
to adjust
value
Slide the slider
Up
or
Down
to adjust
value.
3
Auto
Press
Ok
button
to switch between
Auto and manual
adjustment.
Select to switch
between Auto
and manual
adjustment.
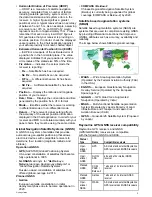
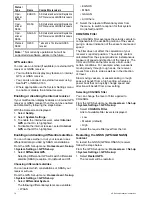
Using control dialogs
Control dialogs enable you to control externally
connected equipment, such as an autopilot unit.
The following diagram shows the main features of
a typical control dialog:
D12279-2
1
3
2
Screen item
Description
1
Status
— provides status information for the
connected equipment. For example, the Pilot
Control dialog displays the locked heading
and current navigation mode for a connected
autopilot unit.
2
Control icons
— provide direct control of
the connected equipment. For example, the
Pilot Control dialog
Standby
and
Track
icons
enable you to instruct a connected autopilot
unit to perform specific functions.
3
Close
— Closes the control dialog.
Getting started
73
Summary of Contents for eS Series
Page 2: ......
Page 4: ......
Page 30: ...30 eS Series installation instructions...
Page 56: ...56 eS Series installation instructions...
Page 92: ...92 eS Series installation instructions...
Page 114: ...114 eS Series installation instructions...
Page 124: ...124 eS Series installation instructions...
Page 128: ...128 eS Series installation instructions...
Page 138: ...138 eS Series installation instructions...
Page 146: ...146 eS Series installation instructions...
Page 147: ......
Page 148: ...www raymarine com...