42
Raymarine Satellite TV Systems
4. Click the drop-down arrow at the right of the longitude box and select
W or E according to your longitude.
5. Click on the latitude box and enter your latitude in degrees and
minutes format.
6. Click the drop-down arrow at the right of the latitude box and select N
or S according to your latitude.
7. Click ‘Set GPS’ to save this information and set the GPS.
8. Click ‘Restart’. The system leaves set up mode and the antenna will
start tracking.
Method 2 - Selecting the nearest city.
If your are unable to enter your exact position, you can enter the latitude
and longitude for the nearest city.
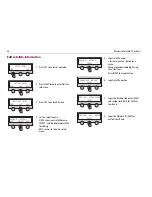
1. Click ‘Set Antenna GPS and Find Antenna Angle’ in the menu options.
The set GPS screen is displayed.
2. Click ‘Setup’. The GUI will now enter set up mode.
3. Click on the arrow at the right of the ‘City’ box. A drop-down menu of
city names according to your area of operation (US or Europe) appears.
4. Scroll down the list and select the city which is nearest to your current
position. The latitude and longitude information for the selected city is
displayed.
5. Click ‘Set GPS’ to save this information.
6. Click ‘Restart’. The system leaves set up mode and the antenna will
start tracking.
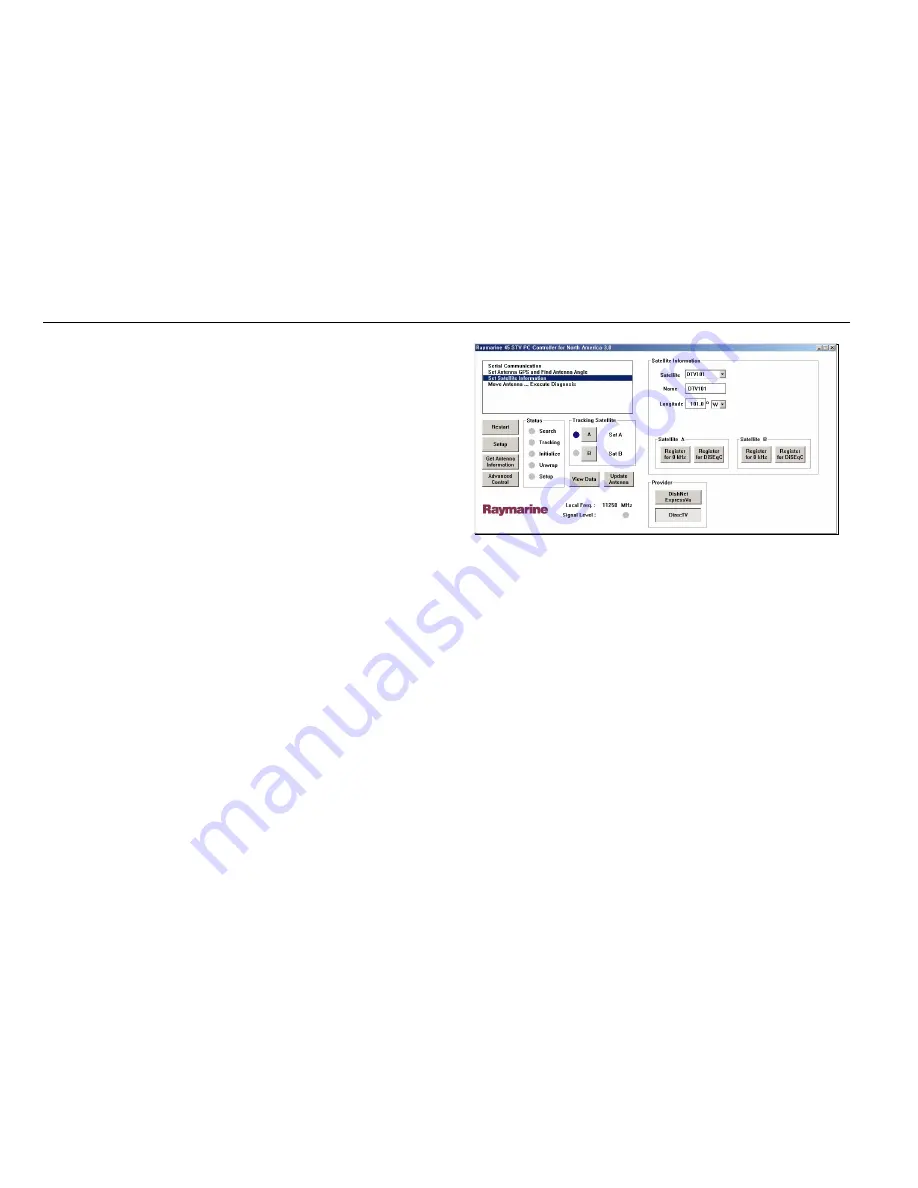
Editing the satellite information
This section of the GUI enables you to edit satellite information
To edit a satellite’s information:
1. Click ‘Set Satellite Information’ in the menu options. The set satellite
information screen is displayed.
2. Click ‘Setup’. The GUI will now enter set up mode.
3. Click on the arrow at the right of the Satellite box. A drop-down menu
of satellites appears.
4. Scroll down and select the satellite that you want to edit. The satellite
name, its latitude and longitude and method of verification will be
displayed.
You can now change and edit the data for the selected satellite using the
following command buttons:
•
Register for Satellite A - registers the selected satellite as Sat A of
the satellite pair.
•
Register for Satellite B - registers the selected satellite as Sat B of
the satellite pair.
5. Click ‘Restart’. The system leaves set up mode and the antenna will
start tracking.
D8018_1
Summary of Contents for 45 STV
Page 1: ...Raymarine Satellite TV Systems User s Guide Document Number 81258_3 Date October 2006...
Page 6: ...2 Raymarine Satellite TV Systems...
Page 10: ...6 Raymarine Satellite TV Systems...
Page 28: ...24 Raymarine Satellite TV Systems...
Page 55: ...51 Hotbird Widebeam Hispasat 60STV 45STV D9229_1 60STV 45STV D9230_1...
Page 56: ...52 Raymarine Satellite TV Systems Thor II Sirius 60STV 45STV D9231_1 45STV 60STV D9232_1...
Page 57: ...53 US satellites Direct TV Dish Network 60STV 45STV D9234_1...
Page 58: ...54 Raymarine Satellite TV Systems ExpressVu Mexico Panamsat 9 Sky...
Page 59: ...55 Australia Optus C1 New Zealand Optus B1 60STV D9236_1 60STV 45STV 45STV 60STV D9237_1 45STV...
Page 60: ...56 Raymarine Satellite TV Systems Far East Telstar Agila2 D9238_1 D9239_1...
Page 61: ...57 Middle East Nilesat Arabsat 60STV D9240_1 60STV...
Page 62: ...58 Raymarine Satellite TV Systems Turksat 60STV 45STV D9241_1...


