RCT150A Operator • Service • Maintenance Manual
800.392.2686
47
Maintenance
Check the tension of the fan belt or any other belts used
on the machine. Refer to the Maintenance Intervals section
of this manual.
3. Clean the Cooler
Maintenance to the outside of the engine is just as critical
as maintaining the internal fluids. It is extremely important to
keep the cooling system clean and free from debris. If a cooler
is not properly kept clean the result will be a catastrophic
failure to the engine.
Cleaning the condensers and the radiator with pressurized
air may be done on a daily basis, depending on conditions.
Cleaning with water will likely need to be done much less
frequently.
If an engine starts to overheat, a warning light will come on
and the temperature gauge will be out of the green and into
the red. At this point two things need to happen:
1. The air intake screens and the cooler must be inspected
and any debris hindering the air flow to the engine must
be removed.
2. The machine should be run at an idle under no load until
it reaches a safe operating temperature. Running under
no load will most effectively cool it down because the
cooling fan will continue to run.
Cleaning the Cooler
If debris is accumulating in the engine area so that you can
no longer see the majority of the floor, it is time to clean. It is
recommended that a de-greasing agent be used to soak the
engine area prior to using a pressure washer (hot water) to
clean out debris. Use the following procedures to properly
clean all Rayco coolers and belly pans:
1. Park on level ground, shut the engine off, remove the
ignition key.
2. Remove all belly pans and guards from the final drives.
Store bolts and covers away from the machine until
finished.
3. Move the machine to the designated wash area; put the
machine on an incline with the front of the machine being
higher than the rear to aid in draining while cleaning.
4. Open all engine compartment doors and hoods and check
to make sure water will not enter the engine internally
from any point.
5. Spray engine de-greaser in every area that is to be
washed. Heavily spray the radiator area and floor pan to
aid in breaking down the dirt and oil. Allow de-greaser
to soak for 10 minutes prior to washing (hot water).
Be careful not to directly spray or wash electrical
components.
6. Wash each row of the radiator in the direction of the
rows, starting at the top and working your way down.
You will notice a debris-free cooler fin will allow all the
water (hot water) to flow through and not spray back at
you. When a plugged area is found, rewash the area until
the water flows through. Repeat this procedure until the
cooler is completely clean. Maintain a safe distance (3”
away from the coolers) and make certain you can spray
the radiators straight on to prevent folding over the fins.
7. Wash out the engine compartment starting at the hood
and working all the dirt down to the belly area. The dirt
in the belly pan should be loosened up enough to wash
out with a regular garden hose. This will keep the heavy
dirt and mud from being sprayed back into the previously
cleaned engine compartment. Once the machine is
clean, re-wash the radiator to clean any mud that may
have been sprayed back into the fins.
8. Start the machine, and monitor all pressures and
temperatures for at least ½ hr at ¾ throttle to aid in
drying off the radiator and engine before returning the
machine to work. The cooler must be completely dry, or
debris could re-enter it, causing the fins to plug again,
causing overheating. DO NOT touch the cooler to see
if it is dry while the machine is running.
9. Remove the machine from the wash area, park on level
ground, shut off the engine, and remove the ignition key.
10. Reinstall all belly pans and guards. Check fluid levels,
air cleaner, and all electrical functions prior to returning
to work.
If the unit continues to overheat after cleaning the machine
as described above, please consult your Authorized RAYCO
Dealer to discuss other issues that may be causing the
problem.
Summary of Contents for RCT150A 2019
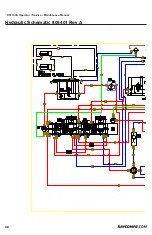
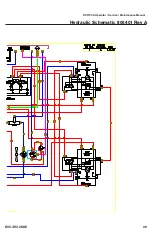
Page 48: ...RCT150A Operator Service Maintenance Manual 48 Hydraulic Schematic 806401 Rev A 210 bar ...
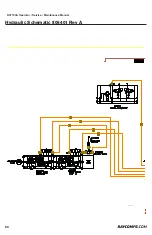
Page 49: ...RCT150A Operator Service Maintenance Manual 800 392 2686 49 Hydraulic Schematic 806401 Rev A ...
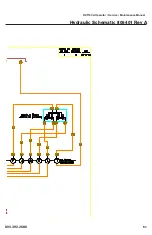
Page 50: ...RCT150A Operator Service Maintenance Manual 50 Hydraulic Schematic 806401 Rev A ...
Page 52: ...RCT150A Operator Service Maintenance Manual 52 Hydraulic Schematic 806401 Rev A ...
Page 53: ...RCT150A Operator Service Maintenance Manual 800 392 2686 53 Hydraulic Schematic 806401 Rev A ...
Page 62: ...RCT150A Operator Service Maintenance Manual 62 Troubleshoot ...
Page 63: ...RCT150A Operator Service Maintenance Manual 800 392 2686 63 Troubleshoot ...
Page 64: ...RCT150A Operator Service Maintenance Manual 64 Troubleshoot ...
Page 65: ...RCT150A Operator Service Maintenance Manual 800 392 2686 65 Troubleshoot ...
Page 66: ...RCT150A Operator Service Maintenance Manual 66 Troubleshoot ...
Page 67: ...RCT150A Operator Service Maintenance Manual 800 392 2686 67 Troubleshoot ...
Page 68: ...RCT150A Operator Service Maintenance Manual 68 Troubleshoot ...
Page 69: ...RCT150A Operator Service Maintenance Manual 800 392 2686 69 Troubleshoot ...
Page 70: ...RCT150A Operator Service Maintenance Manual 70 Troubleshoot ...
Page 71: ...RCT150A Operator Service Maintenance Manual 800 392 2686 71 Troubleshoot ...
Page 72: ...RCT150A Operator Service Maintenance Manual 72 Troubleshoot ...
Page 73: ...RCT150A Operator Service Maintenance Manual 800 392 2686 73 Troubleshoot ...

