


19
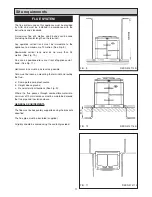
NOTE: SMOKE/SMELL EMITTED DURING INITIAL
USAGE.
During Initial usage of operation of the cooker,
smoke/smell may be emitted and is normal and not a fault
with the appliance, it is therefore advisable to open doors
and or windows to allow for ventilation.
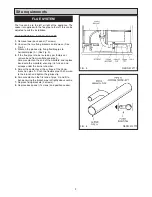
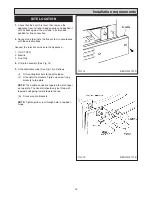
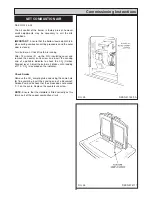
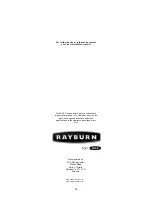
SEE FIG. 21
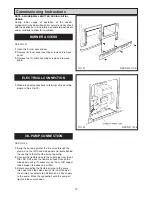
1.
Open the burner access door.
2.
Remove (5) inner panel securing screws and remove
panel.
3.
Remove the (3) plinth securing screws and remove
plinth.
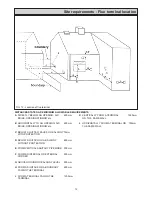
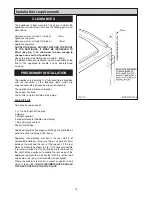
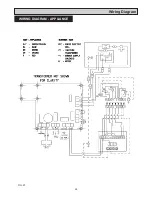
1.
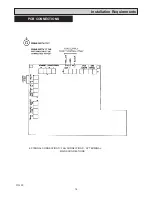
Make electrical connections to terminal strip as wiring
diagram (See Fig. 20)
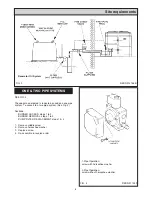
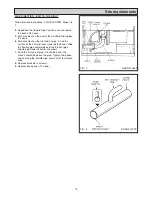
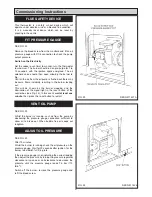
SEE FIG 22
1.
Bring the sensing phial of the fire valve through the
grommet in the left hand side panel and locate behind
the casting to the left of the burner opening.
2.
Connect the flexible hose to the outlet pipe from the oil
filter. DO NOT pass the flexible oil hose through the
side panel casing. If necessary use 10mm O/D copper
tube between the hose and oil filter.
3.
Before connecting the flexible oil pipe to the pump
inlet, open the stop valve slowly and run off some of
the oil into a receptacle to establish an air free supply
to the pump. Make the connection onto the pump oil
tight and leave valve open.
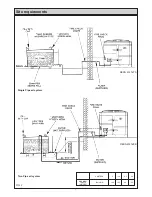
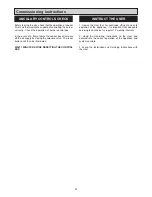
Commissioning Instructions
FIG. 21
DESN 514110 B
DESN 511426
FIG. 22
BURNER ACCESS
OIL PUMP CONNECTION
ELECTRICAL CONNECTION
Summary of Contents for XT- Oil
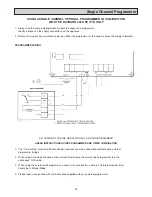
Page 24: ...24 Wiring Diagram FIG 27 WIRING DIAGRAM APPLIANCE...
Page 26: ...26...
Page 27: ...27...