background image

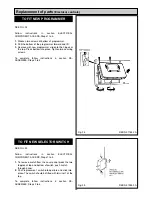
To carry out any servicing on the oil pump. Turn off the oil

line isolating valve near to the appliance.

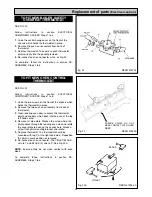
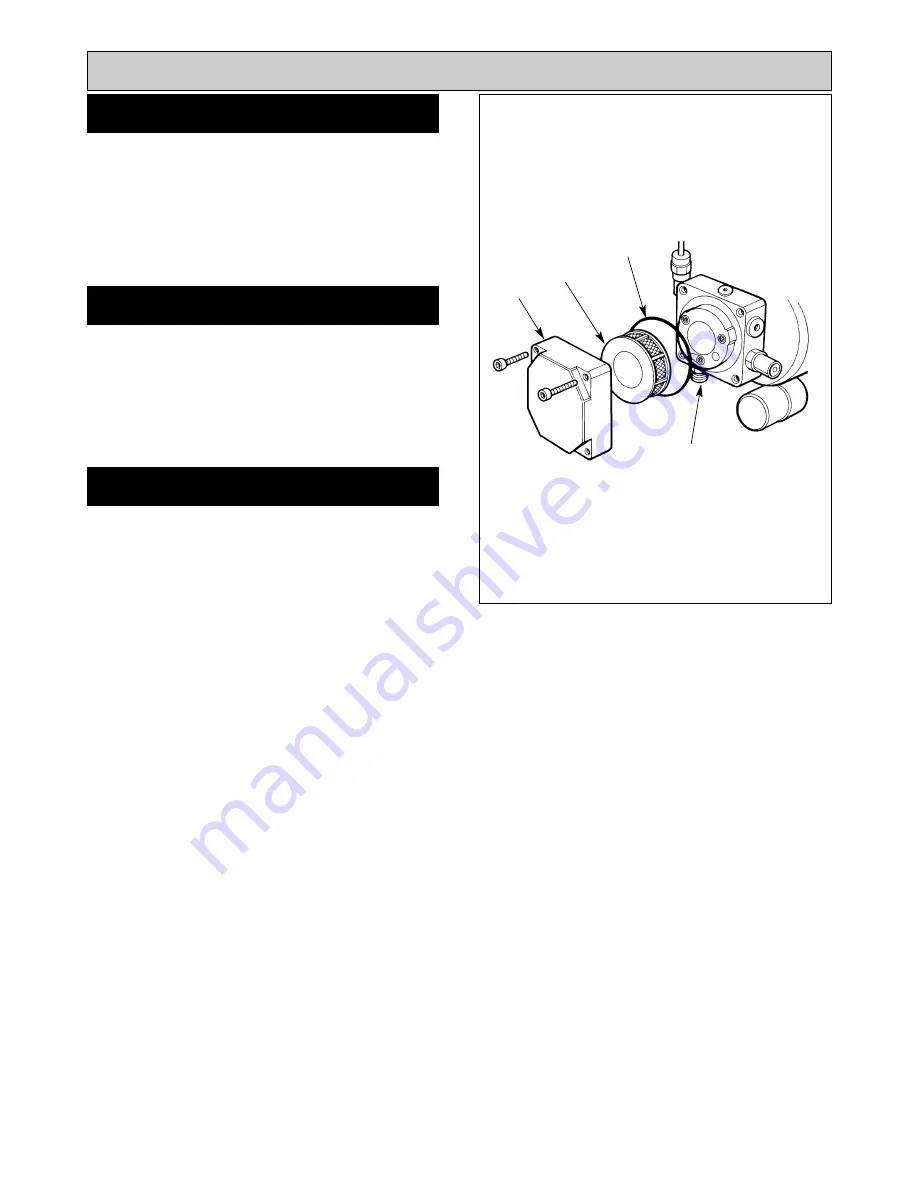
SEE FIG. 15

1.

Remove 4 socket head screws.

2.

Remove filter.

3.

Wash with clean petrol or paraffin.

4.

Re-assemble in reverse order.

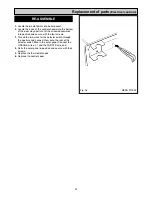
1.

Turn OFF the line isolating valve fitted prior to the oil 

line filter.

2.

Follow manufacturer’s instructions to remove filter 

element from the housing, taking care to collect 

Kerosene residue from the filter housing.

3.

Wash filter thoroughly in clean petrol or paraffin.

4.

Re-assemble in reverse order.

NOTE:

Flexible fuel hose (s) must be replaced at each

service.

14

INTRODUCTION

OIL PUMP STRAINER CLEANING

Oil Pump Servicing 

OIL LINE FILTER CLEANING

Fig. 15

DESN 512002

COVER

STRAINER

FUEL INLET

SEAL

Summary of Contents for Heatranger 440

Page 1: ...SN 512012 A PLEASE READ THESE INSTRUCTIONS BEFORE SERVICING THIS APPLIANCE REMEMBER when replacing a part on this appliance use only spare parts that you can be assured conform to the safety and perfo...

Page 2: ...WITCH ON ELECTRICITY 15 VENT OIL PUMP 15 ADJUST OIL PRESSURE 15 SET COMBUSTION AIR 16 CHECK SMOKE 16 REPLACEMENT OF PARTS FAN MOTOR 17 BURNER IGNITION ELECTRODES 17 IGNITOR 18 RELAY 18 SOLENOID COIL 1...

Page 3: ...M APPLIANCE 32 BURNER DOES NOT START 33 INFORMATION SYSTEM COOKER BURNER 34 35 CONTROL BOX TYPE DKO 970 INFORMATION SYSTEM COOKER BURNER 36 37 CONTROL BOX TYPE DKO 970N FAULT FINDING BOILER 38 39 FAUL...

Page 4: ...hands and other exposed parts When disposing of the product reduce dust with water spray ensure parts are securely wrapped Kerosene and Gas Oil Fuels mineral oils 1 The effect of mineral oils on the s...

Page 5: ...exible oil line burner nozzles and burner head seals MUST BE CHANGED WIRING Ensure there is no damage or loose connections This should be carried out by a competent engineer BURNER REMOVAL for cleanin...

Page 6: ...are being cleaned or a pressure gauge fitted to the pump then the oil supply should be turned OFF and arrangements made to catch any oil which will leak from the oil pump SEE FIG 1 1 Open up the botto...

Page 7: ...air intake SEE FIG 3 4 Undo the burner locking nut and remove head retaining bar 5 Undo burner mounting nut SEE FIG 4 6 Withdraw the burner unit 7 To remove the burner unit completely it may be neces...

Page 8: ...flueway baffles from between boiler cross waterways The baffles are assembled in alternate directions to allow gases to flow front to back through the assembly Each heat exchanger has two rows of baf...

Page 9: ...Cleaning Fig 6A 9...

Page 10: ...ce sealing plate insulation pad and cover panel SEE FIG 8 1 Remove the top oven door and place in a safe position 2 Remove side and base access doors use hex driver 3 Thoroughly clean top side and bas...

Page 11: ...d up The correct combination of burner blast tubes are shown To remove blast tube slacken two grub screws pull forward 480K 440 460K 499K 11 INTRODUCTION Burner Servicing Fig 9 Fig 10C Fig 10A Fig 10B...

Page 12: ...are clean 3 Hold nozzle holder with correct spanner when tightening nozzle 4 Typically finger tight plus 1 4 turn with spanner is sufficient DO NOT OVERTIGHTEN 5 Ensure electrode gaps are correct Fig...

Page 13: ...lean between the blades of the fan impellor with a small brush and remove any residue The fan motor flange has 4 fixings to the fan case 480 499K ONLY 1 Remove 4 fixing screws and pull off fan can inl...

Page 14: ...ve fitted prior to the oil line filter 2 Follow manufacturer s instructions to remove filter element from the housing taking care to collect Kerosene residue from the filter housing 3 Wash filter thor...

Page 15: ...EAST ONE MINUTE then press the re set button to restart SEE FIG 16 Whilst the burner is running vent air from the pump by slackening the pressure gauge port sufficient to allow air to bleed out When b...

Page 16: ...flue ways does not exceed No 2 on the scale Replace the plugging screw insulation pad and cover panel Switch off the boiler burner COOKER BURNER SEE FIG 18A Switch on cooker burner After 15 minutes of...

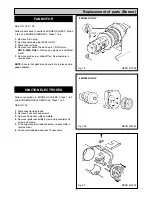
Page 17: ...ets and seals are in place and in good condition Follow instructions in BURNER ACCESS Steps 1 to 3 and BURNER NOZZLE REMOVAL Steps 1 to 5 SEE FIG 20 1 Disconnect ignition leads 2 Remove 2 socket head...

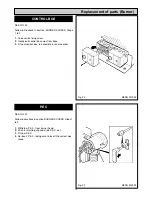
Page 18: ...BURNER REMOVAL Steps 1 to 6 1 Remove push on connectors noting position of each connector 2 Remove two relay fixing screws 3 Fit relay re assemble SEE FIG 21 Follow instructions in sections BURNER ACC...

Page 19: ...ntrol box re assemble in reverse order SEE FIG 23 Follow instructions in section BURNER ACCESS Steps 1 to 3 1 Withdraw P E C from burner head 2 Push in retaining clip and slide P E C out 3 Fit new P E...

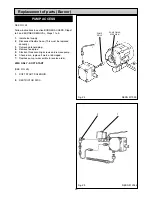
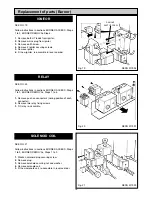
Page 20: ...annually 3 Remove solenoid plug 4 Remove feed pipe 5 Slacken three securing screws and remove pump 6 Check drive replace if worn or damaged 7 Replace pump re assemble in reverse order 499K ONLY SOFT S...

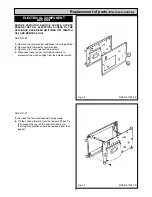
Page 21: ...over panel fixing screws 4 Disconnect cover panel It will be necessary to disconnect the push on tags from the selector switch SEE FIG 27 5 Remove the four control panel fixing screws 6 Tilt the chass...

Page 22: ...22 Fig 28 DESN 513150 Replacement of parts Electrical controls...

Page 23: ...E FIG 30 Follow instructions in section ELECTRICAL COMPONENT ACCESS Steps 1 to 6 1 Undo the two screws on the front of the chassis which hold the thermostat in place 2 Remove the three push on connect...

Page 24: ...hial which passes into the oven at top LH corner 3 Remove LH side plate slacken screw where the phial passes through RH side and rotate Slacken screw front phial mounting bracket rotate See Fig 33 4 R...

Page 25: ...to access the thermostat phial and capillary which pass into the oven at the top left hand corner 4 Remove LH side plate Slacken the screw where the phial passes through the roasting oven side and rot...

Page 26: ...ASSEMBLE Steps 3 to 6 SEE FIG 35 Follow instructions in section ELECTRICAL COMPONENT ACCESS Steps 1 to 4 1 To remove switch from the cover panel press the two toggles at top and bottom of switch push...

Page 27: ...3 Thread the two wires for the selector switch through the aperture and connect them onto the rear of the selector switch fitted in the outer panel Connect the ORANGE wire on 1 and the PURPLE wire on...

Page 28: ...his thermostat is a safety cut out device which is intended to operate if the other controls fail This control will lock out and switches everything off except for the programmer clock and the Pump Ov...

Page 29: ...ZONE VALVE S ETC IF FITTED PUMP SUPPLY THE CIRCULATING PUMP MUST BE CONNECTED DIRECTLY TO THIS SUPPLY PUMP SUPPLY THE CIRCULATING PUMP MUST BE CONNECTED DIRECTLY TO THIS SUPPLY 3 AMP PERMANENT SUPPLY...

Page 30: ...30 Electrical Controls CONTROL CIRCUIT BOILER Fig 37 L1...

Page 31: ...31 Electrical Controls CONTROL CIRCUIT COOKER Fig 38 L2 L2 KB MODEL ONLY...

Page 32: ...32 Fault Finding WIRING DIAGRAM APPLIANCE 440 460 480K 499K Fig 39...

Page 33: ...38 and 39 for detailed and schematic wiring diagrams To check out the electrical wiring at the burners you will first have to access the burner chamber Use the following procedure 1 Isolate the elect...

Page 34: ...lly transmitted by flashing appropriately a LED Using an optional additional terminal the messages can be recorded and displayed in easily readable form Programming sequence display The built in micro...

Page 35: ...re purge timer for the duration as mentioned in the table of timings Low voltage protection at 220 240V 110 120V nominal usage The mains voltage has to be more than 187Veff 94Veff in order to allow th...

Page 36: ...optically transmitted by flashing apprioriately a LED Using an optional additional terminal the messages can be recorded and displayed in easy readable form Programming sequence display The built in m...

Page 37: ...Fault Finding 37 Fig 41A DESN 516838...

Page 38: ...38 Fault Finding...

Page 39: ...39 Fault Finding...

Page 40: ...40 Fault Finding...

Page 41: ...41 Fault Finding...

Page 42: ...HT CHECK WITH GAUGE OIL SOAKED HEARTH BURNER FAULT OIL LEAKS AT PIPE FITTINGS TAKE APART AND REMAKE AS REQUIRED LEAKS AT TUBING CONNECTORS ENSURE END OF TUBING SQUARE NUMEROUS LOCK OUTS CURE THE LOCK...

Page 43: ...43...
Page 44: ...er s policy of continuous product improvement the Company reserves the right to change specifications and make modifications to the appliance described at any time Manufactured by AGA Rangemaster Stat...

Reviews: