SERVICE
MANUAL
RAVAGLIOLI S.p.A.
RAVTD5040WD / 5060WD / 5080WD
RAVTD5080WS - RAVTD1760WS/1780WS
RAVTD1850WS - RAVTD2200WS
Code R0184 - rev.1.2
(01/2011)
Ravaglioli S.p.A. -
Via I° Maggio, n° 3 (Frazione di Pontecchio Marconi)
Page 15/22
40037 Sasso Marconi (Bologna - Italy)
Tel. 051/ 67.81.511 – Fax 051/ 84.64.67 e-mail: [email protected]
3 CALIBRATIONS
3.1 Measuring head calibration
The measuring heads of the RAV wheel aligner are already factory set; moreover, the
calibration settings are stored in the CPU memory of the measuring head itself. At the time of
installation or changing a measuring head, the appliance does not therefore require data
calibration or configuration. Calibration is only required if the transducers are changed or
following ascertained repeated errors due to transducer movement (as a result of falls,
knocks, etc.). Use the following calibration systems depending on the models provided:
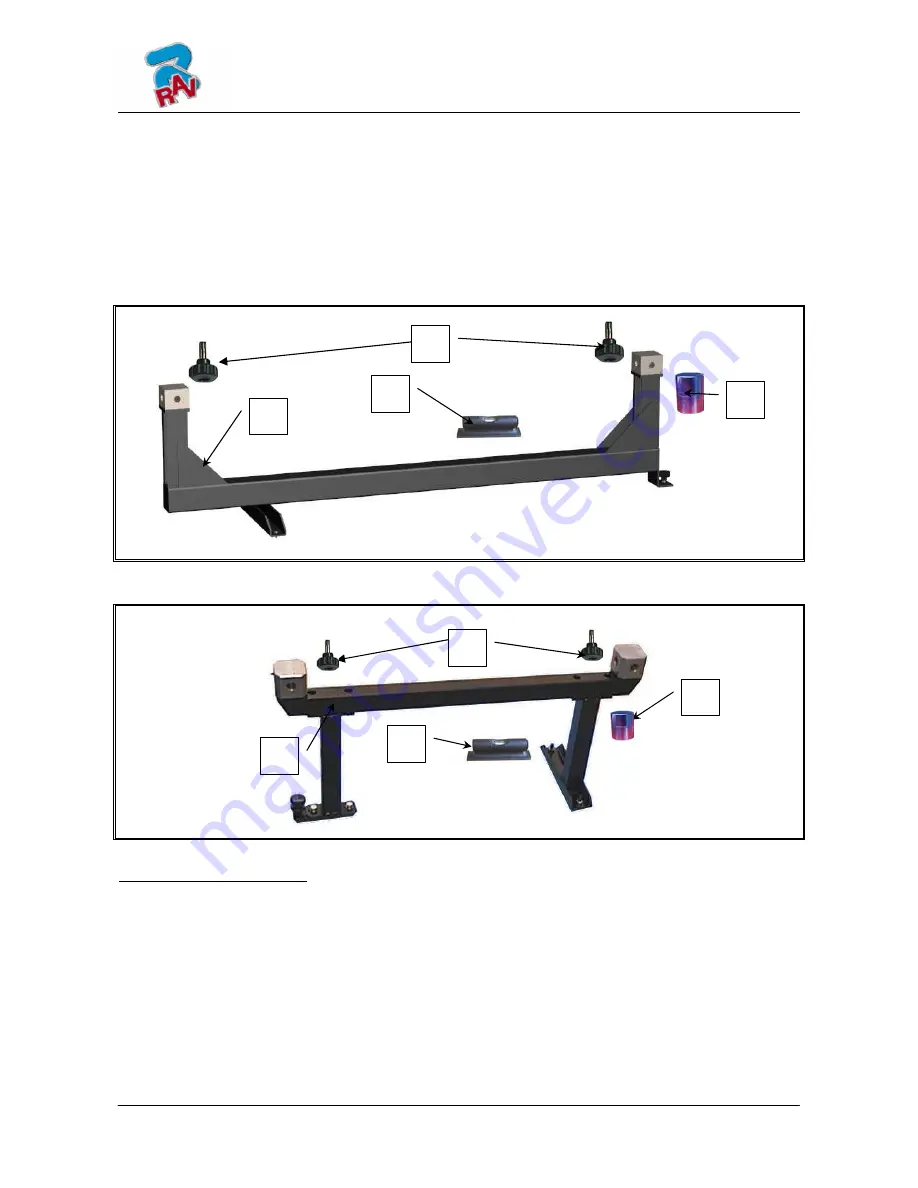
1) STA14 calibration system
Figure 24
2) STA14T transportable calibration system
Figure 25
Key Figure 24, Figure 25
A)
Knobs for fastening the measuring heads
B)
Level
C)
Standard calibration stand
D)
3° thickness for standard calibration stand
E)
Transportable calibration stand
F)
3° thickness for transportable calibration stand
A
B
D
C
A
F
E
B

