background image

13

1

14

11

S300 asy.

S300 sym.

S653

S640

S753

S720

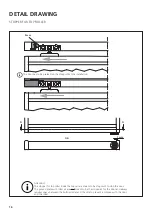
POSITIONING EXAMPLES OF THE STOPPERS

INSTALLATION INSTRUCTION

12_ 

Positioning of stopper for top roller AIR 1 mm

Summary of Contents for AIR-B S34

Page 1: ...Version 1 3 2019 02 26 1 02 2 b Subject to technical changes Installation easy medium difficult 1 02 2 c SLIDING DOOR INSTALLATION INSTRUCTION SYSTEM AIR B S34...

Page 2: ...et n Pencil n Water level n Wire cutting pliers Redesign of manual and product information added Middle insert profile for system air optionally added Added a instuction for the stoppoint Added overla...

Page 3: ...liability of the manufacturer shall be excluded in case of defects and consequential damages resulting from incorrect assembly of this product n Please check the completeness of the delivered parts a...

Page 4: ...lus Incorrect use n Risk or danger may occur in the following cases the door system has improperly been installed or maintained the safety and installation instructions have not been followed after im...

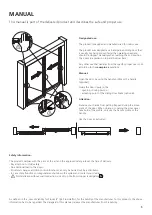
Page 5: ...pening the door never take hold of the profile only use the handle profile or the handle Use the door as instructed MANUAL As defined in the Law of Liability for Products 4 Prod HaftG for the liabilit...

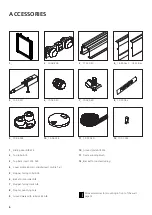
Page 6: ...53 0xx ACCESSORIES Sliding door AIR S34 Top roller AIR Top track insert S 34 AIR Cover profile 60 mm middle insert profile f air Stopper for top roller AIR Brake for top roller AIR Stopper for top tra...

Page 7: ...be adapted for the respective ceiling Lifting capacity at least 60 kg per door Setscrews and counternuts are included in delivery Water level Insert accessories as illustrated before mounting top tra...

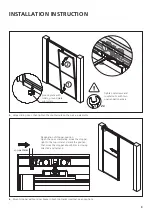
Page 8: ...distance of 6 mm between the bottom edge of the sliding door and floor 1 Hinge the rear sliding door and adjust perpendicularly to the set screws do not fix 2 Mount first ground plate for the hinge d...

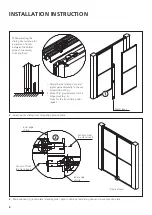
Page 9: ...ick up elements ground plate with rollers ground plate w o rollers Tighten set screws and counternuts with two open ended spanners Designation of stopper position Open the door completely move the sto...

Page 10: ...plugs for punching holes 7_ Mount stopper for top roller AIR in both top track inserts at closing positions Distance to the vertical profile varies according to series have a look on page 13 door is c...

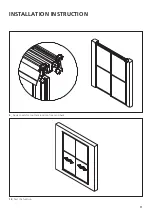
Page 11: ...11 click click INSTALLATION INSTRUCTION 10_ Test the function 9_ Apply covers for top track insert on front and back...

Page 12: ...TION INSTRUCTION 11_ Positions of dust excluding brushes 1 Example 2 Example stile reversed 3 Example stiles mixed Glue on dust excluding brush and fix it with clip on top and bottom Glue side plugs o...

Page 13: ...13 1 14 11 S300 asy S300 sym S653 S640 S753 S720 POSITIONING EXAMPLES OF THE STOPPERS INSTALLATION INSTRUCTION 12_ Positioning of stopper for top roller AIR 1 mm...

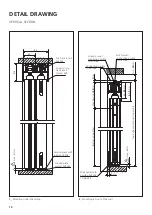
Page 14: ...ront of the wall 1_ Mounting under the ceiling Top track insert AIR S34 Cover for top track insert System AIR Ground plate with rollers AIR S34 Ground plate System AIR S34 Screw for wall connection pr...

Page 15: ...AIR S34 re EV 1 profile right silver EV1 air S34 10 06 291 Abdeckkappe System Air S34 1lfg EV1 end cap f insert profile air S34 1_ 10 06 297 2_ 10 06 296 3_ 10 06 291 4_ 10 05 290 5_ 10 06 022 6_ 17 5...

Page 16: ...rail are meant to be stoppoint to stop the door The ground plate with roller air are not meant to be the stoppoint for the door and always requires space between the bottom roller and the stile to pr...

Page 17: ...WING clear width usable passage opening restriction overlapping profile width profile width opening restriction Bei 2 spurigen Anlagen ist die berlappung zu ber cksichtigen 1_ Overlapping and opening...

Page 18: ...1 www raumplus com TH RH 60 RH 52 52 8 9 8 7 6 43 20 mm 66mm 10mm 10 05 047 10 05 048 1_ XYZ INSTALLATION INSTRUCTION 2_ Overlapping 1_ S 800 mounted to the ceiling to the wall 3_ Position of the bott...

Reviews: