Maintenance and service
123
12
2.
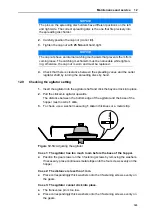
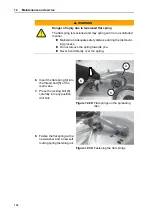
Carefully position the cap nut (do not tilt).
3.
Tighten the cap nut with
25 Nm
until hand tight.
4.
Check that there is clearance between the spreading vanes and the outlet
/agitator shaft by turning the spreading discs by hand.
12.9
Checking the agitator setting
1.
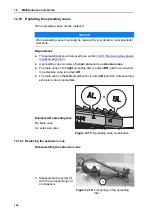
Insert the agitator into the agitator shaft and click the bayonet lock into place.
2.
Pull the clicked-in agitator upwards.
The distance between the bottom edge of the agitator and the base of the
hopper must now be
1 mm
.
3.
To check, use a washer measuring
1 mm
in thickness or a metal strip.
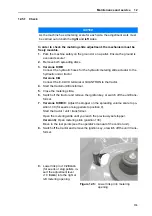
Figure 12.14:
Adjusting the agitator
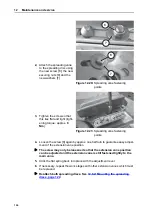
Case 1: The agitator has too much room before the base of the hopper.
Position the gears lower on the 3 fastening screws by removing the washers.
If necessary, place continuous metal strips onto the four screws evenly on the
hopper.
Case 2: The distance is less than 1 mm.
Place correspondingly thick washers onto the 3 fastening screws evenly on
the gears.
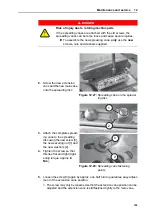
Case 3: The agitator cannot click into place.
The transverse pin is too low.
Place correspondingly thick washers onto the 3 fastening screws evenly on
the gears.
NOTICE
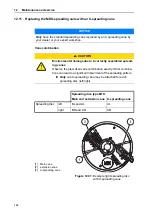
The pins on the spreading disc holders have different positions on the left
and right side. The correct spreading disc is the one that fits precisely into
the spreading disc holder.
NOTICE
The cap nuts have an internal catching mechanism that prevents them from
coming loose. The catching mechanism must be noticeable while tighten-
ing, otherwise, the cap nut is worn and must be replaced.
Summary of Contents for MDS 14.2
Page 8: ...Intended use 1 2...
Page 28: ...Safety 3 22...
Page 38: ...Technical data 4 32...
Page 42: ...Axle load calculation 5 36...
Page 44: ...Transportation without tractor 6 38...
Page 86: ...Machine settings 8 80...
Page 96: ...Calibration and discharging residual material 9 90...
Page 110: ...Important information on spreading 10 104...
Page 114: ...Faults and possible causes 11 108...
Page 146: ......


