background image

32

HAMMER SAFETY WARNINGS

1)   Safety instructions for all operations

a)   Wear ear protectors. 

Exposure to noise can cause hearing loss.

b)   Use auxiliary handle(s), if supplied with the tool.


Loss of control can cause personal injury.

c)   Hold power tool by insulated gripping surfaces, when performing an operation where the 

cutting accessory may contact hidden wiring or its own cord. 

Cutting accessory contacting a 

“live” wire may make exposed metal parts of the power tool “live” and could give the operator an 

electric shock.

2)   Safety instructions when using long drill bits with rotary hammers

a)   Always start drilling at low speed and with the bit tip in contact with the workpiece. 

At 

higher speeds, the bit is likely to bend if allowed to rotate freely without contacting the workpiece, 

resulting in personal injury.

b)   Apply pressure only in direct line with the bit and do not apply excessive pressure. 

Bits can 

bend, causing breakage or loss of control, resulting in personal injury.

ADDITIONAL SAFETY RULES FOR HAMMER

1.   Always wear a dust mask.

Summary of Contents for R-ME1500

Page 1: ...1 500W 7994X493 Martillo electroneum tico MANUAL DE INSTRUCCIONES R ME1500...

Page 2: ...Instrucciones en Espa ol Instru es no Portugu s Instructions in English...

Page 3: ...ntivibraci n 5 Interruptor de encendido apagado 6 Interruptor de martilleo o perforaci n 7 Mango auxiliar 8 Medidor de profundidad 9 Cincel SDS plano en punta 10 Broca SDS 11 Llave 12 Tapa antipolvo N...

Page 4: ...arado y el valor de emisi n de ruido declarado se han medido siguiendo un m todo de prueba est ndar y pueden utilizarse para comparar una herramienta con otra El valor total de vibraci n declarado y e...

Page 5: ...1 Recomendamos adquirir los accesorios en el mismo establecimiento que le vendi la herramienta Consulte el embalaje de los accesorios para obtener m s informaci n El personal de la tienda puede ayuda...

Page 6: ...de seguridad antideslizante casco o protecci n auditiva en las condiciones adecuadas reducir las lesiones personales c Evite el arranque involuntario Aseg rese de que el interruptor est en la posici n...

Page 7: ...ios y sin aceite ni grasa Los mangos y superficies de agarre resbaladizos no permiten manejar y controlar la herramienta con seguridad en situaciones inesperadas 5 SERVICIO a Encargue el mantenimiento...

Page 8: ...lizar protecci n ocular Utilizar mascarilla antipolvo Guantes de protecci n Advertencia Doble aislamiento Los residuos de productos el ctricos no deben eliminarse con la basura dom stica Reciclar en c...

Page 9: ...rla Si la broca no est bien situada repita la operaci n de instalaci n de nuevo RETIRADA Para quitar la broca tire hacia atr s del manguito sujete la broca y s quela A 1 2 2 AJUSTE DEL MANGO AUXILIAR...

Page 10: ...2 Ajuste el interruptor de martilleo o cincelado en la posici n V ase la Fig F2 3 Ahora est preparado para la funci n de perforaci n NOTA Pulse el bot n de bloqueo del selector antes de ajustar el sel...

Page 11: ...za con ambas manos y asegure la posici n del cuerpo Si la broca o el cincel se atascan en la pieza de trabajo el embrague se activar deteniendo el husillo de la herramienta Esto es normal Apague la m...

Page 12: ...i la eficiencia de trabajo es demasiado baja compruebe la broca o el cincel y aseg rese de que no est n romos o desgastados 5 Si no se puede subsanar una aver a devuelva la herramienta a un distribuid...

Page 13: ...Tipo R ME1500 R ME denominaci n de maquinaria se corresponde con martillo Funci n Martilleo de diversos materiales Complies with the following directive 2006 42 CE 2014 30 UE 2011 65 UE y UE 2015 863...

Page 14: ...14...

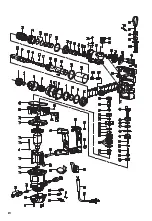
Page 15: ...DS 51 1 52 7994X493 PDH32DS 52 1 53 7994X493 PDH32DS 53 1 54 7994X493 PDH32DS 54 1 55 7994X493 PDH32DS 55 1 56 7994X493 PDH32DS 56 1 57 7994X493 PDH32DS 57 1 58 7994X493 PDH32DS 58 1 59 7994X493 PDH32...

Page 16: ...a antivibra o 5 Interruptor ligar desligar 6 Interruptor seletor da a o de martelo ou de perfura o 7 Pega auxiliar 8 Calibre de profundidade 9 Buril SDS plano e pontiagudo 10 Broca de perfura o SDS 11...

Page 17: ...do e o valor declarado da emiss o de ru do foram medidos de acordo com um m todo de teste padr o e podem ser utilizados para comparar uma ferramenta com outra O valor total de vibra o declarado e o va...

Page 18: ...e vendeu a ferramenta Para mais informa es consulte a embalagem dos acess rios O pessoal da loja pode ajud lo e dar lhe aconselhamento INSTRU ES ORIGINAIS AVISOS DE SEGURAN A GERAIS SOBRE A FERRAMENTA...

Page 19: ...mentas el tricas com o dedo no interruptor ou ligar ferramentas el tricas que tenham o interruptor ligado pode causar acidentes d Retire qualquer chave de ajuste ou chave inglesa antes de ligar a ferr...

Page 20: ...ser efetuada por um t cnico qualificado utilizando apenas pe as de substitui o Deste modo garante se a seguran a da ferramenta el trica AVISOS DE SEGURAN A DO MARTELO 1 Instru es de seguran a para tod...

Page 21: ...rote o ocular Use m scara anti p Luvas de prote o Aviso Isolamento duplo Os res duos de produtos el tricos n o devem ser eliminados juntamente com o lixo dom stico Por favor recicle nos locais onde ex...

Page 22: ...fora Se a broca n o estiver localizada corretamente repita a opera o de instala o REMO O Para retirar a broca puxe a manga de bloqueio para tr s segure e puxe a broca para fora A 1 2 2 AJUSTE DA PEGA...

Page 23: ...e perfura o para a posi o See Fig F2 3 Est agora preparado para a fun o de perfura o NOTA Prima o bot o de bloqueio do interruptor seletor antes de ajustar sempre o seletor indicador F1 F2 F1 8 FUN O...

Page 24: ...a press o na broca de perfura o quando est prestes a romper Isto evita que o berbequim fique encravado 2 Ao perfurar um orif cio grande perfure primeiro um orif cio piloto com uma broca de perfura o...

Page 25: ...o per odo de garantia substituiremos todas as pe as defeituosas ou se assim o entendermos substituiremos a unidade gratuitamente pelo mesmo artigo ou por artigos de maior valor e ou especifica o Esta...

Page 26: ...26...

Page 27: ...DS 51 1 52 7994X493 PDH32DS 52 1 53 7994X493 PDH32DS 53 1 54 7994X493 PDH32DS 54 1 55 7994X493 PDH32DS 55 1 56 7994X493 PDH32DS 56 1 57 7994X493 PDH32DS 57 1 58 7994X493 PDH32DS 58 1 59 7994X493 PDH32...

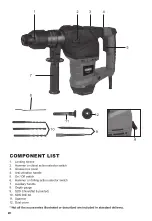
Page 28: ...4 Anti vibration handle 5 On Off switch 6 Hammer or drilling action selector switch 7 Auxiliary handle 8 Depth gauge 9 SDS Chisel flat pointed 10 SDS Drill bit 11 Spanner 12 Dust cover Not all the ac...

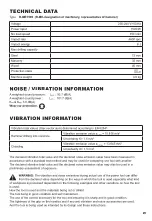
Page 29: ...he declared noise emission value have been measured in accordance with a standard test method and may be used for comparing one tool with another The declared vibration total value and the declared no...

Page 30: ...s and specifications provided with this power tool Failure to follow the warnings and instructions may result in electric shock fire and or serious injury Save all warnings and instructions for future...

Page 31: ...quent use of tools allow you to become complacent and ignore tool safety principles A careless action can cause severe injury within a fraction of a second 4 POWER TOOL USE AND CARE a Do not force the...

Page 32: ...ay make exposed metal parts of the power tool live and could give the operator an electric shock 2 Safety instructions when using long drill bits with rotary hammers a Always start drilling at low spe...

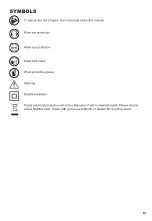
Page 33: ...ar ear protection Wear eye protection Wear dust mask Wear protective gloves Warning Double insulation Waste electrical products must not be disposed of with household waste Please recycle where facili...

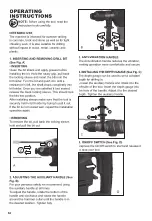
Page 34: ...y trying to pull it out If the bit is not located well repeat the installation operation again REMOVING To remove the bit pull back the locking sleeve hold and pull the bit out A 1 2 2 ADJUSTING THE A...

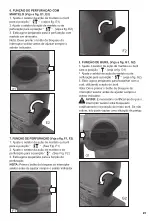
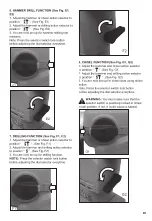
Page 35: ...mer and drilling action selector to position See Fig F2 3 You are now set up for drilling function NOTE Press the selector switch lock button before adjusting the dial selector everytime F1 F2 F1 8 CH...

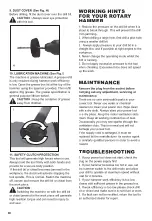
Page 36: ...ill bit 3 Always apply pressure to your drill bit in a straight line and if possible at right angles to the workpiece 4 Never change the operating mode whilst the drill is running 5 Do not apply exces...

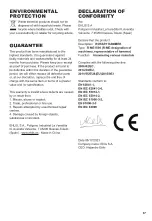
Page 37: ...valid where defects are caused by or result from 1 Misuse abuse or neglect 2 Trade professional or hire use 3 Repairs attempted by unauthorised repair centres 4 Damage caused by foreign objects substa...

Page 38: ...38...

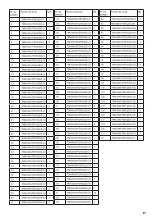
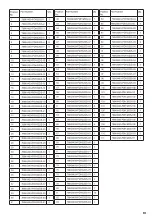
Page 39: ...S 51 1 52 7994X493 PDH32DS 52 1 53 7994X493 PDH32DS 53 1 54 7994X493 PDH32DS 54 1 55 7994X493 PDH32DS 55 1 56 7994X493 PDH32DS 56 1 57 7994X493 PDH32DS 57 1 58 7994X493 PDH32DS 58 1 59 7994X493 PDH32D...

Page 40: ......
Reviews: