


EN
11
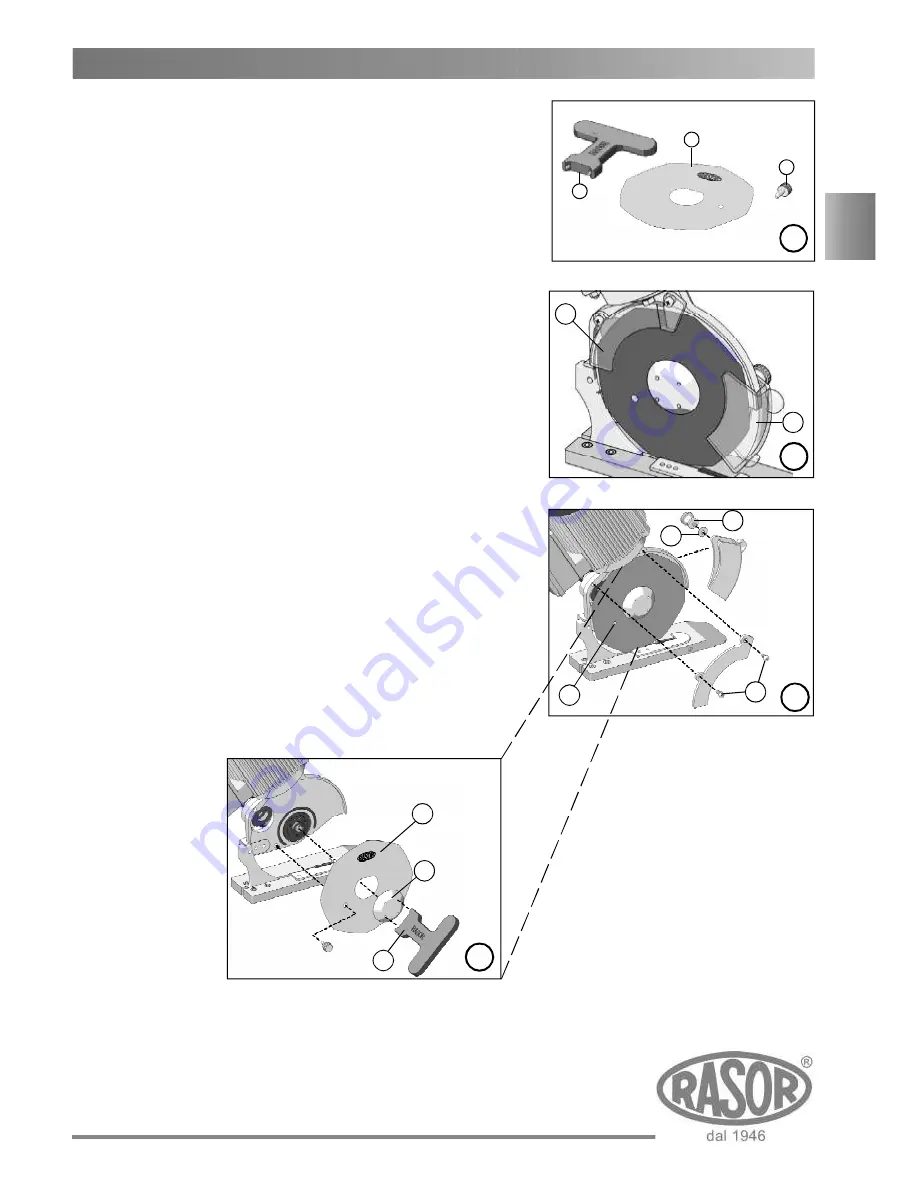
If the blade is no more able to cut (even after repeating
the sharpening operation several times) it is necessary to
replace it. To carry out this operation, use butterfly wrench
“1” and drift “3” locking the blade (shown in picture 10).
To replace the blade, do as follows:
1) Use some protective gloves in compliance with Italian
Legislative Decree 81/08;
2) Remove the fixed rear safety protection “A” (see
picture 11) by unscrewing the cross-slotted screws
“C” by means of the proper screwdriver (not supplied
by the manufacturer) as shown in picture 12.
Remove the movable front safety protection “B” (see
picture 11) by unscrewing pin “D” and the washer
“E” as shown in picture 12.
3) Insert drift “3” (see picture 10) into hole “F”, so as
to lock the blade (the hole on the blade must
correspond to the one on the structure).
4) Use butterfly wrench “1” to unscrew nut “G” and
remove blade “H” (see picture 13).
5) Replace the worn blade with the new one “2”, being
careful to center the blade on the gear, in the correct
position; we remind you to assemble it so that the
side with the writing Rasor can be seen by the
operator.
6) Assemble all the components again and carry out
the sharpening.
14. BLADE REPLACEMENT
11
A
B
10
1
2
3
12
E
F
H
1
G
13
D
C


