


Dominion KX II-101-V2 Quick Setup Guide
6
QSG-KX2101V2-v3.6.0-0E-E
255-62-3058-00-RoHS
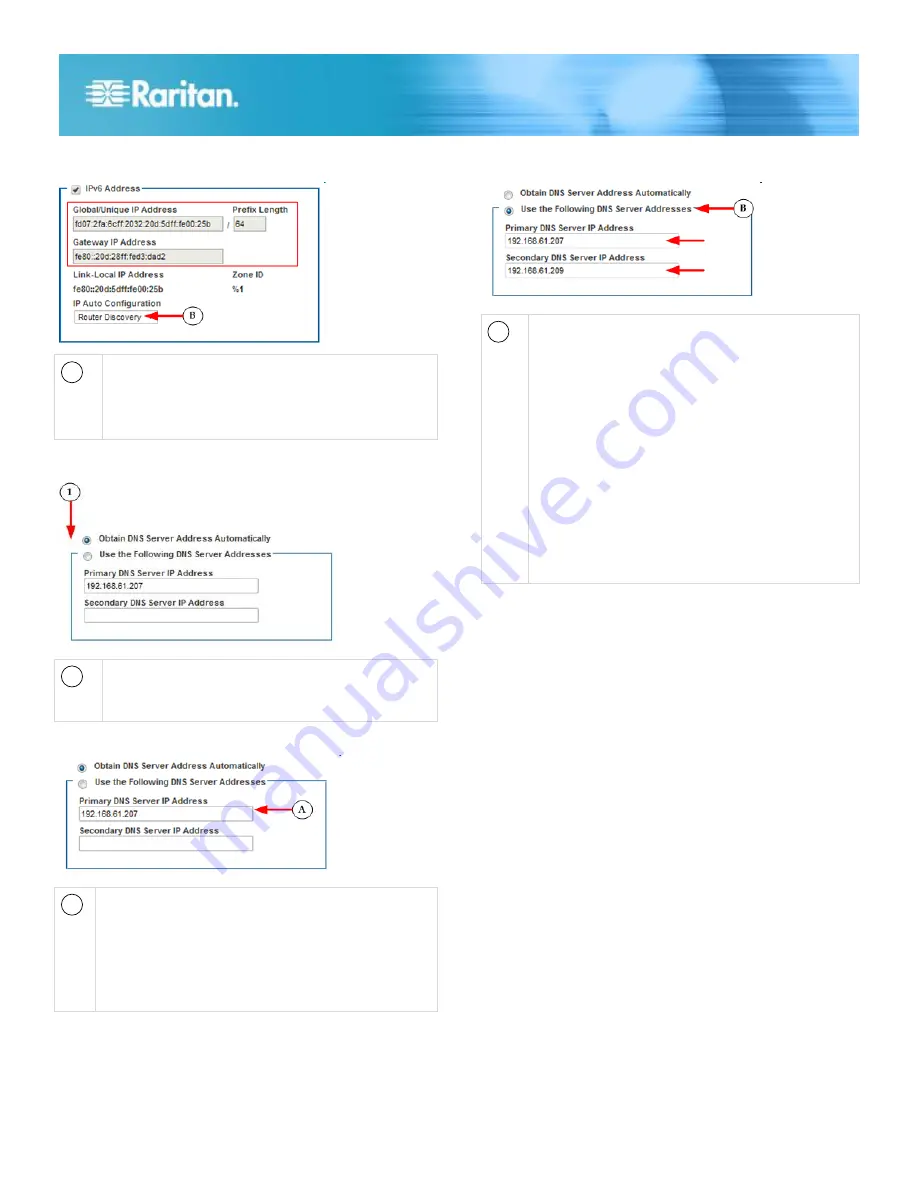
B
Router Discovery
Select this option to locate a Global or Unique IPv6
address instead of a Link-Local subnet.
Once located, the address is automatically applied.
Configure the DNS Settings
1
Do one of the following to configure DNS -
"Obtain DNS Server Address Automatically"
"Use the Following DNS Server Addresses"
A
Select "Obtain DNS Server Address Automatically" if
DHCP is selected.
The DNS information is then provided by the DHCP
server that is used.
When finished, click OK. Your KX II-101-V2 device is
now network accessible.
B
Enter the following information if the "Use the
Following DNS Server Addresses" is selected -
Primary DNS Server IP Address
Secondary DNS Server IP Address
These addresses are the primary and secondary
DNS addresses used if the primary DNS server
connection is lost due to an outage.
Even if DHCP is selected in the IPv4 section, enter
the primary and secondary addresses since these
addresses are used to connect to the DNS server.
When finished, click OK. Your KX II-101-V2 device is
now network accessible.
Next, configure LAN interface settings as needed.
See LAN Interface Settings
Connect to a Switch
Once KX II-101-V2 is network accessible, remove the
crossover cable and connect the KX II-101-V2 to the switch
using a Cat5 cable.
Configure Date/Time Settings (Optional)
Optionally, configure the date and time settings.
The date and time settings impact SSL certificate validation if
LDAPS is enabled.
Use the Date/Time Settings page to specify the date and time
for KX II-101-V2.
There are two ways to do this:
Manually set the date and time.
Synchronize the date and time with a Network Time
Protocol (NTP) server.


