5
to remove a large quantity of glue
without medical help.
• Keep children away. Children
should not use this glue gun.
• When applying at a height, take
all the necessary precautions to
ensure that the glue does not
run onto the operator or onto any
object. Make sure that you have
enough protection wear (skin,
eyes)
• Some materials are heat-sensi-
tive and can be damaged by the
hot nozzle or even the hot glue.
Whenever possible, test a piece
of scrap material or a hidden por-
tion of the object being repaired.
• Stay alert. Pay attention to your
work. Beware of any dripping
hot glue from your project. Use
common sense. Do not operate
this gun when you are tired. Do
not operate under the influence
of alcohol or other drugs that may
impair your physical abilities.
• When you have finished using the
machine, unplug it and wait until it
has cooled. Never immerse glue
gun in water or other liquids to
speed cooling process. Allow it to
air cool only. The glue gun should
be stored in a closed dry and
secure place (tool box, drawer,
cupboard, etc.).
Instructions for Use
• Plug the glue gun into a suitable
socket. Turn on the power switch.
• Allow the tool to heat for approx-
imately 3-5 minutes (EG320) /
2-4 minutes (EG313). Insert a
glue stick in the back of the tool.
• When the gun is fully heated,
squeeze the trigger slowly, until
the melted material begins to
fl ow from the nozzle. Release the
trigger to stop the glue fl ow.
• Work with glue gun trigger to ad-
just the output and speed of the
glue stick.
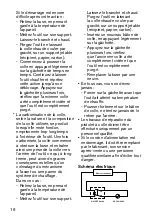
• To change the nozzle, the glue
gun should be slightly warm but
unplugged.
• Unscrew the nozzle using gloves.
Breakdowns and remedies
• To prevent the clogging of
this glue gun, keep feed-
ing mechanism and melt
chamber free from dirt and other
foreign debris.
• Store unused glue sticks in a
clean environment.
• Do not pull glue stick from the
back of the glue gun. The feed
mechanism may be damaged or
impaired. If you need to change
glue type, cut off the protrud-
ing end and feed the remainder
through with the new glue stick.
• Do not lay the heated gun on its
side. Keep the heated gun in an
upright position, on the metal
stand or workbench, with nozzle
pointed down.
• If melted glue has escaped from
the melt chamber entrance and is
interfering with the feed mecha-
nism; allow gun to cool, and gen-
tly remove the obstructing glue.
• Replace the nozzle if glue drips
excessively. Do not attempt to
Changing Nozzle
Summary of Contents for EG313
Page 55: ...56 c 12mm Rapid 200 C...
Page 56: ...57 3 5 EG320 2 4 EG313...
Page 57: ...58 1 Rapid Rapid...
Page 58: ...59 AC 220 240V...
Page 89: ...90 12mm Rapid 200 C...
Page 90: ...91 3 5 EG320 2 4 EG313...
Page 91: ...92 1 Rapid Rapid...
Page 92: ...93 2012 19 ON OFF AC 220 240V...
Page 108: ...109 Rapid 12mm 200 C...
Page 109: ...110 3 5 EG320 2 4 EG313 Rapid 12mm 1 Rapid...
Page 110: ...111 Rapid...
Page 111: ...112 e 2012 19 2 The Rapid PTC ON OFF AC 220 240V...
Page 112: ...113 1 2 RAPID...
Page 113: ...114...
Page 114: ...115...


