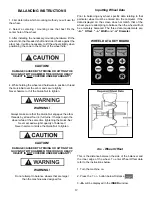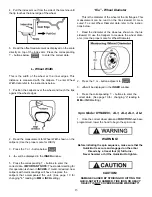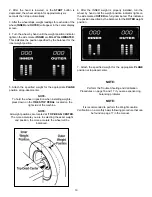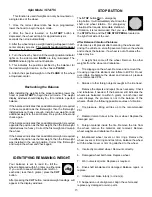
background image

9

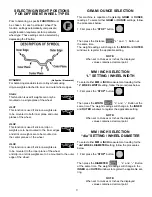
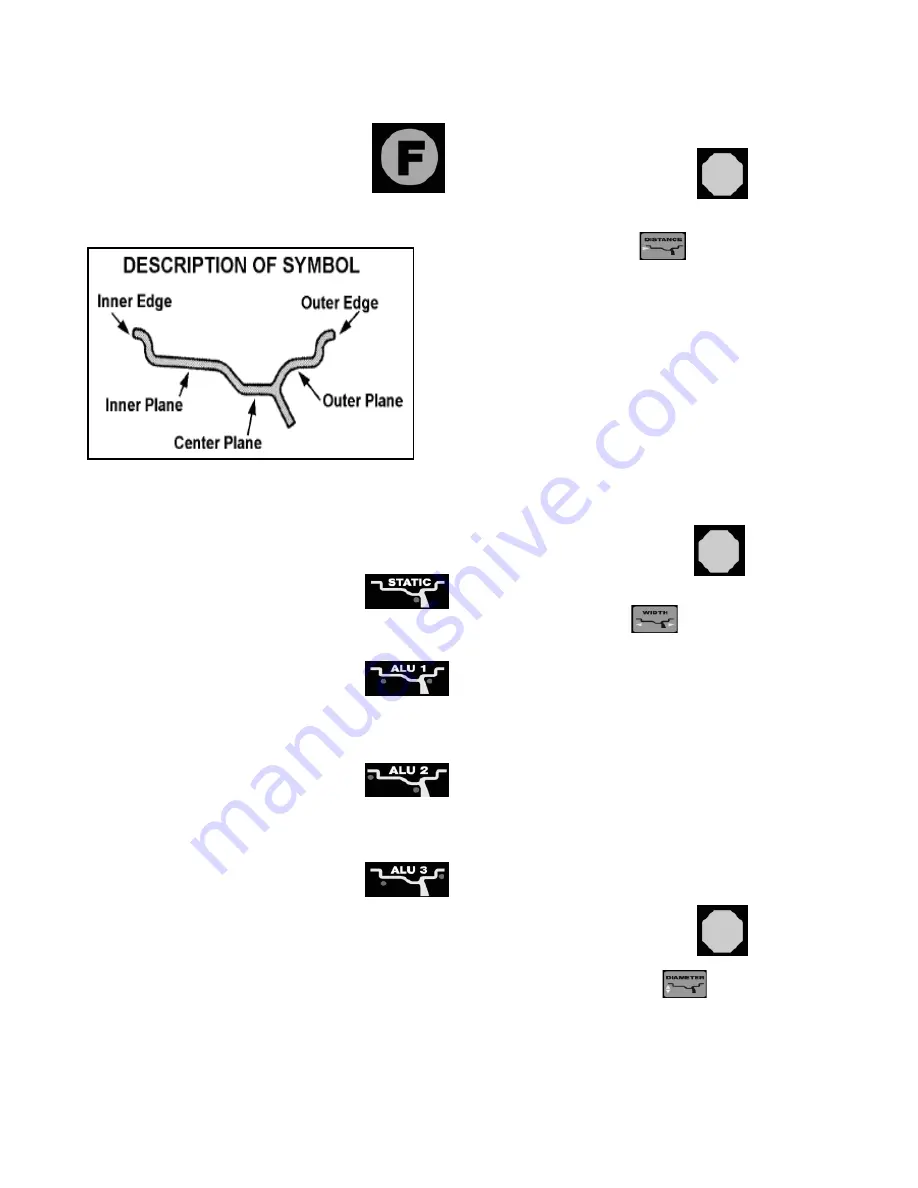
SELECTING WEIGHT POSITIONS

 FOR DIFFERENT WHEEL TYPES

Prior to balancing, a specific FUNCTION must                    

be  chosen  for  each  particular  wheel. The                         

function    settings  automatically  compensate                   

weight  location  requirements  for  a  particular                   

wheel type. These settings can be selected by             

depressing the button.  

DYNAMIC                                        

(No Symbol Illuminated)

For balancing standard steel or alloy wheels using 
clip-on weights attached to inner and outer wheel edges.

Static
This function is used if weights can only be 
mounted on a single plane of the wheel.

ALU1
This function is used if stick-on weights are 
to be mounted to both inner plane and outer 
planes of the wheel. 

ALU2
This function is used if stick-on /clip on 
weights are to be mounted to the inner edges 
and stick on weights are to be mounted on 
the center planes of  the wheel. 

ALU3
This function is used if stick-on weights are 
to be mounted to the inner plane of the wheel 
and clip-on or stick weights are to be mounted to the outer 
edge of the wheel.

GRAM / OUNCE SELECTION

This machine is capable of registering GRAM or OUNCE    
readings. To select either GRAM or OUNCE settings, follow 
the procedures below. 

1. First press the “STOP” button.

Then press the Distance             “+”  and  “-”  Button at 
the same time. 
The weight readings will change in the INNER and OUTER 
windows to register the applicable setting.

NOTE:

When set to Ounces or Inches the displayed 

values contains a decimal point.

MM / INCH SELECTION

L

” SETTING / WHEEL WIDTH

To select either MM or INCH measurement reading for the 
“L” WHEEL WIDTH setting, follow the procedures below. 

1. First press the “STOP” button.

Then press the WIDTH              “+”  and  “-”  Button at the 
same time. The weight readings will change in the INNER 
and OUTER windows to register the applicable setting.

NOTE:

When set to Ounces or Inches the displayed 

values contains a decimal point.

MM / INCH SELECTION

“dia” SETTING / WHEEL DIAMETER

To select either MM or INCH measurement reading for the 
“dia” WHEEL DIAMETER setting, follow the procedures 
below. 

1. First press the “STOP” button.

Then press the DIAMETER                 “+”  and  “-”  Button 
at the same time. The weight readings will change in the 
INNER and OUTER windows to register the applicable set-
ting.

NOTE:

When set to Ounces or Inches the displayed 

values contains a decimal point.

Summary of Contents for DST-2420

Page 1: ...r DO NOT operate or repair this equipment without reading this manual and the important safety instructions shown inside 1645 Lemonwood Dr Santa Paula CA 93060 USA Toll Free 1 800 253 2363 Tel 1 805 933 9970 Fax 1 805 933 9160 www rangerproducts com FOR BALANCING AUTOMOBILE MOTORCYCLE LIGHT TRUCK TIRES WHEELS Keep this operation manual near the machine at all times Make sure that ALL USERS read th...

Page 2: ...chine until you read and understand all the dangers warnings and cautions in this manual For additional copies or further information contact BendPak Inc Ranger Products 1645 Lemonwood Dr Santa Paula CA 93060 1 805 933 9970 www rangerproducts com www bendpak com OPERATOR PROTECTIVE EQUIPMENT Personal protective equipment helps make tire and wheel service safer However equipment does not take the p...

Page 3: ...This warranty is exclusive and in lieu of all other warranties expressed or implied In no event shall BendPak Inc Ranger Products be liable for special consequential or incidental damages for the breach or delay in performance of the warranty BendPak Inc Ranger Products reserves the right to make design changes or add improvements to its product line without incurring any obligation to make such c...

Page 4: ...t in damp or wet locations or expose them to rain and moisture Avoid unintentional starting Be sure the balancer is turned off before servicing Disconnect the balancer before servicing Use only manufacturer s recommended accessories Improper accessories may result in personal injury or property damage Repair or replace any part that is damaged or worn and that may cause unsafe balancer operation D...

Page 5: ...let The unit is heavy and the weight is not evenly distributed Dropping the unit from the pallet may cause personal injury or equipment damage Electrical Requirements NOTE It is recommended to operate the Balancer on 220Volts for optimum performance STANDARD WIRING IS 220 VOLTS YOUR MACHINE HAS A DUAL VOLTAGE MOTOR and can be run on either 110 or 220 volts Your balancer features a dual voltage 110...

Page 6: ......

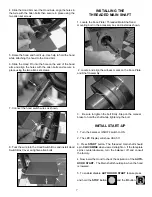
Page 7: ...FT 1 Locate the Face Plate Threaded Main Shaft and mounting bolt in the accessory box and install as shown 2 Locate and align the witness marks on the Face Plate and Shaft Assembly 3 Be sure to tighten the bolt firmly Step on the manual brake to hold the shaft while tightening the bolt INITIAL START UP 1 Turn the balancer ON OFF switch to ON 2 The LED Display will show USA 511 3 Press START button...

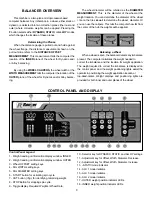
Page 8: ...er how far from the center of the hub the weights will be applied Balancing a Wheel When a wheel is spun the balancer detects any imbalance present The computer calculates the weight needed to correct the imbalance and the location for weight application The weight required to correct the imbalance is displayed on the control panel and the weight positioning lights assist the operator in positioni...

Page 9: ...s machine is capable of registering GRAM or OUNCE readings To select either GRAM or OUNCE settings follow the procedures below 1 First press the STOP button Then press the Distance and Button at the same time The weight readings will change in the INNER and OUTER windows to register the applicable setting NOTE When set to Ounces or Inches the displayed values contains a decimal point MM INCH SELEC...

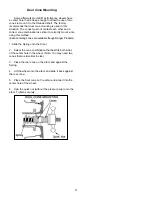
Page 10: ...WARRANTY Rear Cone Mounting Most original equipment and steel wheels can be mounted properly using this method The wheel is centered on a cone from the inner side of the hub 1 Place the cone spring on the arbor with the large end towards the balancer 2 Select the cone that best fits the center hole in the wheel Slide the cone onto the arbor with the large end towards the spring 3 Lift the wheel on...

Page 11: ...re using this method Extra centering cones are available though Ranger Products 1 Slide the Spring onto the Arbor 2 Select the cone combination that best fits both sides of the center hole in the wheel Note You may need two cones that are identical in size 3 Place the rear cone on the arbor and against the Spring 4 Lift the wheel onto the arbor and slide it back against the rear cone 5 Place the f...

Page 12: ...o spin the wheel while at the same time tightening the Quick Nut Never exceed weight capacity of balancer Never hammer or strike the Quick Nut to tighten CAUTION DAMAGE CAUSED BY STRIKING OR HITTING THE QUICK NUT WITH HAMMER TIRE IRON OR HEAVY OBJECT IS NOT COVERED UNDER WARRANTY WARNING Do not attempt to balance wheels that are larger than the machine was designed for Inputting Wheel Data Prior t...

Page 13: ...lipers that accompanied the unit See page 10 for changing L reading to MM or INCH setting dia Wheel Diameter This is the diameter of the wheel at the rim flanges This measurement can be read on the tire sidewall Or mea sured To enter Wheel Diameter data refer to the instruc tions below 1 Read the diameter of the wheel as shown on the tire sidewall Or use the Calipers to measure the wheel diam eter...

Page 14: ...IRE STOP PEDAL located on the right side of the machine NOTE All weight positions are located at TOP DEAD CENTER The more accurate you are in selecting the exact weight and position the more accurate the wheel will be balanced 6 After the INNER weight is properly installed turn the wheel by hand until the weight position indicator lights on the side marked OUTER are fully illuminated This indicate...

Page 15: ...er is left on each side less than 5 grams press the CUT button After pressing the CUT button residual weight readings will appear in the display windows STOP BUTTON The STOP button IS an emergency stop button It will immediately shut down the shaft and wheel rotation For emergency situations that require immediate shutdown of rotation it is recommended that you use the STOP button and the TIRE STO...

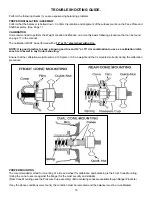
Page 16: ...It is good practice to keep a known good tire and 14 or 15 rim combination to use as a calibration refer ence tire to assist in any trouble shooting Ensure that the calibration weight used is a 100 gram or 3 5 oz weight and that is mounted correctly during the calibration procedure PROPER MOUNTING The recommended method for mounting of a tire and wheel for calibration and balancing is the Front Co...

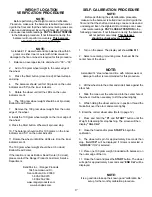
Page 17: ...endPak Inc Ranger Products 1645 Lemonwood Dr Santa Paula CA 93060 1 805 933 9970 1 800 253 2363 www rangerproducts com www bendpak com SELF CALIBRATION PROCEDURE NOTE Before performing the self calibration procedure make sure the balancer is bolted down and or rigid to the floor and that the shaft and centering cones are clean and undamaged Even the slightest dirt or damage can cause inaccurate re...

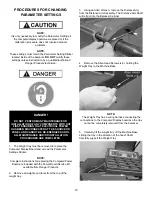
Page 18: ...Ranger Products 2 Remove all weights and tools from the top of the weight tray 3 Using an Allen Wrench remove the Distance Arm from the Distance Arm Assembly The Distance Arm Shaft will retract into the Balancer Cabinet 4 Remove the Allen Head Screws x 6 holding the Weight Tray to the Machine Base NOTE The Weight Tray has a wiring harness connecting the connections to the Computer Display boards s...

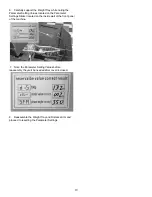
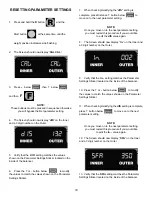
Page 19: ...ed on the Parameter Settings Sticker located on the inside wall of the front panel of the machine 7 Note the Parameter Setting Values before reassembly they will be needed after cover is closed 8 Reassemble the Weight Tray and Distance Arm and proceed to resetting the Parameter Settings ...

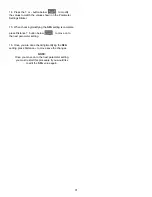
Page 20: ...button below to move on to the next parameter setting NOTE Once you move on to the next parameter setting you must restart this procedure if you would like to edit the dIS value again 8 The Screen should now display In on the Inner and a 3 digit number on the Outer 9 Verify that the In setting matches the Parameter Settings Sticker located on the inside of the balancer 10 Press the or button below...

Page 21: ...modifying the SFA setting is complete press Distance button below to move on to the next parameter setting 16 Once you are done checking modifying the SFA setting press Distance to move save the changes NOTE Once you move on to the next parameter setting you must restart this procedure if you would like to edit the SFA value again ...

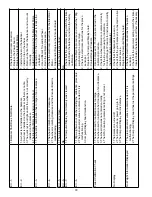
Page 22: ...g weight was not attached during the calibration procedure 2 The piezo sensor s wires are disconnected or it is malfunctioning 3 Computer Display board malfunction 1 Do the calibration procedure and attach the 100g weight during the correct step 2 Check the electrical connections for the piezo sensor s 3 Replace the Computer Display board 4 Contact Ranger Products Failed Calibration Check 1 The wh...

Page 23: ...23 ...

Page 24: ...24 ...

Page 25: ...25 ...

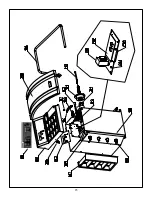
Page 26: ... Side Panel 124 Spindle Cover 125 Encoder Photo Electricity Board 126 Belt 127 Motor 128 Motor Bracket 129 Motor Pulley 130 Motor Pulley Key DRAWING NO DESCRIPTION 201 Transformer 202 Power Board 203 Resistor 204 Power Mounting Plate 301 Brake Pad 302 Brake pad Spacer 303 Brake Bracket 304 Spring 305 Brake Fixed Plate 306 Brake Square Plate 307 Tie rod Head 308 Tie rod 309 Brake Connector 310 Bush...

Page 27: ..._______________________________ ________________________________________________________________________________ ________________________________________________________________________________ ________________________________________________________________________________ ________________________________________________________________________________ ____________________________________________...

Page 28: ...r Parts Or Service Contact BendPak Inc Ranger Products 1645 Lemonwood Dr Santa Paula CA 93060 Toll Free 1 800 253 2363 Tel 1 805 933 9970 Fax 1 805 933 9160 www bendpak com www rangerproducts com p n 5900233 ...

Reviews: