31
WARNING SERVICING TO BE CARRIED OUT ONLY BY AN AUTHORISED PERSON
Disconnect from electricity and gas before servicing. Check appliance is safe when you have finished.
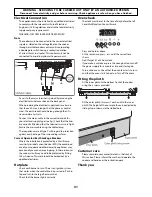
Electrical Connection
This appliance must be installed by a qual i fi ed electrician
to comply with the relevant In sti tute of Electrical
Engineers (I.E.E.) regulations and also the local elec tric i ty
supply company re quire ments.
WARNING: THIS APPLIANCE MUST BE EARTHED
Note
The cooker must be connected to the cor rect electrical
supply as stated on the voltage la bel on the cooker,
through a suitable cooker control unit incorporating
a double pole switch having a contact separation
of at least 3mm in all poles. This cooker must not be
connected to an ordinary domestic power point.
Access to the mains terminal is gained by re mov ing the
electrical terminal cover box on the back panel.
When preparing the electrical supply leads, make sure
that the earth wire is longer that the phase or neutral
wires. The earth lead should be long enough that it is
never under any strain.
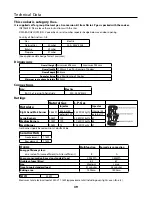
Connect the mains cable to the correct terminals for
your electrical sup ply type (see fi g.). Check that the links
are correctly fi tted and that the terminal screws are tight.
Secure the mains cable us ing the cable clamp.
These appliances are of type X with regard to protection
against over heating of the sur round ing surfaces.
Current Operated Earth Leakage Breakers
Where the installation is protected by a 30 milliamp
sensitivity residual current device (RCD), the combined
use of your cooker and other domestic appliances may
oc ca sion al ly cause nuisance tripping. In these instances
the cooker circuit may need to be protected by fi tting
100mA device. This work should be carried out by a
qualifi ed electrician.
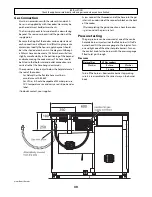
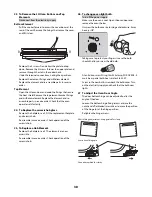
Hotplate
Check each burner in turn. There is an ignition system
that works when the control knob is pressed in. Push in
tap and turn to the large fl ame symbol.
Check that the burner lights correctly.
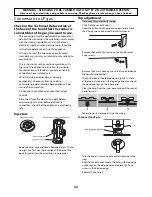
Oven check
The clock must be set to the time of day before the left
hand Multifunction Oven will work.
Press and hold as above.
At the same time, press - or + until the correct time
shows.
Don’t forget it’s a 24 hour clock.
If you make a mistake or press the wrong button, turn off
the power supply for a minute or two and start again.
Turn on the ovens. Check that the oven fan starts to turn
and that the oven starts to heat up. Turn off the ovens.
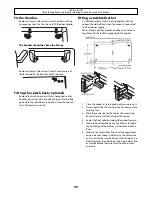
Fitting the plinth
Fit the inner plinth to the bottom front of the cooker
using the 5 screws provided.
Fit the outer plinth (2 screws 1 each end) to the inner
plinth. The height of the outer plinth can be adjusted by
sliding it up or down via the slotted hole.
Customer care
Please complete your contact details in the front of
this section. Please inform the user how to operate the
cooker and hand over the instruction pack.
Thank you.
Summary of Contents for Classic 110 Deluxe Duel Fuel
Page 1: ...Classic Deluxe 110 Dual Fuel Users Guide Installation Service Instructions U108810 03...
Page 41: ...41...
Page 42: ...42...
Page 43: ...43...
Page 44: ...040506...


