ASSEMBLY MANUAL XAIR April, 04, 2006
MANUEL DE MONTAGE XAIRF 2 Juin 2006 Page 34 / 72
C 5)
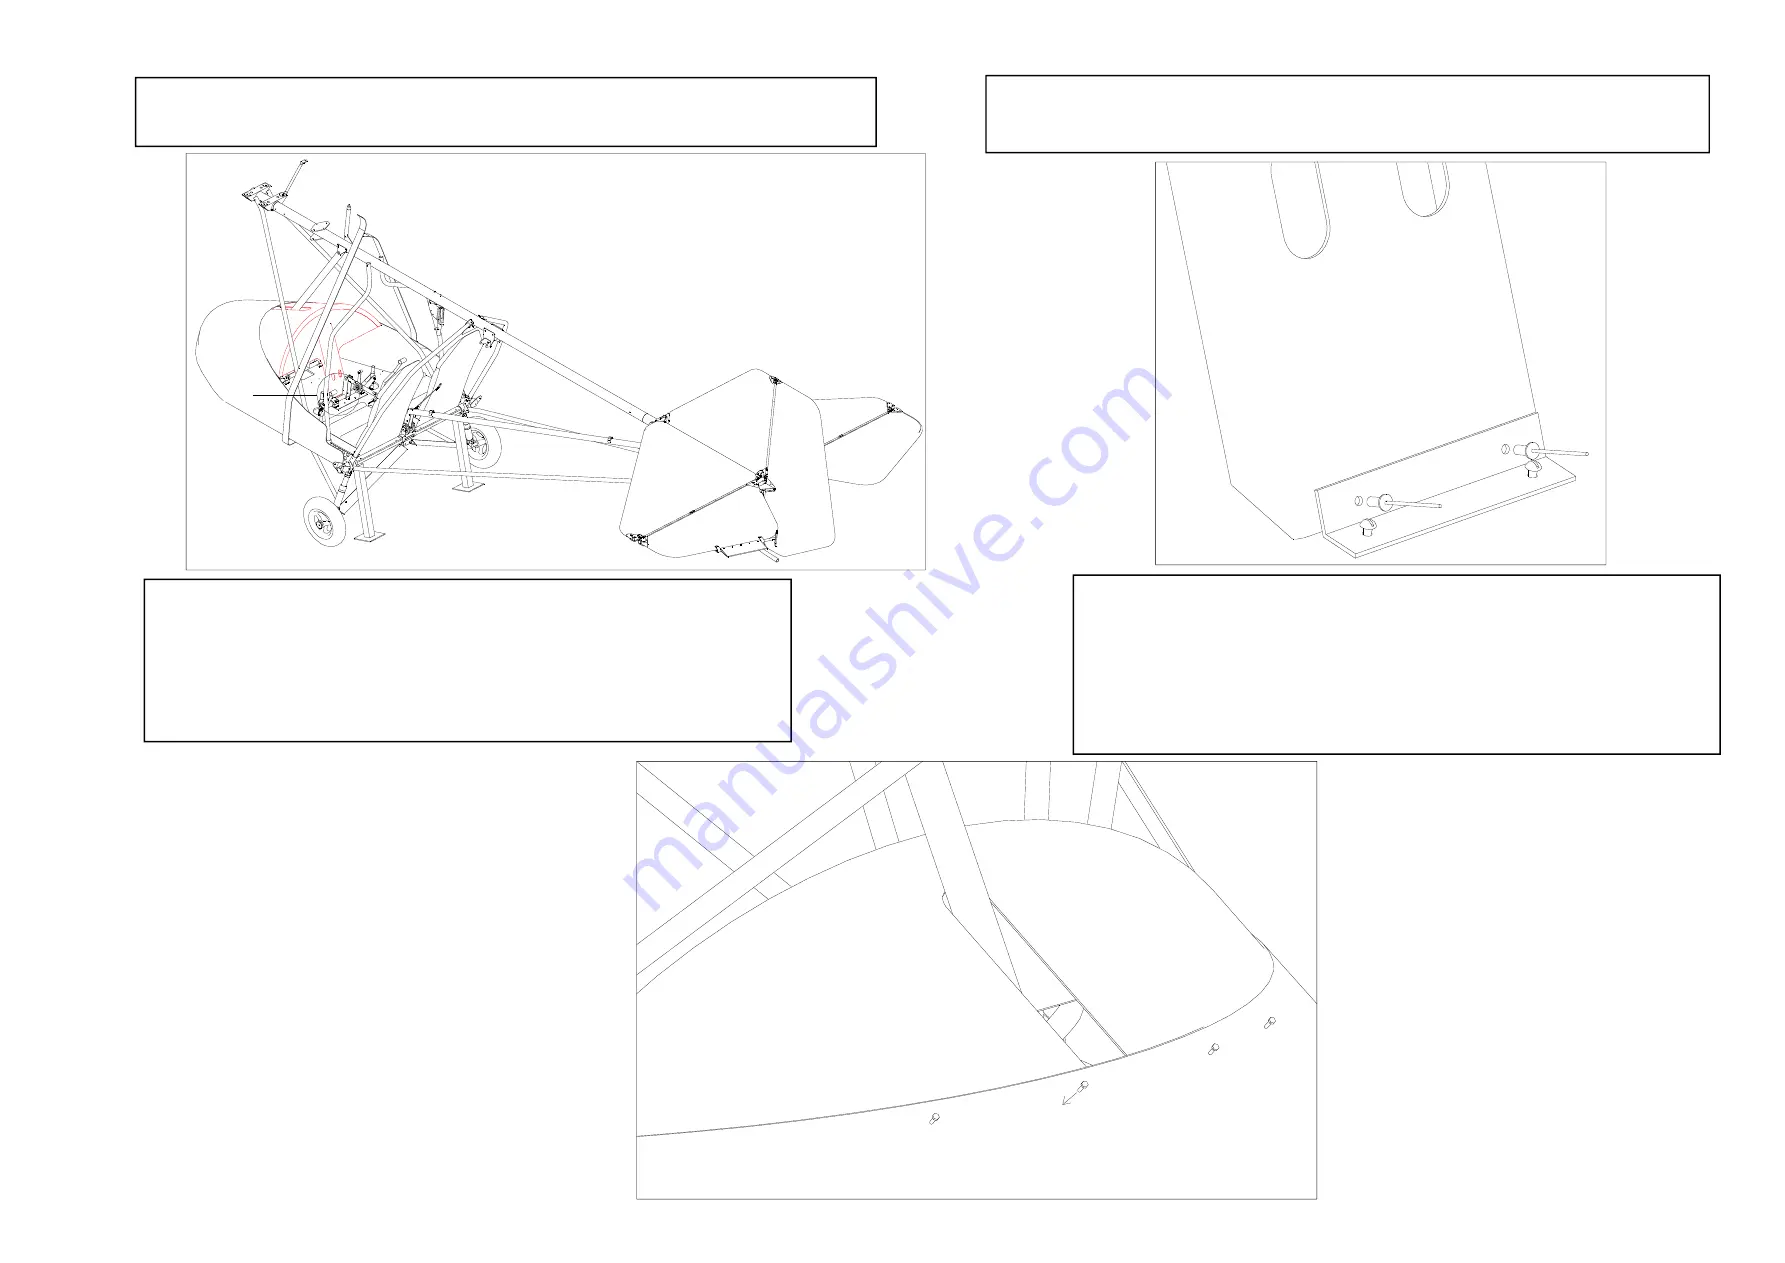
Position the unit, centering the dashboard hood on the center hole of the fairing (C5A).
(“L” corner aluminum not supplied in the kit).
C 6)
Starting from the center line of the fairing, drill the first hole on one side,
insert the screw, then drill the first hole on the other side, and so on until all
holes have been drilled.
Do not tighten the nuts.
Place the rubber support around the openings that let the forward cabin tubes
through the windshield
.
C 5)
Positionner l’ensemble dans la machine en centrant la casquette de tableau de bord sur le
trou central du carénage. ( C5 A cornière non-livrée dans le kit )
C 6)
En partant de l’axe médian du carénage, percer le premier trou d’un co-
té, mettre la vis, puis percer le premier trou de l’autre coté, ainsi de suite alter-
nativement jusqu’à ce que tous les trous soient percés.
Ne pas bloquer les écrous.
Poser le jonc sur le périmètre de la lumière découpée dans les flancs de pare-brise
pour le passage des tubes latéraux avant de cabine.
A
C5
C6
1
2
3
4
A
C5
Summary of Contents for 917 2006
Page 13: ...ASSEMBLY MANUAL XAIR April 04 2006 MANUEL DE MONTAGE XAIRF 2 Juin 2006 Page 13 72 A1A...
Page 43: ...ASSEMBLY MANUAL XAIR April 04 2006 MANUEL DE MONTAGE XAIRF 2 Juin 2006 Page 43 72...
Page 59: ...ASSEMBLY MANUAL XAIR April 04 2006 MANUEL DE MONTAGE XAIRF 2 Juin 2006 Page 59 72...
Page 66: ...ASSEMBLY MANUAL XAIR April 04 2006 MANUEL DE MONTAGE XAIRF 2 Juin 2006 Page 66 72...
Page 67: ...ASSEMBLY MANUAL XAIR April 04 2006 MANUEL DE MONTAGE XAIRF 2 Juin 2006 Page 67 72...
Page 68: ...ASSEMBLY MANUAL XAIR April 04 2006 MANUEL DE MONTAGE XAIRF 2 Juin 2006 Page 68 72...
Page 69: ...ASSEMBLY MANUAL XAIR April 04 2006 MANUEL DE MONTAGE XAIRF 2 Juin 2006 Page 69 72...
Page 70: ...ASSEMBLY MANUAL XAIR April 04 2006 MANUEL DE MONTAGE XAIRF 2 Juin 2006 Page 70 72...


