6
5 Uploading the project file
Once all programming has been completed the project file should be uploaded to the Bridge.
The Bridge stores the Room, Channel and Scene information for the system. This
information is required for the App. to operate correctly.
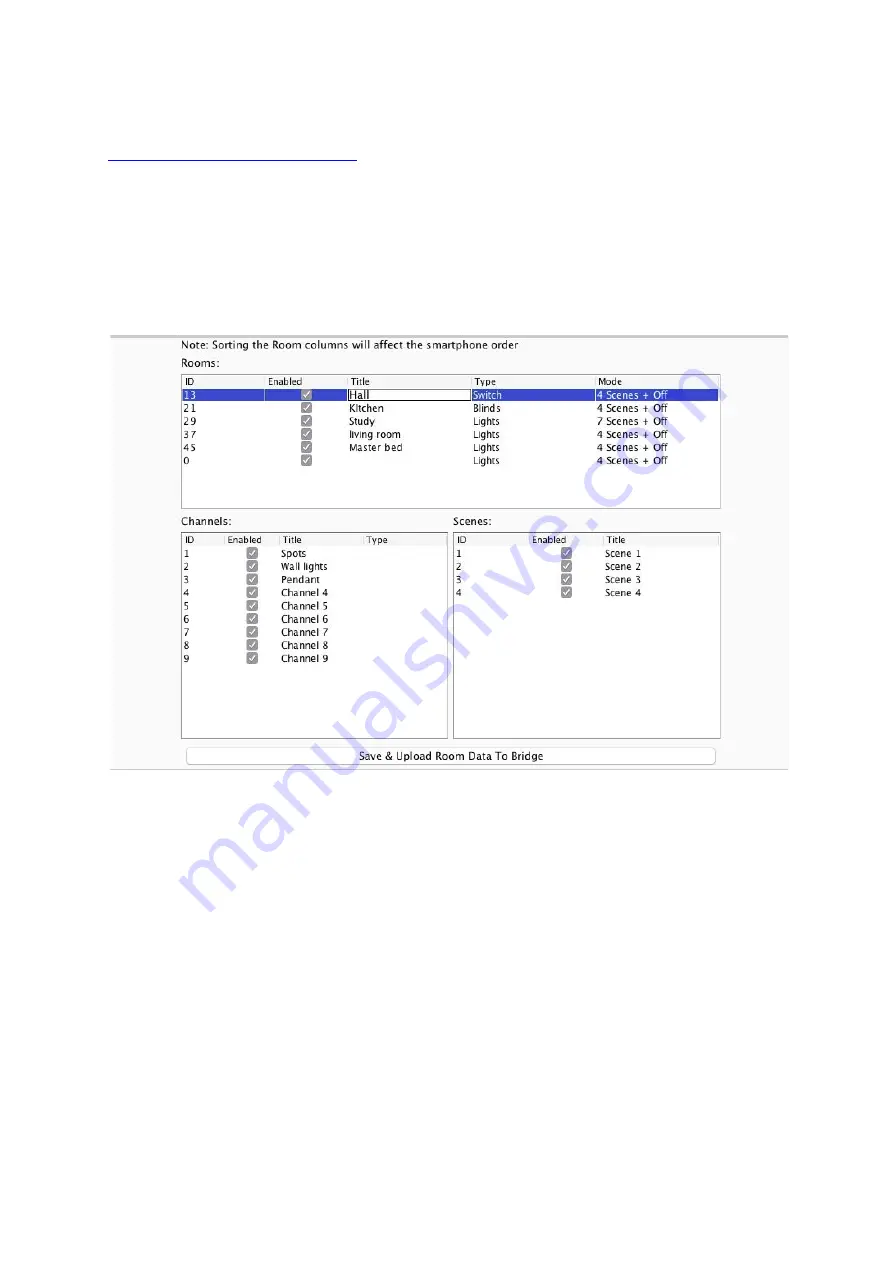
The “Smartphone/Web Data” tab is used to upload the Project File to the Bridge. Once
selected it will open the page as below. Press “
Save & Upload Room Data To Bridge
” to
upload.
Type
- This will change the appearance of the icon used at the top of the room screen on the
App. It will also affect the keypad that appears. For example a room set to “switch” type will
show two buttons: “on” and “off” whereas a “blind” type room will show three buttons: “open”,
“stop” and “close”.
Mode -
The mode of the room is only set when “lighting” is selected as the type. It will set the
variety of “keypad” that will appear in the App. Typically it is best to make this match the
physically keypad in the room.
NB
1) If a number of scenes that is not 4, 7 or 16 is desired then “named scenes” should be
selected. Give custom names to the scenes in the room editor and any number of scenes can
be made to appear on the App.
2) While the order of the rooms can be changed from this screen the order of the channels is
always fixed. To get channels in a specific order they must be addressed or mapped in this
order.
WA-Bridge
Manual Version 2.1.3


