


Documentation Center
In the following screen you will see fields for the application parameters.
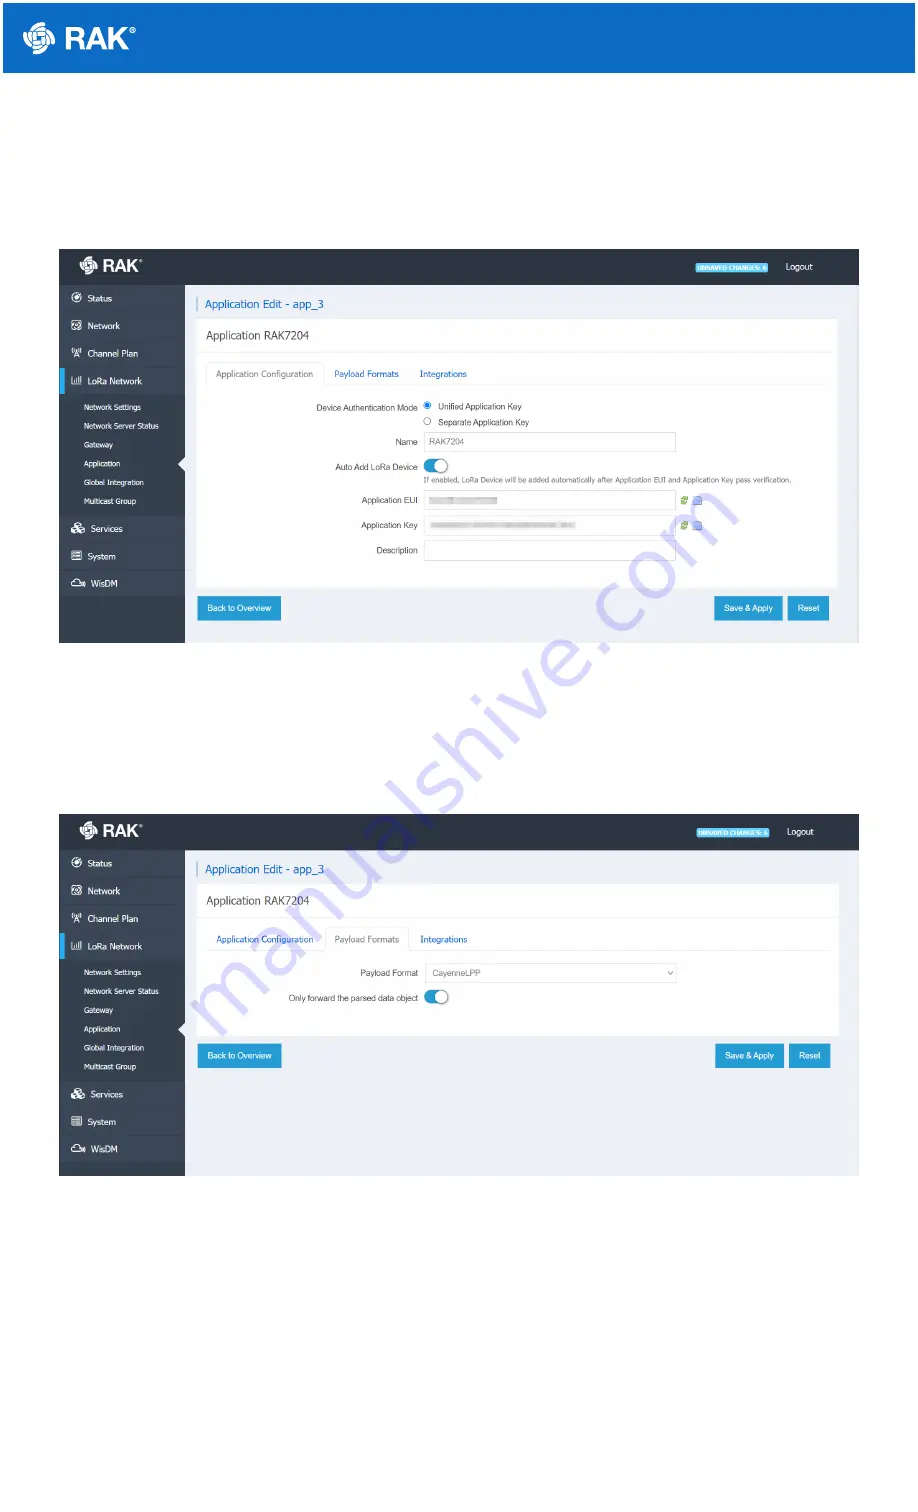
In the Application Configuration sub-window enable the "Auto Add LoRa Device" functionality. Generate a random
Application EUI and Application Key via the green arrow button next to the text fields. Note these down as you will
need them for the RAK7204 configuration.
Figure 16: Application configuration
Move to the Payload Formats sub-window and set the payload format to "CayenneLPP" via the drop down menu.
This is the format that the RAK7204 uses, thus enabling this functionality will allow you to see the parsed data in
the Application Server. Finally enable the "Only forward the parsed data object" functionality, press the "Save &
Apply" button to finalize the configuration changes.
Figure 17: Payload Format
3. Now that your application has been created you need to go to the device section by pressing the "Edit " button.


