


Documentation Center
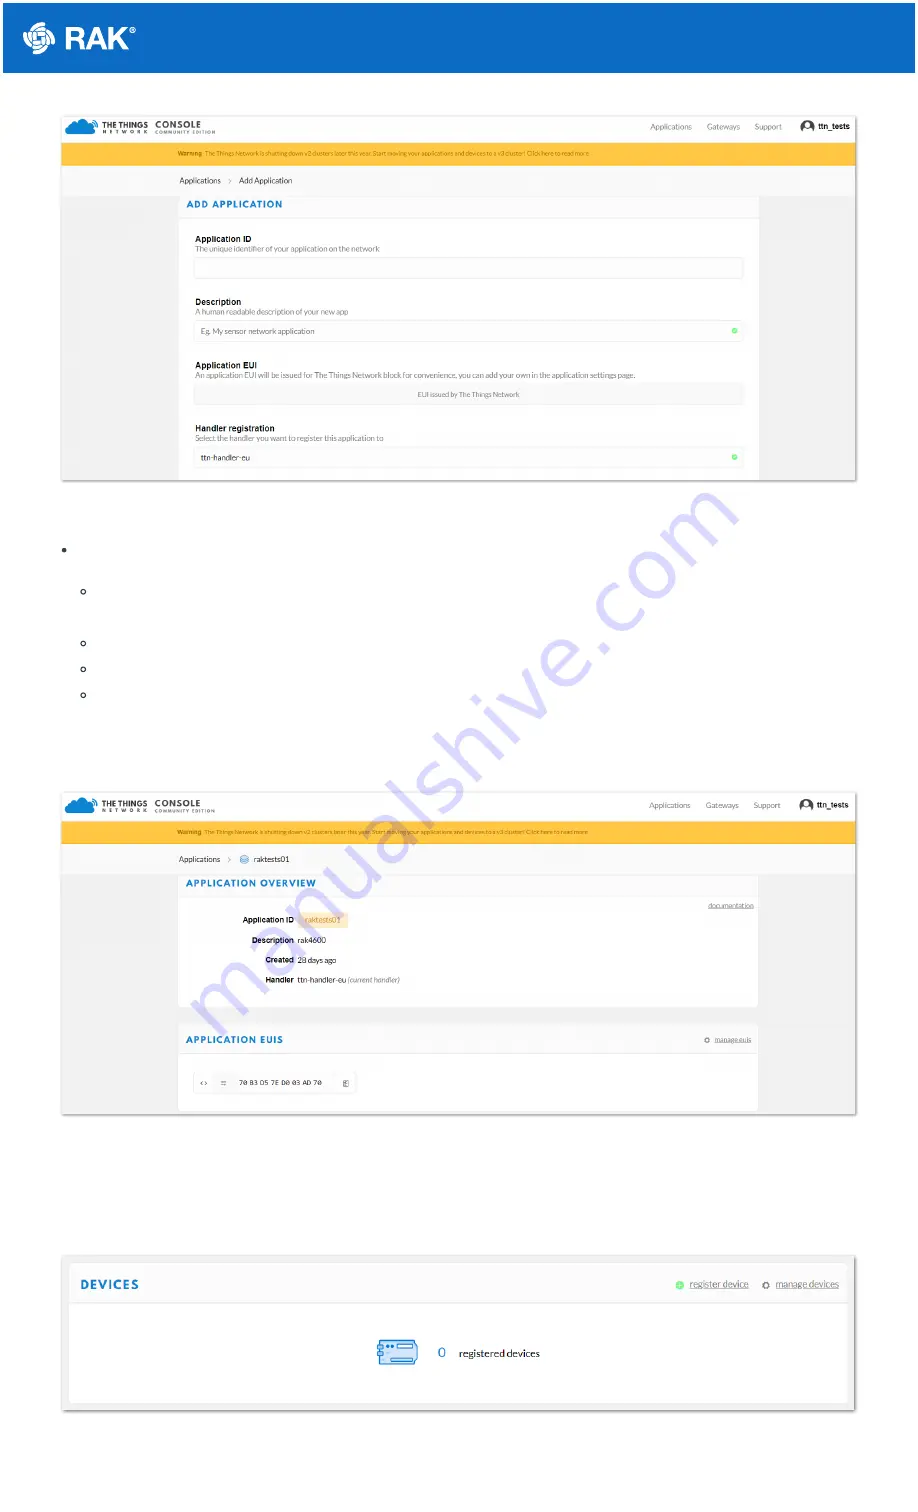
Figure 7: Adding an Application
Here are the things that you should take note of in adding an application:
Application ID - this will be the unique ID of your application in the Network. Note that the characters should
be in lower case, no spaces are allowed.
Description - this is a short and concise human-readable description of your application.
Application EUI - this will be generated automatically by The Things Network for convenience.
Handler Registration - handler you want to register this application to.
3. After you fill in the necessary information, press the "Add application" button at the bottom of this page. If you
see a similar page, as shown in Figure 8, then you have successfully registered your application.
Figure 8: Application Overview
Register a New Device
1. Scroll down until you see the Devices section. Or, you can click the "Devices" button at the top.
Figure 9: Register a New Device