Raise3D E2_Quick Start Guide
www.raise3d.com
-
14
➢
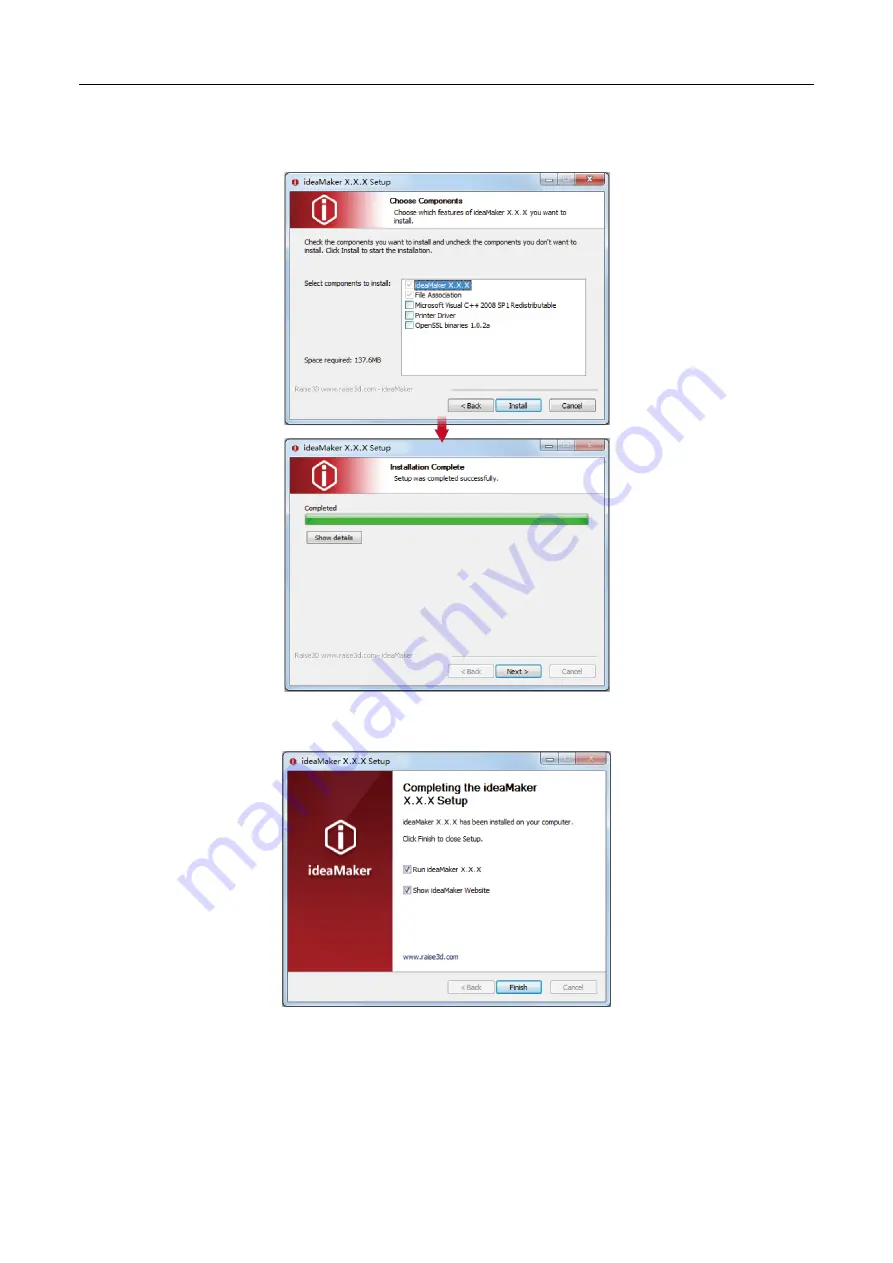
Follow the instructions provided by the guide, and click "Install". After the installation is finished, click "Next"
to go to the next step.
Click "Finish" and ideaMaker is installed.
Page 1: ...Quick Start Guide E2 3D Printer Please review this entire guide before operating the printer...
Page 2: ...lity EMC 2 Technical Specifications 4 Printer Components and Parts 6 Raise3D Supplies and Accessories 10 Precaution and Hardware Installation 11 Software Installation 13 WLAN Connection 20 Maintenance...
Page 3: ...emperatures in the printer can reach 300 572 Hot Surface The hot surface sign indicates the presence of devices with high temperatures Always use extra care when working around heated components Alway...
Page 4: ...FI SE CH UK HR CE Output power table Function Frequency Maximum Output Power EIRP Wi Fi 2412 2472 MHz 18 dBm b 18 dBm g 13 dBm HT 5150 5250 MHz 19 dBm a 18 5 dBm HT20 17 5 dBm HT40 5725 5850 MHz 14 dB...
Page 5: ...equipment generates uses and can radiate radio frequency energy and if not installed and used in accordance with the instructions may cause harmful interference to radio communications However there...
Page 6: ...0 78125 0 078125 micron 30 150 mm s Flexible Steel Plate with Buildtak 110 C Silicone Mesh leveling with Flatness Detection PLA ABS HIPS PC TPU TPE NYLON PETG ASA PP PVA Glass Fiber Infused Carbon Fi...
Page 7: ...ional conditions a Attribution Any reproductions or modifications of the hardware must contain the following attribution on the silkscreen and packaging Based on the DuetWifi by Think3dPrint3d and Esh...
Page 8: ...Platform Tray is highly magnetized to ensure that the build plate stays in place E Touch Screen On board computing system to display printer status error messages and receive commands F Power Saving B...
Page 9: ...ides interior lighting of the chassis D Filament Holder Holds the filament spool maximum weight 3 kg E Input Power AC input and switching F Filament Exit The filament leads from here to the extruder G...
Page 10: ...pply Switches from alternating current to direct current Please be careful it s dangerous Do not remove the power box without permission I Air Filter Fan Pulls air out of the machine through the air f...
Page 11: ...Guide Rail Guides the extruder s movement along the X axis D X axis Motor Left Right Respectively controls the corresponding extruder for horizontal movement E Z axis Motor Left Right Controls both en...
Page 12: ...upplies and Accessories Power Cable 5 Hex Wrenches Filament 2 Tweezers Heat Resistant Gloves Spatula Filament Guide Tube 2 Nozzle Cleaning Kit 1 Filament Holder 4 USB Storage Fuse 0 3 mm Feeler Gauge...
Page 13: ...e of 10 to 90 without condensation The storage temperature shall be in the range of 25 C to 55 C and the relative humidity range shall be 10 to 90 non condensation The altitude shall not exceed 2 000...
Page 14: ...tains five power cords of different standards Please use the power cord that conforms to your current country or region and connect it to the power socket Turn on the switch and start the device Turn...
Page 15: ...g software ideaMaker is available on the USB storage device included with your printer Additional downloads and versions are available online at https www raise3d com download Open the installer and c...
Page 16: ..._Quick Start Guide www raise3d com 14 Follow the instructions provided by the guide and click Install After the installation is finished click Next to go to the next step Click Finish and ideaMaker is...
Page 17: ...ge for the ideaMaker installer This is located in the USB storage device included with your printer Alternatively you can download the latest version from https www raise3d com download Next drag the...
Page 18: ...g ideaMaker for the first time you will need to select your printer model Select printer setting and choose the type of the printer you are using then press Next Select the diameter of your filament P...
Page 19: ...Raise3D E2_Quick Start Guide www raise3d com 17 Using ideaMaker Click the button to import Giveaway Spinner included in the USB storage device Click the Start or button to begin slicing the model...
Page 20: ...firm your printer type and material are correct then select the standard slicing template Click Edit to select the type of Platform Addition and the type of Support Click Save and Close to return to t...
Page 21: ...ve the sliced files gcode and data by exporting them to the included USB storage device NOTE File names that do not conform to the Western Latin character set may not display properly Confirm that the...
Page 22: ...password When the Wi Fi module is manufactured 2 4G is set at HT20 5GHz is set at HT40 Note The Wi Fi s frequency is fixed before being manufactured The customer is not allowed to modify the Wi Fi s p...
Page 23: ...l up the X axis As shown in figure 1 click Maintenance to level up the X axis and it will touch the top beam until horizontal Click the Utilities menu and home the Z axis Press the upward arrow to lif...
Page 24: ...he distance between the nozzle and the printing platform exactly matches the thickness of the gauge about 0 3 mm Tighten the nozzle screw and remove the gauge The other nozzle is adjusted in the same...
Page 25: ...he printing parameters and settings Press Print to start printing the test file During printing you can check the status of your printing including printing time and other parameters from the touch sc...
Page 26: ...on Menu and Settings button Taskbar Visual display of the current model Print parameters Move the axis Loading Unloading Leveling Visual display of X Y Z axes Coordinate value and Custom edit function...
Page 27: ...this guided setup please contact our expert technicians by creating a ticket at support raise3d com Customers outside of the US please contact your local Raise3D distributor or reseller For sales info...
Page 28: ...2618 USA 1 888 963 9028 Netherlands Office Stationsplein 45 Unit A4 004 3013AK Rotterdam the Netherlands China Office 4th Floor B5 1688 North Guoquan Road Yangpu District Shanghai 200438 400 6367 888...