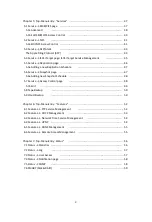

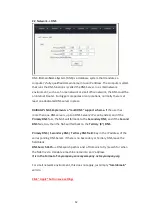


17
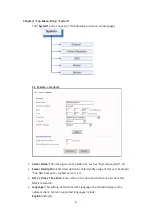
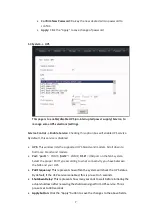
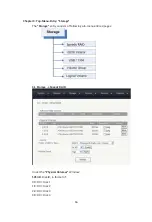
Info:
disk Info, such as: Brand, Model, and Firmware
Size:
Disk size
Select/Stat:
Disk-selection/disk-status. The empty box means the disk is not
selected. Check-marking the box selects his disc. Next to the box is that stat of
the disc. “OK” means the disk is at normal status. It could show “Failed” or
“Removed” if the disk is bad or removed.
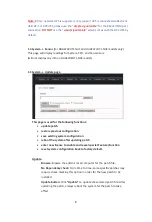
Blink button
: This feature blinks the LED on the Physical hard drive tray to help
identify which hard drive is being referenced.
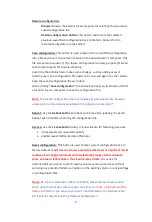
Create a RAID or Spare
: When there are no existing RAID volumes, you can only
create a RAID and will not be allowed to create a Spare. The Spare is allowed
only if you have an existing RAID with RAID-level of: 1, 5, 6, or 10.
Supported RAID-level is: 0, 1, 5, 6, or 10
Stripe Size:
The stripe size for the RAID can be anywhere from 4KB ~ 1024KB.
Option is selected via the drop down menu. The default size is 64KB.
Rebuild Speed
: The options are:
High
,
Mid
, and
Low
. This is used to define how
much internal storage speed should be allocated to the RAID rebuilding,
therefore, reserve a portion of resources for normal data accessing. The higher
the rebuild speed is, the less resources it has for normal data access.
For first time RAID creations, always set rebuild speed to “
High
,” to decrease
time needed to initialize RAID.
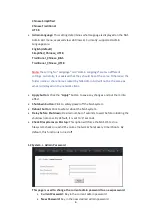
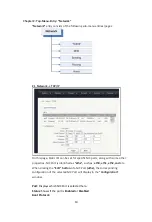
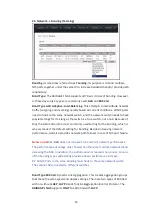
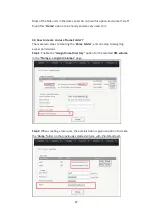
3.2 Basic Steps to Create a RAID:
Step 1
: select by check-marking all the disks to be put into the same RAID array.
Step 2
: select the RAID-level
Step 3:
select the Stripe-Size, or leave it at 64KB
Step 4
: click the “Create” button, and the GUI will display the page below:


