


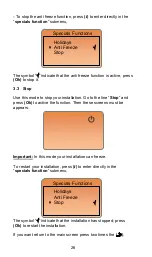


33
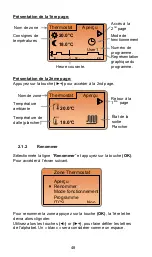
Choose the value which must be adjusted with the underlined
cursor, press
(Ok)
when the value start blinking, adjust it with
(
◄-)
or
(►+)
. Press
(Ok)
to valid your adjustments.
Dimming function on backlight.
The backlight is always light up (at 100%) during 1 minute if a key
is pressed.
But you can also active the backlight all the time with dimmed
function. After 1 minute the backlight will go to this setting level.
(By default the value is adjusted at 0%
“Off”).
During the adjustment the backlight follow the setting to show the
intensity.
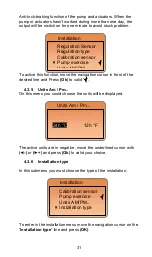
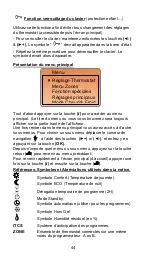
4.5 Factory settings
This menu will be used to reload the product with manufactured
configuration.
Move the negative cursor with
(
◄-)
or
(►+)
on the “Yes” position
and press
(Ok)
during 2 seconds. Then this message will be
appears before the restarting of the product:
Important:
All programs, installation configuration will be lost. Ensure that you
have all needed element to reconfigure before using this function.
Factory settings
Ok
Factory settings
No
Yes
Summary of Contents for Purmo Tempco CP W
Page 2: ...2...
Page 147: ...147 Pami 177 Notatki 178 Annexes PROGRAM P1 to P9 250...
Page 182: ...182 Memory safe 213 Notes 214 Annexes PROGRAM P1 to P9 250...
Page 215: ...215...
Page 216: ...216 230...
Page 218: ...218 NTC 10K 248 248 249 250...
Page 220: ...220 1 2 3 4 OK i 27 04 2009 11 15 22 6 C 33 3 1 2 4...
Page 221: ...221 i OK i ITCS ZONE A B...
Page 222: ...222 1 2 1 ITCS A A B B 3 4 On Off PWM 5...
Page 223: ...223 1 OK OK OK 2 27 04 2009 11 15 22 6 C 33 20 0 C 18 0 C rH 60 osi gni ty...
Page 224: ...224 2 OK 2 1 ITCS A B 2 1 2 1 1 OK ITCS 1 A A B B...
Page 225: ...225 2 1 2 OK 1 nazw ITCS 20 0 C 18 0 C 20 0 C 18 0 C 1 0 12 24 programu dnia...
Page 226: ...226 OK OK 10 2 1 3 OK OK 2 1 4 OK ITCS ITCS...
Page 227: ...227 OK OK 9 P1 P9 3 U1 U3 OK OK 7 00 P1 View P1 0 12 24 P1...
Page 228: ...228 15 6 3 1 1 6 OK 1 1...
Page 229: ...229 OK OK Ok 5 OK 2 1 2 05 30 1 00 00 2...
Page 230: ...230 1 2 OK OK OK 2 1 2 OK 3 4 17 30 2 3 07 45 17 30 1 2 05 30 07 45 4...
Page 231: ...231 OK OK Ok 2 2 1 00 00 3 4 17 30 22 45...
Page 234: ...234 Ok ITCS 2 1 6 Ok ITCS 27 04 2009 11 15 22 6 C 33 ITCS ITCS...
Page 235: ...235 2 2 A A 6 A P1 2 3 B B 6 B P1 B A...
Page 236: ...236 3 i Ok 3 1 Ok Ok Ok Ok Ok Ok Ok 27 04 2009...
Page 237: ...237 i Ok 3 2 Ok 1 10 6 C 27 04 2009...
Page 238: ...238 7 0 C i Ok 3 3 Ok 1...
Page 239: ...239 i Ok 2 4 4 1 Ok OK 4 2 Ok...
Page 240: ...240 Ok Ok Ok Ok Ok 4 3 OK 11 15 27 04 2009...
Page 241: ...241 4 3 1 Ok 10 k 25 C 1 10 k 25 C 18 0 C 35 C 2 10 k 25 C 0 C 1 2...
Page 242: ...242 4 3 2 Ok On Off 0 5 C PWM 5 5 4 3 3 12 On Off PWM 5 5...
Page 243: ...243 1 5 1 Ok Ok 4 3 4 1 Ok 4 3 5 Ok 24 C 12 F...
Page 244: ...244 4 3 6 OK Ok H C module...
Page 245: ...245 4 4 Ok Ok 100 1 1 0 4 5 Ok 2 Ok 0 50...
Page 246: ...246 5 Ok...
Page 247: ...247 6 Er Lo Hi V _ _ _...
Page 250: ...250 Annexes PROGRAM P1 to P9...
Page 251: ...251...


