


11
1
/
4
Sheet Sander - Owner's Manual
INSTALLING THE DUST BAG ASSEMBLY
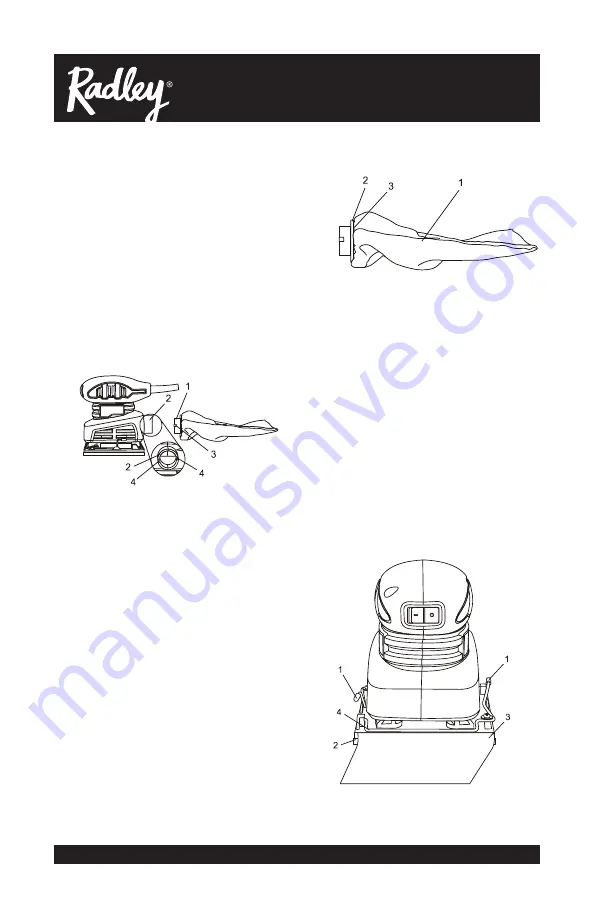
1.
Insert the dust duct bag assembly
sleeve (1) into the dust chute (2) (Fig. 1).
NOTE:
Make sure the tabs (3) insert into
the matching slots (4) in the dust chute.
2. Rotate the dust chute sleeve CLOCKWISE
approximately 15° to lock it into place.
NOTE:
Remove and clean the dust
bag assembly periodically to remove
accumulated dust from the dust bag.
REMOVING & CLEANING THE DUST BAG
1.
Remove dust bag assembly by rotating
the dust bag assembly approximately
15° counter clockwise and pulling it out
of the dust chute in the sander.
2. Remove the dust bag (1) from the
dust bag support (2) by opening the
elasticized end of the dust bag (3) and
sliding it off the dust bag support (Fig. 2).
3. Carefully shake the dust bag with the
elasticized opening pointing downward
to remove the sanding dust.
NOTE:
It is best to perform this
function outdoors over a trash can to
prevent sanding dust from escaping
into the work area.
4. Once the sanding dust is removed
from the dust bag, reinstall the dust
bag onto the dust bag support.
5. Reinstall the dust bag assembly into
the dust chute as noted above.
INSTALLING SANDPAPER
WARNING: Unplug the sander from
the power source before installing or
changing the sandpaper.
1.
Lift up and outward on the front and rear
sandpaper clamp levers (1) at the front
and rear of the backing pad (2) (Fig. 3).
2. Insert one end of the ¼ sheet
sandpaper (3) with grit side up into
the open front sandpaper clamp
(4), making sure it is aligned with
the backing pad. Lift the sandpaper
clamp lever up and inward to lock the
sandpaper into the clamp.
ASSEMBLY AND OPERATING
Fig. 1
Fig. 2
Fig. 3
Summary of Contents for 1262-300
Page 17: ...16 1262 300 EXPLODED VIEW ...