Radiolink Electronic Ltd
9
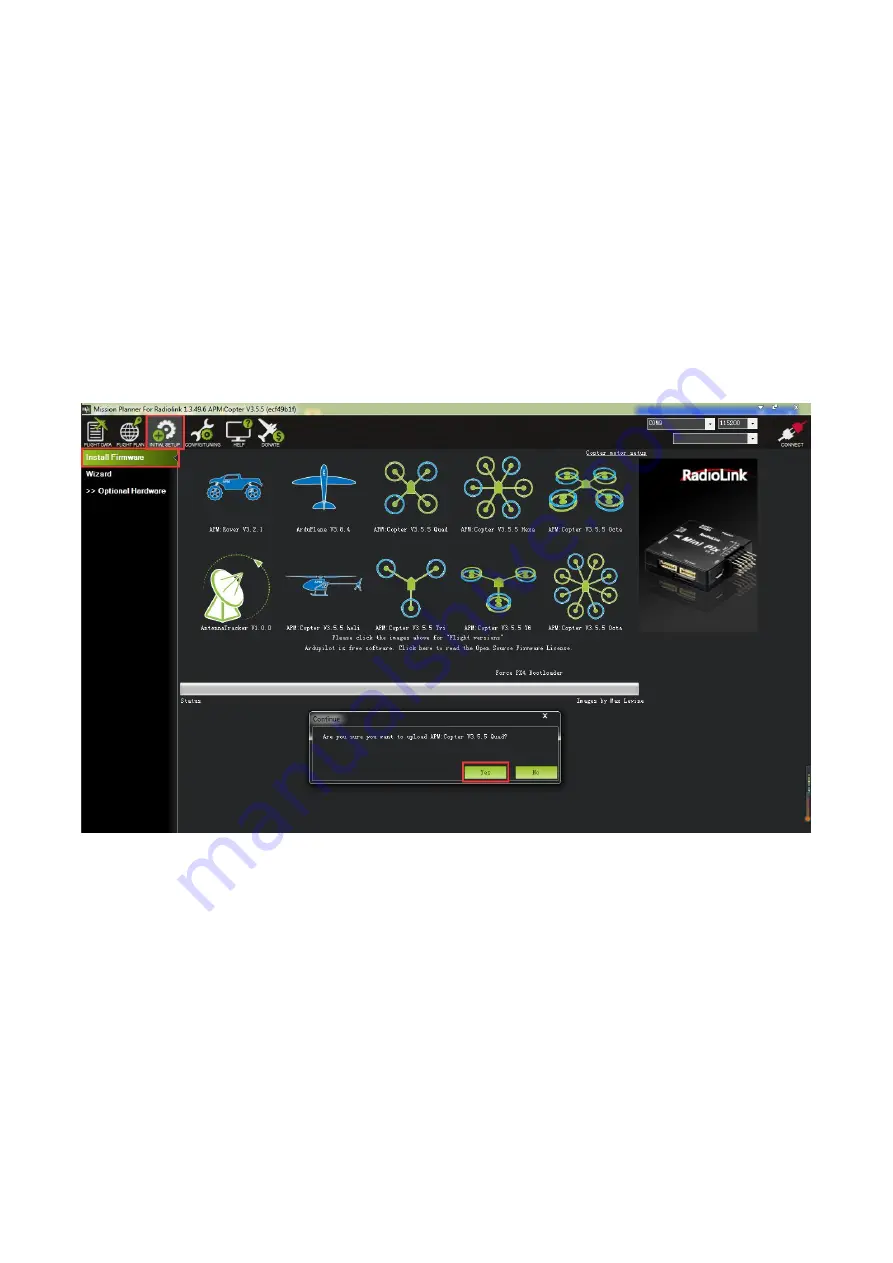
3.1 Download and Install Firmware
Please connect your crossflight and computer via USB cable. Open the Mission Planner to loading the
firmware you need to your crossflight.
Attention:
(1) Do not click CONNECT before you upload the new firmware, please click DISCONNECT if you have
connected successful before. Upload new firmware will be not success if you have connected already.
(2) Please do not upload new firmware by wireless data transmission because it has missed the reset
signal.
(3) If there’s without firmware version number, it means failed upload new firmware. It may cause of
network problem, please re-upgrade firmware until shows the version.
Click “Yes” to install the firmware,
Disconnect the USB cable, click OK and then reconnect USB cable immediately (Pay attention:
crossflight will have failed to connect if there are more than one COM, please remove other equipment if
disconnect).
Red status LED means the crossflight is loading the firmware.
After upgrade firmware 3.1 or after version 3.1, there will be a pop-up warning motors will run at idle speed
after disarmed.
Please click “CONNECT” to connect your crossflight and computer when firmware has installed successful. it
turns to green means connect successful.
Summary of Contents for Crossflight
Page 6: ...Radiolink Electronic Ltd www radiolink com 3 1 crossflight Introduction 1 1 Spare Parts...
Page 7: ...Radiolink Electronic Ltd www radiolink com 4 1 2 Connectors...
Page 43: ...Radiolink Electronic Ltd www radiolink com 40 Octocopter Y6 X8 Tricopter...
Page 62: ...Radiolink Electronic Ltd www radiolink com 59...


