background image

4

IMPORTANT SAFETY INSTRUCTIONS

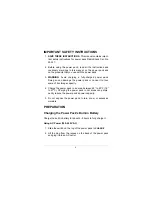
1. SAVE THESE INSTRUCTIONS. This manual contains impor-

tant safety instructions for power pack RadioShack Cat. No.
23-047.

2. Before using the power pack, read all the instructions and

cautionary markings in this manual, on the power pack and
on the products that you use with the power pack.

3. WARNING. Avoid charging a fully-charged power pack.

Doing so can damage the power pack or cause it to lose
some of its storage capacity.

4. Charge the power pack in an area between 65° to 80°F (18°

to 27°C). Charging the power pack in hot areas can perma-
nently reduce the power pack’s power capacity.

5. Do not expose the power pack to rain, snow, or excessive

moisture.

PREPARATION

Charging the Power Pack’s Built-in Battery

Charge the built-in battery for about 4–5 hours to fully charge it.

Using AC Power (100–240V AC)

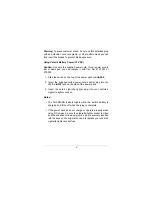
1. Slide the switch on the top of the power pack to 

CHARGE

.

2. Lift the plug from the recess on the back of the power pack

and plug it into an AC outlet.

Summary of Contents for Universal Rechargeable Ni-MH PowerPack for 3/4.5/6/7.5/9 Volt DC...

Page 1: ...1 CONTENTS Preparation 4 Charging the Power Pack s Built in Battery 4 Selecting the Right Adaptaplug 6 Using the Power Pack 7 Replacing the Fuse 8 Care 9 Specifications 10...

Page 2: ...3650 mAh and fully charges in only 4 to 5 hours The amount of run time for the prod uct you are powering depends on the output voltage you select see Page 7 You can charge the power pack at any locat...

Page 3: ...onveniently carry it anywhere WARNING To reduce the risk of fire or shock hazard do not expose this product to rain or moisture CAUTION RISK OF ELECTRIC SHOCK DO NOT OPEN CAUTION TO REDUCE THE RISK OF...

Page 4: ...t to Part 15 of the FCC Rules These limits are designed to provide reasonable pro tection against harmful interference in a residential installation This equipment generates uses and can radiate radio...

Page 5: ...the power pack or cause it to lose some of its storage capacity 4 Charge the power pack in an area between 65 to 80 F 18 to 27 C Charging the power pack in hot areas can perma nently reduce the power...

Page 6: ...CHARGE 2 Insert the supplied coiled power cord s barrel plug into the 12V DC INPUT jack on the side of the power pack 3 Insert the cord s cigarette lighter plug into your vehicle s cigarette lighter...

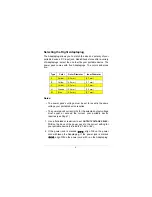
Page 7: ...r pack s current mA for the selected output voltage must equal or exceed the current your portable device requires see Page 7 1 Use a flat blade screwdriver to set OUTPUT VOLTAGE SELEC TOR on the back...

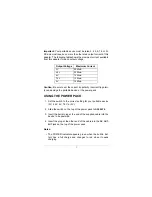
Page 8: ...THE POWER PACK 1 Set the switch to the correct setting for your portable device 3V 4 5V 6V 7 5V or 9V 2 Slide the switch on the top of the power pack to OPERATE 3 Insert the barrel plug at the end of...

Page 9: ...these steps to replace the 2 amp fuse 1 Turn the metal ring counterclockwise then remove the metal ring and tip 2 Remove the fuse If it is blown or broken replace it with a 2A fast blow fuse Caution D...

Page 10: ...ck carefully do not drop it Keep the power pack away from dust and dirt and wipe it with a damp cloth occasionally to keep it looking new Modifying or tampering with the power pack s internal componen...

Page 11: ...m 2000 mA 6V Maximum 1500 mA 7 5V Maximum 1200 mA 9V Maximum 1000 mA Battery Capacity 3650 mAh Full Charging Time 4 5 hours Dimensions 41 3 213 16 1 1 2 Inches 110 72 38 mm Weight Approximately 14 1 o...

Page 12: ...11 NOTES...

Page 13: ...uring the warranty period take the product and the RadioShack sales receipt as proof of purchase date to any RadioShack store Ra dioShack will at its option unless otherwise provided by law a correct...

Reviews: