background image

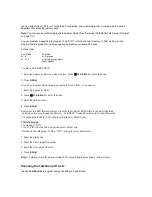
5. Repeatedly press 

or 

to select the size code for the first block, then press 

E/PGM

. The next 

available block appears.


6. Repeat Step 5 until you have selected a size code for each desired block. 


7. Press 

SRCH

. The scanner exits the trunking programming mode, tunes the data channel,   

then searches using the map you programmed.


Note:

 If you select size code S-12, S-13, or S-14, these restrictions apply: 


• S-12 can only be assigned to Blocks 0, 2, 4, or 6 
 
• S-13 can only be assigned to Blocks 0 and 4 
 
• S-14 can only be assigned to Block 0 

 
Since these size codes require multiple blocks, you will be prompted for the next available block   
when you program a fleet map. For example, if you assign Block 0 as S-12, the scanner prompts you 
for 

b2

, the next block available, instead of b1. If you assign Block 0 as S-14, you would not see   

another prompt because S-14 uses all available blocks. 


Programming the Base and Offset Frequencies 

 
To properly track Motorola VHF and UHF trunked systems, 
you must program the applicable base and offset frequencies for each system. 
 
For a list of these frequencies and other scanner information, go to 

www.trunkscanner.com


and other similar frequency resources. 
 

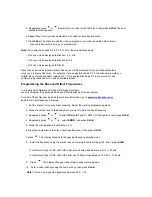
1. Set the scanner for conventional scanning. Select the trunking programming mode. 
 
2. Press the number key of the bank where you want to store the base frequency. 

3. Repeatedly press 

or 


to select 

Motorola Type

  UHF or VHF system

, then press 

E/PGM

.  

4. Repeatedly press 

or 

to  select 

bASE

, then press 

E/PGM

.  

 
5. Press the configuration Block Number (1-3) . 


6. Press the number keys to enter a new base frequency, then press 

E/PGM.


7. press 

. The display changes to the spacing frequency entering mode.   

 
8.  Enter the frequency using the number keys according to the following guide, Then press 

E/PGM.


• For Motorola Type II VHF, (E2-VHF Hi band) use 5kHz steps between 5 kHz – 100 kHz. 
 
• For Motorola Type II UHF, (E2-UHF band) use 12.5kHz steps between 12.5 kHz – 100 kHz. 


9. Press 

  . The display changes to the offset channel entering mode. 

 
10.    Enter a offset channel using the number keys, then press 

E/PGM. 


Note:

 Your can only input the frequency between 380 – 759. 

Summary of Contents for PRO-528

Page 1: ...Owner s Manual PRO 528 1000 Channel Handheld Trucking Scanner PRELIMINARY DRAFT ...

Page 2: ... xx Turning on the Scanner and Setting Squelch xx Storing Known Frequencies into Channels xx Searching For and Temporarily Storing Active Frequencies xx Chain Search xx Direct Search xx Service Bank Search xx Search Skip Memory xx Scanning the Stored Channels xx Manually Selecting a Channel xx Special Features xx Delay xx Turning Channel Storage Banks On and Off xx Locking Out Channels xx Priority...

Page 3: ... IDs xx Unlocking a Single Talk Group ID xx Unlocking All Talk Group IDs xx Using Trunk Scanning Scan Delay xx Monitoring Talk Group IDs xx Using Talk Group ID Lists xx Manually Storing Talk Group IDs in Talk Group ID Lists xx Entering EDACS Partial Talk Groups xx Scanning the Talk Group ID Lists xx Deleting a Stored Talk Group ID List xx Priority Talk Group ID Scanning xx Scanning Type I and Hybr...

Page 4: ...essing a single button you can quickly search those frequencies most commonly used by public service and other agencies without tedious and complicated programming This scanner gives you direct access to over 37 000 exciting frequencies including police and fire departments ambulance services and amateur radio services and you can change your selection at any time Your scanner also has these speci...

Page 5: ...ter Disconnect Tone Detect the scanner automatically tunes to the trunking data channel when it receives a disconnect transmission You can turn this off so you can continuously monitor a channel with a weak transmission where conversations are often disconnected Manual Access lets you directly access any channel Liquid Crystal Display makes it easy to view and change programming information Displa...

Page 6: ...Band 108 136 9875 12 5 Aircraft Band 137 144 5 Military Land Mobile 144 148 5 2 m Amateur Band 148 162 5 VHF Hi Band 162 174 5 Federal Government 216 224 9950 5 1 5 m Amateur Band 400 406 6 25 Miscellaneous 406 420 6 25 Federal Government Land Mobile 420 450 6 25 70 cm Amateur Band 450 470 6 25 UHF Standard Band 470 512 12 5 UHF T Band 806 956 12 5 Public Service 800 Band except cellular band 1240...

Page 7: ...illegal transmissions in compliance with the law which requires that scanners be manufactured in such a way as to not be easily modifiable to pick up those transmissions Do not open your scanner s case to make any modifications that could allow it to pick up transmissions that it is not legal to listen to Doing so could subject you to legal penalties We encourage responsible legal scanner use Prep...

Page 8: ...geable batteries Before you use Ni MH batteries you must charge them The scanner has a built in circuit that lets you recharge Ni MH batteries while they are in the scanner To charge the batteries set ALKALINE JACK Ni MH to NI MH install the batteries in the scanner and connect an external AC or DC adapter to the scanner s POWER jack see Using AC Power on Page XX or Using Vehicle Battery Power on ...

Page 9: ...scanner before you connect it to AC power When you finish disconnect the adapter from AC power before you disconnect it from the scanner Follow these steps to use the scanner on AC power 1 Turn VOLUME OFF counterclockwise until it clicks to make sure the power is turned off 2 Insert the Adaptaplug into the AC adapter s cord so it reads TIP Insert the Adaptaplug into the scanner s POWER 9V 300mA ja...

Page 10: ...lled and ALKALINE JACK NI MH is set to NI MH the adapter powers the scanner and recharges the installed batteries at the same time Note If the scanner does not operate properly when you use a DC adapter unplug the adapter from the cigarette lighter socket and clean the socket to remove ashes and debris CONNECTING THE ANTENNA To attach the supplied flexible antenna to the connector on the top of yo...

Page 11: ... listen to a continuous broadcast Even though some earphones headphones let you hear some outside sounds when listening at normal volume levels they still can present a traffic hazard CONNECTING AN EXTENSION SPEAKER In a noisy area an optional extension speaker positioned in the right place might provide more comfortable listening Plug the speaker cable s 1 8 inch 3 5 mm mini plug into your scanne...

Page 12: ...OLD RESUME Stops and resumes searching SCAN MANUAL Scans the stored channels and scan lists Stops scanning and lets you directly enter a channel number or frequency manually stores talk group IDs in scan lists E PGM Stores frequencies into channels programs the trunking frequency fleet map and ID memories TRUNK Turns trunk tracking on and off and stores trunked frequencies SRCH Starts a chain sear...

Page 13: ...marine band in service mode 3 AIR Lets you select the air band in service mode 4 POL Lets you select the police band in service mode WX Starts weather search and stops it activates skywarn function Turns the Signal Stalker function on or off A LOOK AT THE DISPLAY The display has indicators that show the scanner s current operating status The display information helps you understand how your scanne...

Page 14: ...lect a channel and talk group you locked out appears when you lock the keypad alerts you when the battery power gets low appears when you select Skywarn channel PGM appears while you store a frequency into a channel while you enter a frequency range during a chain search or when you program trunking frequencies fleet maps or ID memories while trunking or appears during a chain direct or service se...

Page 15: ... you turn it on 1 Turn SQUELCH fully counterclockwise 2 Turn VOLUME OFF clockwise until it clicks and you hear a hissing sound 3 If the scanner is scanning press SCAN MANUAL to stop scanning then turn SQUELCH clockwise until the hissing stops STORING KNOWN FREQUENCIES INTO CHANNELS You can locate and store specific frequencies into channels for later use To assist you in locating a desired frequen...

Page 16: ...e 3 Select the bank where you want to copy move the frequency The smallest empty channel number and 000 0000 flashes on and off over the frequency you want to store 4 Press or to move to the channel where you wish to store the frequency 5 Press E PGM to enter the frequency and return to the program mode 6 Pressing CLR DELAY cancels the programming If there is no empty channel the scanner automatic...

Page 17: ...CH appears Note If you enter an invalid frequency the scanner displays Error Press CLR DELAY 2 When the scanner stops on a transmission quickly press either HOLD RESUME to stop searching and listen to the transmission HOLD appears PGM to store the displayed frequency into memory 3 To release the hold and continue searching press HOLD RESUME Note To step through the frequencies while HOLD appears p...

Page 18: ...cy during a chain direct and service search and Signal Stalker The scanner stores the frequency in memory and automatically resumes the search To clear a single frequency from skip memory so the scanner stops on it during a chain direct and service search and Signal Stalker 1 Press HOLD RESUME to stop the search 2 Press or to select the frequency L O appears 3 Press L O L O disappears To clear all...

Page 19: ...g mode PGM appears Or during scanning if the radio stops at a channel you want to listen to press HOLD RESUME Press HOLD RESUME to resume automatic scanning Special Features DELAY Sometimes a user might pause before replying to a transmission To avoid missing a reply on a specific channel the scanner automatically program a 2 second delay into any channel or frequency You can monitor the channel f...

Page 20: ... until the scanner beeps twice PRIORITY The priority feature lets you scan through the channels and still not miss important or interesting calls on specific channels You can program one stored channel in each bank as a priority channel If the priority feature is turned on as the scanner scans the bank it checks that bank s priority channel for activity every 2 seconds The scanner automatically de...

Page 21: ...o the wired programming mode PGM and WirEd appear Then send the data from the PC Data frame numbers being received appear 6 When the scanner has successfully received all data End appears If the scanner received an error while receiving data End d Err and its frame number appear If the scanner received a communication error while receiving data C Err indicates the packet number where the error occ...

Page 22: ...e scanner so the auto backlight turns on for about 5 seconds when the scanner receives signals If you press a key except within 5 seconds the display remains lighted for more than 15 seconds To turn auto backlight display on or off 1 Press MENU 2 Repeatedly press or to select AutoLit then press E PGM 3 Repeatedly press or to select ON or OFF then press E PGM 4 Press MENU to exit the menu mode CHAN...

Page 23: ...radio receives a data signal and data skip is selected the signal is ignored To turn on the data skip feature 1 Turn off the priority feature if it is on see Priority on Page XX 2 Press MENU 3 Repeatedly press or to display dAtA S then press E PGM 4 Repeatedly press or to select OFF or ON then press E PGM 5 Press MENU to exit the menu mode Note This feature does not apply to the air band and weath...

Page 24: ...county SAME uses a standard established by the US Census bureau called FIPS The format of a FIPS code is PSSCCC where P area subdivision 0 entire area SS State code 00 all states CCC County code 000 all counties For example the FIPS code for Tarrant County Texas is 048439 48 Texas 439 Tarrant County Some counties are further subdivided in which cases the first digit will be 0 for all subdivisions ...

Page 25: ... observers A Skywarn group exists in virtually every US county with a signifi cant population During inclement weather reports made by Skywarn observers include information about pea sized and larger hail wind and wind gusts 40 MPH and greater heavy rainfall lightning cloud to cloud and especially cloud toground wall clouds seen in severe thunderstorms which spawn tornadoes severe lowering of a wa...

Page 26: ...many transmission sources such as pager radio transmitters multiuse radio towers traffi c control devices etc Signal Stalker might not fi nd the transmission you are searching for or it might find A transmission other than the one you are searching for You can screen unwanted transmissions by pressing L O to lock them out See Frequency Skip for more information Signal Stalker cannot detect satelli...

Page 27: ...earch range or program mode appears Every 2 seconds the scanner searches for frequencies in the range you specified in Setting the Signal Stalker Options When the scanner finds a frequency it sounds the alert you specified in Setting the Signal Stalker Options and Found flashes Press any key to confirm the displayed frequency Press HOLD RESUME to resume scanning To turn on Signal Stalker and turn ...

Page 28: ... scanner from locking on the control channel reliably If it is set too low it will slightly delay finding the control channel The best setting is the same as for conventional reception and is critical for monitoring trunked systems PROGRAMMING TRUNKED FREQUENCIES Follow these steps to select program and store trunked frequencies 1 If you are not in conventional programming mode press E PGM beforeh...

Page 29: ...anning the Talk Group ID Lists on Page XX While scanning conventional frequencies follow the steps below to switch to the trunk mode after the scanner finds the data channel 1 Press TRUNK The scanner begins scanning both trunking and conventional banks 2 Hold down TRUNK for about 1 second The scanner switches to the trunk scan mode 3 Hold down TRUNK for about 1 second again The scanner switches to...

Page 30: ...eet map for that system you might have to turn off status bit ignore in order to determine the proper fleet map Important If you are scanning any system other than a Motorola Type I system be sure status bit ignore is set to ON or you will miss some transmissions Follow these steps to turn status bit ignore on or off 1 If you are not in conventional programming mode press E PGM beforehand Press TR...

Page 31: ... that ID 3 Press HOLD flashes then the scanner monitors the ID 4 Press SRCH to resume searching for a data channel trunk scanning Locking Out Talk Group IDs Many municipal and commercial services use trunk systems to transmit signals from such devices as water meter transmitters door alarms and traffic signals Some signals are encrypted as well and most are not voice signals Since all these are as...

Page 32: ...d SRCH begins to flashing All active group IDs appear in quick succession To stop monitoring IDs press again Note When you monitor IDs any IDs you have locked out also appear USING TALK GROUP ID LISTS When you program trunked frequencies into a bank see Storing Trunked Frequencies on Page XX your scanner sets up ten scan lists for that one bank in which you can store your favorite IDs Each list ca...

Page 33: ... fleet number and subfleet number 4 Press E PGM To enter a Partial EDACS ID 1 Enter the agency number you want to store Press CLR to enter the dash 2 Press E PGM Or you can program all the talk group numbers for one fleet of an agency 1 Enter the agency number 2 Press CLR to enter the dash 3 Enter the fleet number 4 Press E PGM Note Remember the AFS format allows you to enter full or partial EDACS...

Page 34: ...can program all the talk group numbers for one fleet of an agency 1 Enter the agency number 2 Press CLR DELAY to enter the dash 3 Enter the fleet number 4 Press E PGM Remember the AFS format allows you to enter full or partial EDACS IDs for powerful flexibility in all modes Be sure to read the section An EDACS Trunked System to learn how this works The scanner defaults to AFS talk group displays f...

Page 35: ...EMS Your scanner is preset to scan Type II system IDs When you scan trunked frequencies each Type II user ID you see appears as an even number without a dash example 2160 Your scanner can also scan Type I trunked systems Each Type I ID appears as a three or four digit number followed by a hyphen followed by a one or two digit number example 200 14 If you notice a mix of odd and even user IDs examp...

Page 36: ...S4 4 S4 4 S4 4 S12 5 S4 5 S4 5 S12 6 S4 6 S4 6 S12 7 S4 7 S4 7 S12 E1P7 E1P8 E1P9 Size Size Size Block Code Block Code Block Code 0 S10 0 S1 0 S4 1 S10 1 S1 1 S4 2 S11 2 S2 2 S0 3 S4 3 S2 3 S0 4 S4 4 S3 4 S0 5 S4 5 S3 5 S0 6 S4 6 S4 6 S0 7 S4 7 S4 7 S0 E1P10 E1P11 E1P12 Size Size Size Block Code Block Code Block Code 0 S0 0 S4 0 S0 1 S0 1 S0 1 S0 2 S0 2 S0 2 S0 3 S0 3 S0 3 S0 4 S0 4 S0 4 S0 5 S0 5...

Page 37: ...of the desired map example E1P7 The preprogrammed fleet map appears 5 Press E PGM The scanner return to fleet map list item Note When the scanner searches for transmissions you see Type I fleet and subfleet IDs such as 100 12 100 9 000 12 or 400 8 How do you know if the preset map you selected is correct Listen to find out if you are following complete conversations If not try another preset map P...

Page 38: ...nd UHF trunked systems you must program the applicable base and offset frequencies for each system For a list of these frequencies and other scanner information go to www trunkscanner com and other similar frequency resources 1 Set the scanner for conventional scanning Select the trunking programming mode 2 Press the number key of the bank where you want to store the base frequency 3 Repeatedly pr...

Page 39: ...hether the signal is present or not 1 Select the trunking programming mode and the bank you want to change 2 Press or to select Motorola Type 2 or Motorola Type 1 then press E PGM 3 Press or to select Eot then press E PGM 4 Press or to select Eot ON or Eot OFF then press E PGM Note If you set the squelch so you hear a hissing sound the scanner will remain on the voice channel even when a disconnec...

Page 40: ...ur scanner Scan another transmission The data frequency is missing Find the data frequency see Storing Trunked Frequencies on Page XX The scanner does not track a trunked system The system you are trying to track is a Type I system and the scanner is set to scan Type II systems Set the scanner to receive Type I trunked frequencies See Scanning Type I and Hybrid Trunked Systems on Page XX Scanner i...

Page 41: ...ts memory Note Do not turn off the scanner again until CLEAr stops flashing Otherwise the scanner might not clear its memory properly Follow these steps to restore the 150 preprogrammed frequencies stored in the private bank 1 Make sure your scanner is turned off 2 While holding down 3 and E PGM turn on the scanner After several seconds the scanner restores the frequencies Specifications Frequency...

Page 42: ...nce 50Ω Audio Output 270 mW maximum Built in Speaker 17 16 Inches 36 mm 8Ω Dynamic Type Power Requirements 4 AA Alkaline Batteries 6 0 VDC or 4 AA Rechargeable Ni MH Batteries 4 8 VDC or Optional AC Adapter or Optional DC Adapter Current Drain Squelched 80 mA Full Output 160 mA Dimensions HWD 6 x 2 3 5 x 1 3 4 153 x 66 x 44 mm Weight without antenna batteries belt clip 8 4 oz 238 g Specifications ...

Reviews: