background image

©

2003 RadioShack Corporation.

All Rights Reserved.

RadioShack and RadioShack.com

are trademarks used by

RadioShack Corporation.

OWNER’S MANUAL —
Please read before using this equipment.

www.radioshack.com

SM

What’s Included

AC Adapter — power the Travel Theater from a
standard AC outlet.

DC Adapter — power the Travel Theater from your
vehicle’s cigarette lighter socket.

Carrying Case — protects the Travel Theater and
enables convenient carrying.

Two Pairs of Stereo Earbuds — for private listening.

Audio/Video Cables — connect the Travel Theater
to a TV, amplifier, video game, or camcorder.

RF Antenna Adapter — connect cable TV or an
external antenna for viewing regular TV.

Shoulder Strap — Attaches to the carrying case.

Four Straps for Vehicle Installation — install the
Travel Theater in your vehicle.
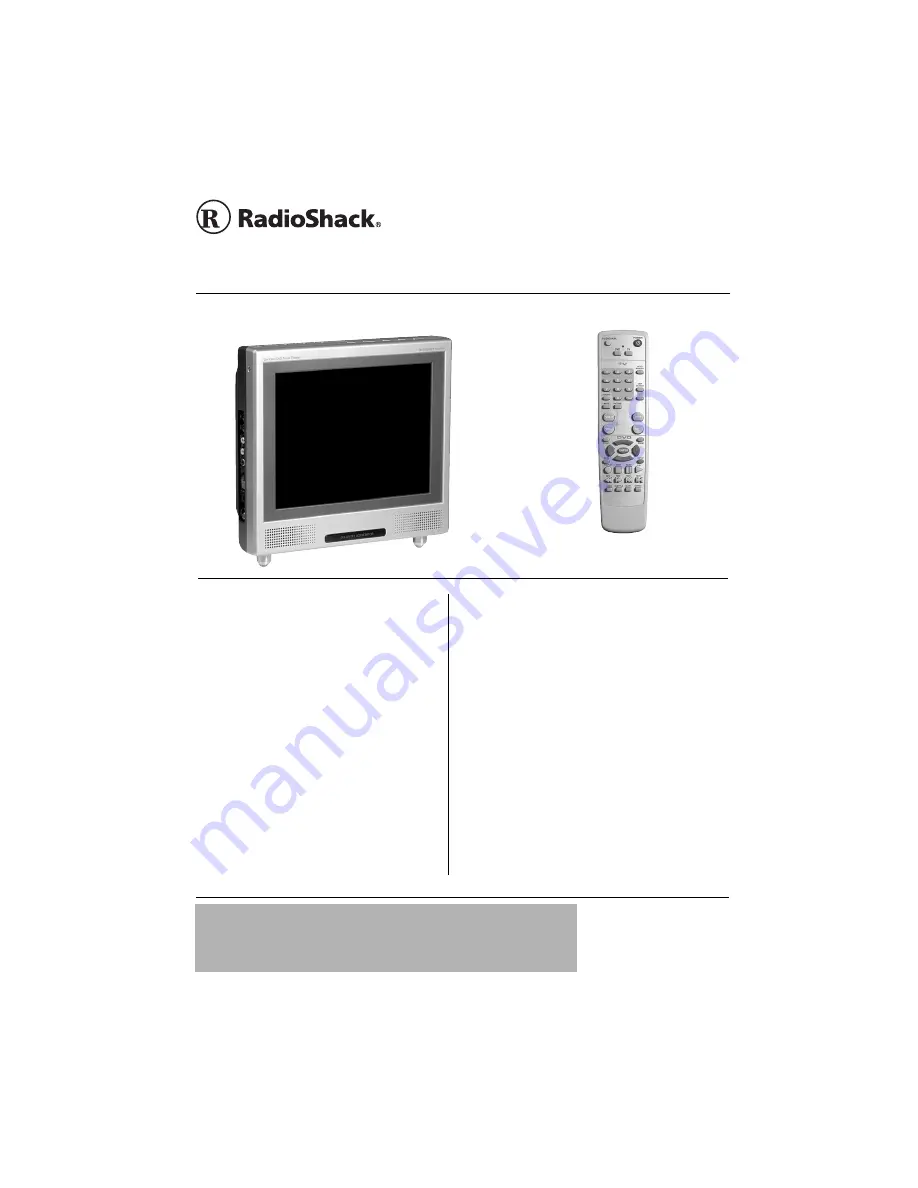
Remote Control

10.4-Inch Flat Liquid Crystal Display (LCD) —
delivers higher resolution and brighter colors
than standard LCD screens.

Fluorescent Backlight — illuminates the LCD
so you can watch the TV in the dark or in low-
light conditions.

Automatic Electronic Tuning System —
scans VHF and UHF bands and locks in your
favorite stations at the touch of a button.

Dual speakers – enjoy stereo sound from the
DVD player.

10.4” Go Vision

DVD Travel Theater

!

 IMPORTANT 

!

If an icon appears at the end of a paragraph, go to the box on that page
with the corresponding icon for pertinent information.

!

 —

Important

Ô

— Note

— Caution

16-3314

Summary of Contents for 16-3314

Page 1: ...nect cable TV or an external antenna for viewing regular TV Shoulder Strap Attaches to the carrying case Four Straps for Vehicle Installation install the Travel Theater in your vehicle Remote Control...

Page 2: ...Travel Theater yourself Refer all servicing to qualified service personnel The lightning symbol is intended to alert you to the presence of uninsulated dangerous voltage within this product s enclosur...

Page 3: ...o disassemble the housing Refer servicing to qualified personnel Protect the AC adapter cord from being walked on or pinched particularly at plugs and the point where they exit from the apparatus Do n...

Page 4: ...annels dVOLUME e Press to decrease or increase volume PICTURE Press repeatedly to adjust the on screen picture contrast brightness tint and color TV AUX Press repeatedly to toggle between TV and AUX m...

Page 5: ...ck and insert the cable s red plug to the AUDIO R jack to hear sound from the external connected device A V Output Input Set to OUTPUT to output the Travel Theater s A V signal to external A V equipme...

Page 6: ...TE Press while in Erase mode to erase a TV channel Press while in Write mode to store a TV channel CH and CH Press to scroll upward or downward through external antenna or Cable TV channels MENU Press...

Page 7: ...ning the velcro strip to the panel 3 Attach one of the supplied straps to the carrying case and hang the strap over the back of the headrest 4 Attach one strap to each loop on the bottom of each side...

Page 8: ...ect the supplied DC adapter cord s barrel plug to the Travel Theater s DC 12V jack 2 Connect the other end of the adapter to the vehicle s cigarette lighter socket Cautions You must use a power source...

Page 9: ...igh volume levels Extended high volume listening can lead to permanent hearing loss Once you set the volume do not increase it Over time your ears adapt to the volume level so a volume level that does...

Page 10: ...nect the yellow plug s other end to the TV s VIDEO IN jack 2 Connect the supplied audio video cable s white plug to your Travel Theater s AUDIO L jack Connect the other end to your TV or receiver s Au...

Page 11: ...ack 2 Connect the audio video cable s red plug to your device s right output socket Connect the other end of the cable to the Travel Theater s AUDIO R jack 3 Connect the supplied audio video cable s y...

Page 12: ...it supports the Travel Theater on a flat surface 3 Connect the supplied AC adapter s barrel plug to the Travel Theater s DC 12V jack 4 Insert the AC plug to a standard AC outlet Cautions You must use...

Page 13: ...cs LOADING AND PLAYING A DISC 1 Press POWER to turn on the Travel Theater 2 Press TV DVD AUX on the remote until the DVD logo appears on screen indicating DVD mode 3 With the disc s label facing front...

Page 14: ...channels the TV stops only on channels that were stored into memory If SKIP is off the TV searches and stops at all available channels 6 To manually store a TV channel tune to that channel and press...

Page 15: ...DISPLAY to view the desired option DISPLAY OFF appears when the Info menu is off Setup Main Menu The Setup Main Menu can be accessed when a disc is not in the player It allows you to specify general...

Page 16: ...o language 1 During disc playback press AUDIO The audio language banner appears if the disc is programmed for a different audio language Otherwise appears 2 Continue pressing AUDIO until the desired l...

Page 17: ...o a comfortable listening level 5 To remove the CD from the player press EJECT SKIPPING TRACKS Press NEXT J to go to the next track and PREV F to go to the previous track USING REPEAT There are two re...

Page 18: ...ng the track SKIPPING TRACKS 1 Press NEXT J to skip to the beginning of the next song 2 Press PREV F to skip to the beginning of the previous song TO REPEAT AN MP3 TRACK While a disc is playing press...

Page 19: ...g NEXT J or PREV F 5 Press STOP Dto view the JPEG submenu pages Use e d f or g and ENTER to highlight and select the desired function To return to the JPEG main menu press STOP D TO REPEAT A JPEG PHOT...

Page 20: ...bottom of the screen appears WIDE When the Travel Theater is connected to a wide screen TV a wide picture is then shown on the full screen 4 Select MAIN PAGE using eor d on the remote 5 Press ENTER to...

Page 21: ...r d on the remote 2 Press g to access the parental options 3 Select the desired parental level using eor d 1 KID SAF 2 G General Audiences all ages 3 PG Parental guidance suggested 4 PG 13 Parents str...

Page 22: ...eor d on the remote 2 Press g to access the default options 3 Press ENTER to reset the Travel Theater to factory preset mode Main Page Select MAIN PAGE using eor d on the remote Press ENTER to return...

Page 23: ...re restricts this action The disc s software does not support that feature The feature is not available at the moment You have requested a title or chapter that is out of range Thepicture is distorted...

Page 24: ...t TV DVD AUX to TV mode Make sure your Travel Theater is connected properly Make sure all cables are securely inserted into the appropriate jacks No picture and no sound If you use an AC or DC adapter...

Page 25: ...Do not touch disc surfaces Hold by the edges or by one edge and the hole in the center Do not affix labels or adhesive tape to label surfaces Don t scratch or damage the label Do not use damaged crac...

Page 26: ...equipment off and on the user is encouraged to try to correct the interference by one or more of the following measures Reorient or relocate the receiving antenna Increase the separation between the e...

Page 27: ...Camera TV or Stereo Amplifier INPUT OUTPUT Switch Slide Type Speaker Built In Stereo Speakers Maximum 2 Watts per Channel Headphones Jacks Two 2 Jacks 1 8 inch 3 5mm Operation Temperature 41 F to 104...

Page 28: ...defect during the warranty period take the product and the RadioShack sales receipt as proof of purchase date to any RadioShack store RadioShack will at its option un less otherwise provided by law a...

Reviews: