


A B
2-Trial fit each part before gluing . Be certain that there are no gaps.
If the parts will join, but with a gaps, sand or trim the parts a little at a
time until the parts meet exactly with no gaps.
3-Check for the correct dihedral angle
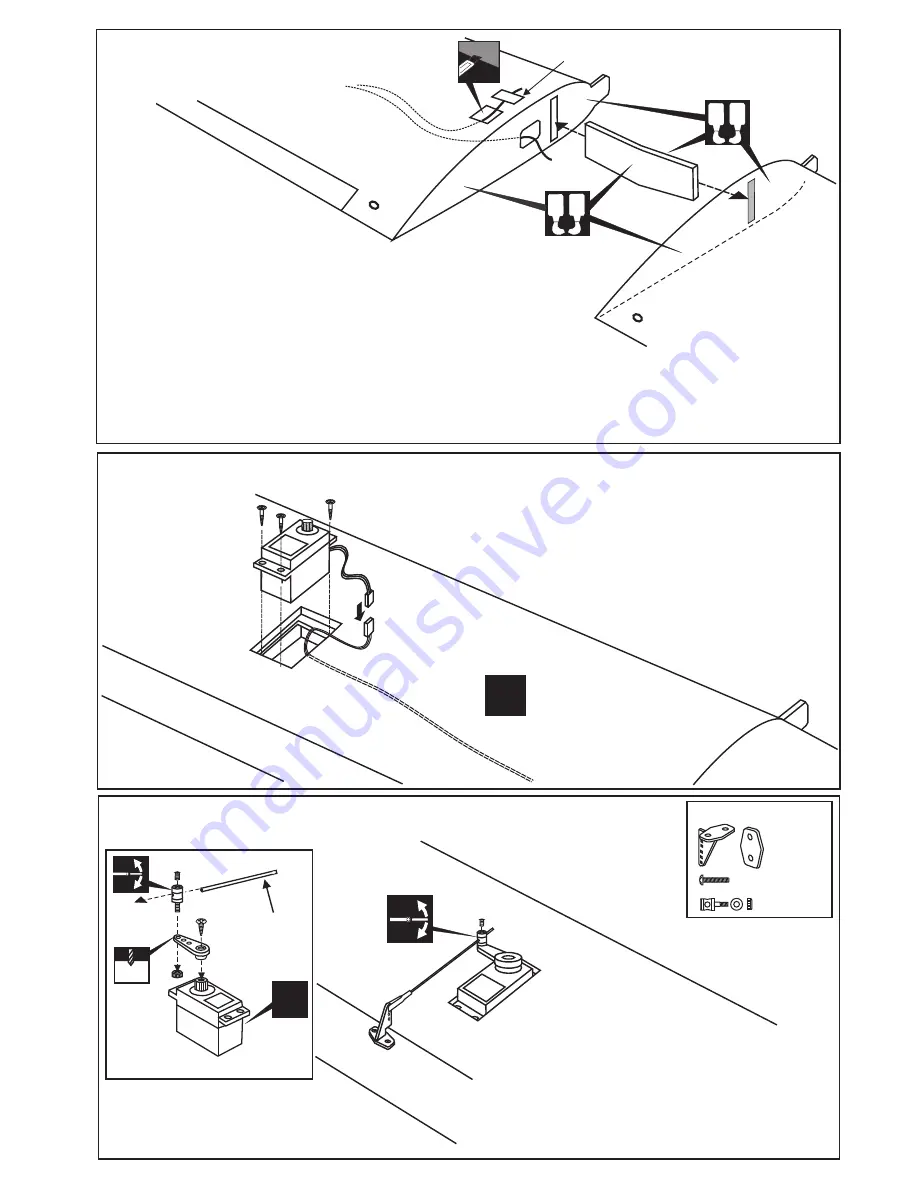
Carefully slide the wing halves together, ensuring that they are accurately aligned, Firmly press the two
halves together, allowing the excess epoxy run out. Clean off the excess epoxy
4-When joining the wing halves it is extremely important to use plenty of epoxy (30 minutes epoxy).
WING TOP-VIEW
A B
IMPORTANT:
Please do not clean off the excess epoxy on the wing with strong solvent or pure alcohol, only use
kerosene to keep the colour of your model not fade.
Extension cord
Cut away the covering of the wing bottom where the
aileron servo goes.
Install the servo extension cord in to the wing.
Install the aileron servo on the servo mount.
AILERON SERVO
WING BOTTOM-VIEW
WING BOTTOM-VIEW
Attach the control horn on the aileron with 2x15mm screws.
Screw the clevies halfway on the theared end of the aileron
push rod. Attach the push rod to the aileron horn. Mark the
position where the push rod will attach to the servo arm.
Cut off the excess length of the push rod
Plastic control horn
..........2
...................4
..........2
Included with the
radio set.
X
X
3mm set Screw
2 mm
Aileron pushrod
D=5/64”(2mm)
Ensure that the servo is centered. If necessary, adjust the
metal clevis so the aileron is also in the neutral position.
Thread for aileron servo extension
Cut the hole for the aileron servo extension exit.
1-Cut the hole on the top of the
wing halves (left and right) for the
aileron servo extension exit. Remove
the thread out of the hole and secure it
in place with adhesive tape.
Adhesive tape
1
2
3