background image

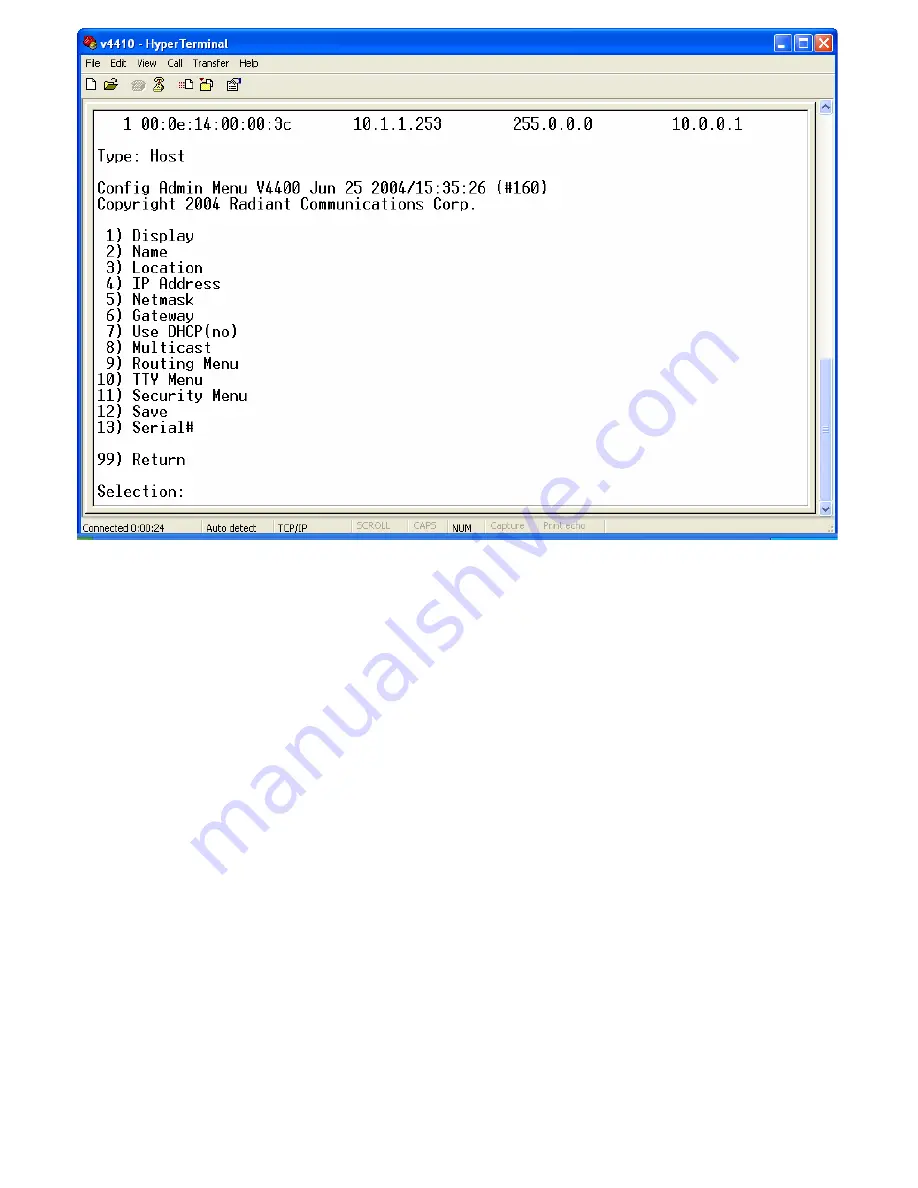
4. Before exiting HyperTerminal, you can assign an Administrative Username and Password to the 

V4410. 

a. From the Main Admin Menu, select “5” Config Menu> “11” Security Menu. 

b. Enter the items that you would like to modify. When you modify the Password, your entry will be 

visible in plain text and you will be asked to confirm your entry. When finished, you must save 
your settings in order for them to take effect. Select “3” and press ENTER. 

5. After saving your changes, go up to the top-level Main Admin Menu (99 to go up) and select “6” to issue 

a Reset. The V4410 should reset and the Menu should appear on your console window again when the 
reboot is complete. Your V4410 should be ready to test. 
NOTE: The values that you enter and save in this menu will be stored even if the unit is rebooted. If at 

any point your V4410 becomes unusable or has undesirable settings, it can be restored to a 
factory default state by pressing and holding in the blue reset button on the front of the unit for 
3 seconds. 

6. Exit HyperTerminal and disconnect your Null Modem Cable if no longer needed.  


Starting a Video Stream 

1. Select Connections to add, modify, or control a connection. 
2. Enter the IP Address of the V4410 that you are connecting to and assign a name to your 

connection, renaming the existing default connection. 

3. In the Basic and Advanced dialog boxes, enter the desired configuration setting for the unit 

including the Stream Type, then click Save. 

4. Click Start to begin the video stream. 


8

Summary of Contents for V4400 Series

Page 1: ...RADIANT COMMUNICATIONS CORP REV 0204 Radiant Communications Corporation V4400 MPEG 2 Digital Video Audio Encoder Decoder...

Page 2: ...10 4 Starting a Video Stream 8 Appendix A Embedded Web Server Configuration 9 Appendix B Console Menu Configuration 11 Appendix C Special PC Configuration 15 V4420 Decoder Set up and Installation 18 M...

Page 3: ...g that one encoder can transmit to any number of network locations using either PC s or decoders UNPACKING THE UNIT Remove all materials from the packing box and confirm receipt of the following V4410...

Page 4: ...mended that you assign a static IP Address to your V4410 1 In order to configure your V4410 you will need to ask your IT Networking department for the following information a Does your network use DHC...

Page 5: ...name and an icon for this connection click OK c Specify the port that you are connected to on your PC typically COM1 click OK d Configure the Port Settings as shown next to communicate with the V4410...

Page 6: ...u select 5 and press ENTER to open the Config Menu f Once DHCP is turned off you will want to modify options 4 7 Record each value that you enter as you will need those values when you go to start con...

Page 7: ...g When you are finished configuring options select 12 to Save your settings and 99 to Return to the Main Admin Menu 7...

Page 8: ...is complete Your V4410 should be ready to test NOTE The values that you enter and save in this menu will be stored even if the unit is rebooted If at any point your V4410 becomes unusable or has undes...

Page 9: ...cify the address of the unit in the browser location bar 2 This will bring up the main configuration page which will allow you to start stop streams In the upper middle portion of the page we can see...

Page 10: ...he unit without connecting the Ethernet give the unit enough time to boot and fail DHCP then the unit will default to this configured address and will respond as such when the Ethernet cable is eventu...

Page 11: ...ad character before you type the password To get around this you will need to insert an extra junk character for each line of communication with the menu after the username is entered or use any other...

Page 12: ...Select a name and an icon for this connection then hit OK Choose the appropriate communications port the one the cable is connected to then hit OK 12...

Page 13: ...Configure the settings so the match the above then hit OK 13...

Page 14: ...modify options 4 7 Once these options have been set to the desired values you should invoke configuration Submenu item 12 Save which will store the new settings into the flash so they will be stores...

Page 15: ...of your PC 3 Go to the control panel on your PC and select the Network Connections Icon 4 Use your right mouse button to select your specific network connections and choose properties 5 A Dialog Box...

Page 16: ...member otherwise you will need each of the above settings 8 After recording the current valid values you will want to change them to something on the 192 168 1 0 Network You can use the settings in th...

Page 17: ...ing a DHCP server then the unit should negotiate an IP address from it 12 Once booted you should be able to configure the V4410 using any of the configuration techniques discussed in this document Onc...

Page 18: ...option selected The main menu page consists of Linux STB Management Choose an option Network configuration Browser set up Proxy set up Channels Trusted domains Software Hardware Information Smart Card...

Page 19: ...Port Gopher Proxy Port Don t use proxy for the following Channels are a means whereby a variety of different sources of information such as web pages multicast or RTSP based video can be selected fro...

Page 20: ...T IEEE 802 3 Protocols Multicast IGMP UDP IP MECHANICAL 1U Rack 19 x 1 75 x 12 POWER 1U Rack 95 130VAC or 200 240 VAC COMPRESSION MPEG 2 4 2 0 NTSC 352 X 240 CIF 352 X 480 1 2 D1 480 X 480 2 3 D1 PAL...

Page 21: ...NOTES 21...

Reviews: