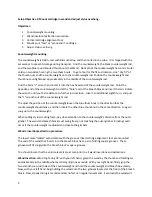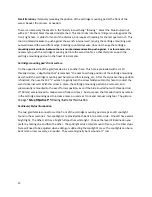
Small iterations
: Iteratively tweeking the position of the cartridge mounting pad at the front of the
wand. Repeat the process, as needed.
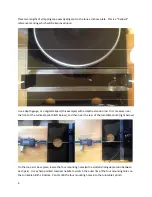
There is an accessory that assists in the final stylus overhang “focusing”. Select the blue knurled nut
with a (2”, 50mm) black threaded rod attached. This tool slides into the cartridge mounting pad at the
front, right hole. It slides for most of the distance, but requires threading for the last quarter inch. This
tool is rotated clockwise to push against the wand’s internal wall, moving the cartridge mounting pad
outward toward the wand front edge. Rotating counterclockwise, does not change the cartridge
mounting pad’s position, because there is no internal wand wall to push against. For this reason, it is
mounting pad’s position, because there is no internal wand wall to push against. For this reason, it is
necessary to push the cartridge mounting pad into the wand too far, so that this tool can push the
cartridge mounting pad out in the finest of increments.
Cartridge mounting pad’s front surface
On the opposite side of the gold female pins is another hole. This hole is preloaded with a small
threaded screw, a depth-stop that “remembers” the exact overhang position of the cartridge mounting
pad, should the cartridge mounting pad be removed for cleaning, etc. After the stylus overhang position
is finalized, then use the M2 “L” wrench to gently turn the screw hidden within this hole to contact the
wand’s internal wall. With this screw in place, the cartridge mounting pad can be removed, and
subsequently remounted to the exact former position, even if the blue knurled nut with threaded rod
(2”,50mm) was removed to, reduce wand front-end mass. Dual purpose: the threaded rod may remain
in the cartridge mounting pad to increase mass, or used as a front-end manual cuing tool. The picture
on page “
Setup Objective 3
” following illustrates this situation.
on page “
Setup Objective 3
” following illustrates this situation.
Cantilever/Stylus Illumination
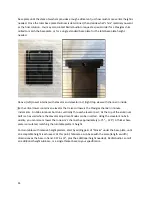
The two gold female connectors at the front of the cartridge mounting pad accept an LED spotlight
found in the accessories. Two spotlights are provided both bent into a semi-circle. One LED has a warm
bright light. The other LED has a bright full spectrum white light. Choose the level of illumination you
prefer by testing one and then the other. The spotlight adds a small amount of mass, so the total stylus
force will need to be adjusted when adding or subtracting the spotlight’s mass. The spotlights can be re-
bent more or less severely, as needed. They were originally bent around a ½” rod.
12


