


11 / 32
User Manual
Rev. 1.
0
- 15/12/06
PJ500C-LCD & PJ1000-LIGHT
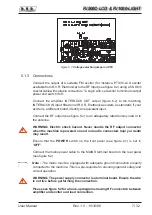
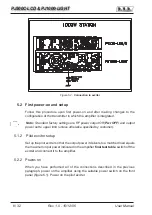
5.3 Operation
NOTE: For better clarity, only the typical screens of
PJ1000-LIGHT
are reported
below.
PJ500C-LCD
screens look the same except that full scale values are
different.
1) Power on the amplifier (chap. 6.1) and ensure that the
ON
light turns on (chap.
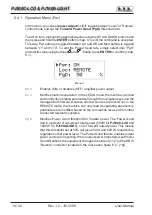
6.1). Machine name should appear briefly on the display, quickly followed by
forward and reflected power readings (Menu 1), provided that the amplifier is
delivering output power.
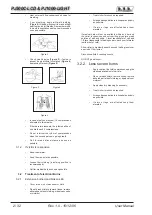
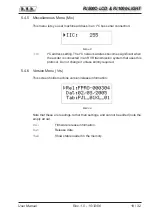
Menu 1
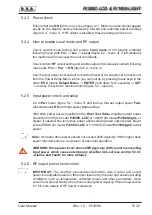
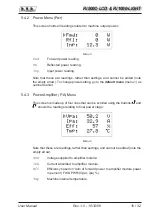
1b) To
modify power level setting
, hold down the
ENTER
button until opening
the
power setup menu
.
The edit screen will look like this:
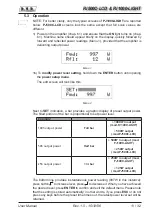
Menu 2
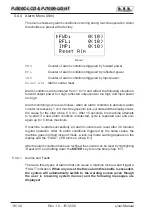
Next to
SET
indication, a bar provides a graphic display of preset output power.
The filled portion of the bar is proportional to set power level.
Example
100% output power
Full bar
≅
1000W in output
(mod.PJ1000-LIGHT)
≅
500W output
(mod.PJ500C-LCD)
50% output power
Half bar
≅
500W in output (mod.
PJ1000-LIGHT)
≅
250W output
(mod.PJ500C-LCD)
25% output power
1/4 bar
≅
250W in output (mod.
PJ1000-LIGHT)
≅
125W output
(mod.PJ500C-LCD)
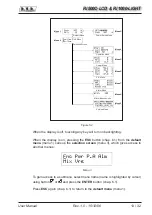
The bottom line provides instantaneous power reading (997W in this instance);
press button to increase level, press to decrease it. When you have achieved
the desired level, press
ENTER
to confirm and exit the default menu. Please note
that the setting is stored automatically; in other words, if you press
ESC
or do not
press any keys before the preset time times out, the latest power level set will be
retained.