


7
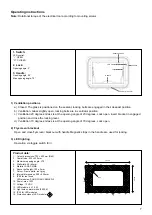
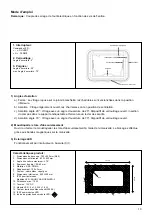
Operating instructions
Note:
Rotational torque of the electrical tool according to mounting screws.
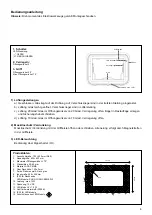
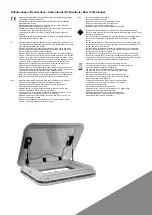
Handle position
Handle
LED switch
Current
Lock
Power: max. 15 W
1. Switch:
LED control:
“–”: OPEN
“O”: CLOSED
2. Lock:
Opening angle: 2°
3. Handle:
Opening angle: 20°
Max. opening angle: 70°
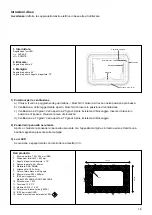
Product data:
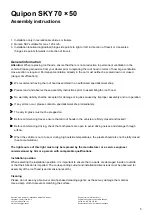
1. Cutout dimensions: 702 × 502 mm (R60)
2. Overall size: 833 × 633 mm
3. Maximum opening angle: ≤ 70°
4. Wall width: 25–60 mm
5. Material: ASA, PMMA
6. Above roof height: 100 ± 2 mm
7. Colour: Frame white, roof grey
8. Internal dimensions: 599 × 409 mm
9. IP55 for roof hood
LED modules: SHUN YUAN CB24LED-3
10. Power: max. 15 W
11. Voltage: 12 V DC
12. LED module: 6 × 1,2 W
13. Light colour: warm white (3000 K)
14. IP20 for LED modules
15. Protection class of LED module:
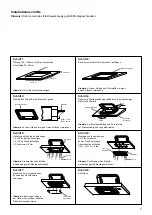
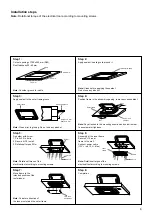
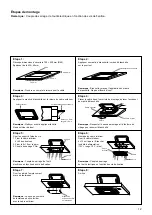
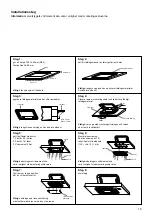
1) Ventilation positions
a) Closed: The glass is positioned on the sealant, locking bolts are engaged in their deepest position.
b) Ventilation: Glass slightly open, locking bolts are in ventilator position.
c) Ventilation 20 degrees: Glass is at the opening angle of 20 degrees. Lock open, insert bracket in engaged
position and close the locking lever.
d) Ventilation 70 degrees: Glass is at the opening angle of 70 degrees. Lock open.
2) Flyscreen / blackout
Open and close flyscreen / blackout with handle Magnetic strips in the handle are used for locking.
3) LED lighting
Operation via toggle switch (0 / I).
R60
702 mm
502 mm


