


3
.
Indoor Monitor Performance Data
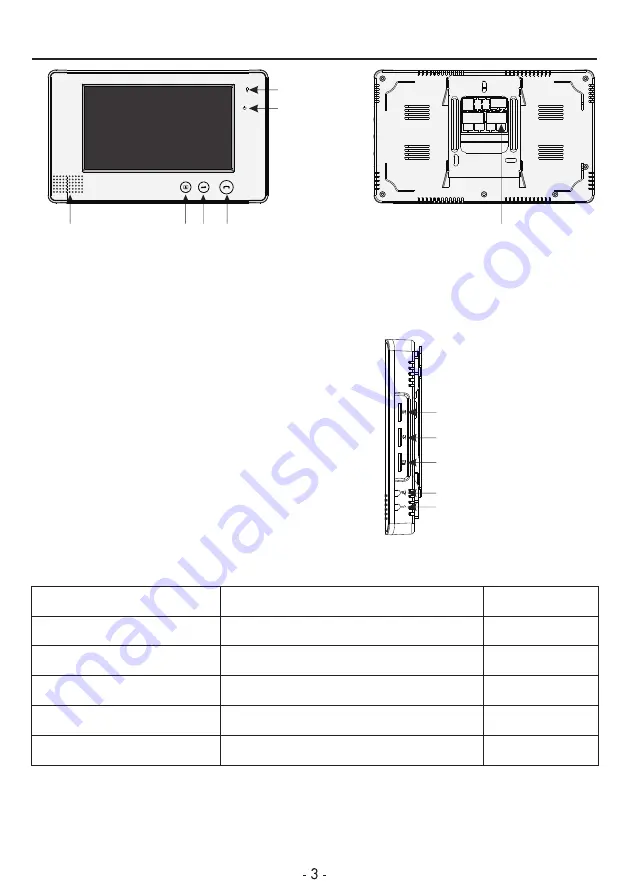
Microphone
Power Indicator Light
T
alk
Unlock
Monitor
speaker
P
o
w
e
r
S
o
c
k
e
t
1. Adapter input voltage: AC110-240V, 60Hz/ 50Hz
2. Adapter output voltage, output current: DC15V 1200mA
3. Talking last time: 120s±10%
4. Monitoring last time: 40S±10%
2
5. Working distance: 50M(4 x 0.5mm )
6. Power consumption: standby
<
0
.
5W,
working
<
10W
7. Illumination intensity: 2 luces
8. Visual angle: 92° wide-angle
9. Working temperature: -5°C~40°C
10. Relative humidity: 10-90%(RH)
Parameter
Screen Size
Resolution
Active Area
Pixel Size
Screen Figure Dimension
Unit
Inch
Dot
mm
mm
mm
169.4
【
W
】
X 100
【
H
】
X 5.7
【
D
】
0.107
【
W
】
X 0.37
【
H
】
154.1
【
H
】
X 86.58
【
V
】
480 X 3 X 234
7.0
Specifications
Performance Parameter
11. Indoor monitor dimension: 232
【
W
】
X
140
【
H
】
X
21
【
D
】
mm
Chroma Adjuster
Brightness Adjuster
Talking Volume Adjuster
Music Volume Adjuster
Music Selection Adjuster
Summary of Contents for VP-700A
Page 1: ...Instruction Manual COLOR VIDEO DOOR PHONE KITS VP 700A ID ...
Page 11: ......


