


5
Quansys Biosciences
Q-VIEW IMAGER PRO SETUP
The Q-View Imager Pro weighs approximately 13.6
kg (30 lbs). Use both hands and lift with your legs,
not with your back, when moving the Q-View Imager
Pro. To correctly setup the Q-View Imager Pro the
following steps should be followed:
1. Place the Q-View Imager Pro on a clean work
area.
2. Connect the wall cord to the Q-View Imager
Pro power supply.
3. Plug the wall cord into a surge protector.
4. Turn on the PC that will be running Q-View
Software.
5. Run the Q-View Imager Pro drivers installer.
6. Connect the USB cord to both the Q-View
Imager Pro and the PC.
7. Turn on the Q-View Imager Pro by pushing the
power switch on the back to the “|” position.
8. Install Q-View Software onto the computer
and follow the set up wizard prompts.
9. Once Q-View Software recognizes the Q-View
Imager Pro, green LED lights will turn on
around the tray button on the front of the
Q-View Imager Pro.
10. Press the tray button on the front of the
Q-View Imager Pro.
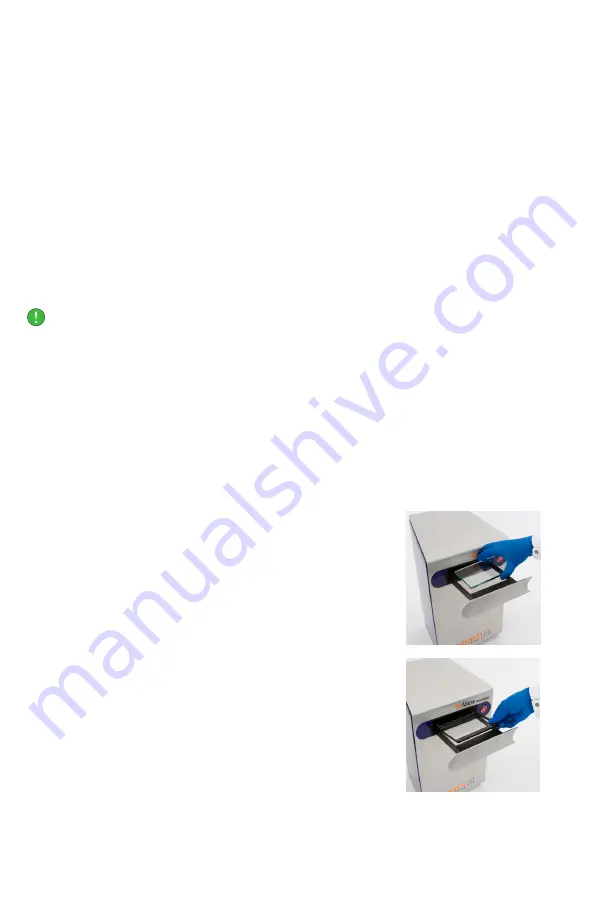
11. Once the tray is
opened, ensure the
enclosure where the
glass fits is clean of
debris and liquids.
12. Clean the Q-View
Imager Pro glass with
a lint-free cloth and
ethanol, rubbing alcohol,
or window cleaner.
13. Take the cleaned glass
and insert it into the
receptacle.
14. Then take the glass
cover and insert it on
the tray on top of the
glass with the A1 icon
positioned in the lower left hand corner.
15. Once the Q-View Imager Pro is connected,
click Continue on Q-View Software to scan for
imagers.
Note:
Steps 5
and 8
only apply to
PCs NOT purchased
from Quansys.
PCs purchased
from Quansys are
preconfigured with
Q-View Software and
the required Drivers
to run the Q-View
Imager Pro.


