


SETTING UP THE GEN 5 IN QTM
6
3.
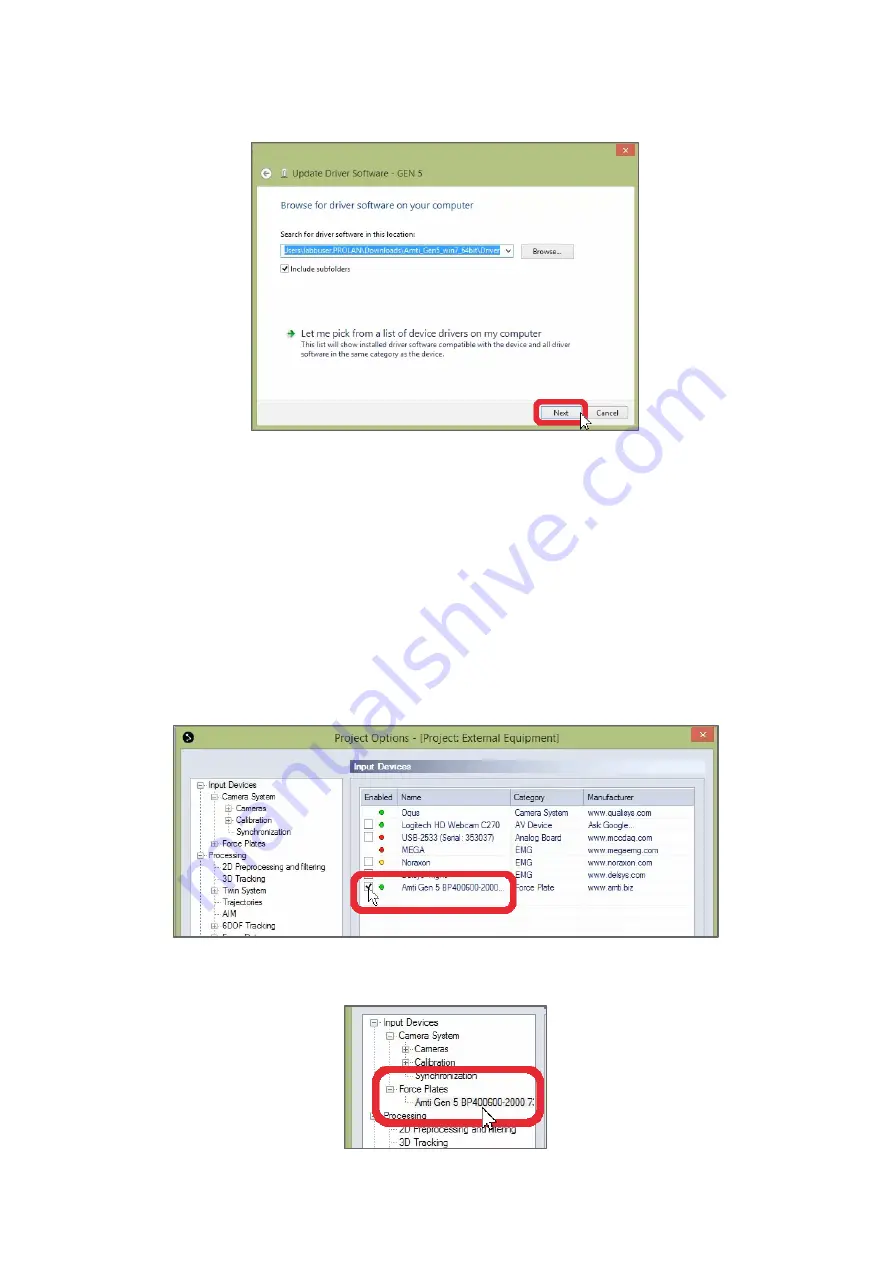
Click “Next,” and Windows will install the driver.
4.
When the installation finishes, click “Close.”
5.
You will need to close QTM as well before continuing.
Setting up in QTM
Once the Gen 5 driver has been installed, reopen QTM and select your current
project so you can adjust the amplifier’s settings.
1.
Open Project Options as before by clicking the gear icon near the top left of
your screen or by typing the keyboard shortcut
Ctrl+W
.
2.
In the Input Devices window, you will see a green circle next to the AMTI Gen
5 indicating that the amplifier is plugged in. Select the checkbox next to it, and
“Force Plates” will now show up under Input Devices in the list to the left.
3.
Click the plus sign beside “Force Plates,” then click on “Amti Gen 5” to change
its settings.


