


July 7, 2015
7022-514C
21
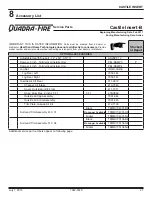
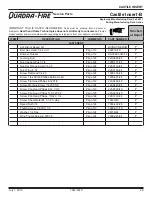
CASTILE INSERT
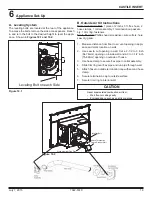
F. Hearth Support for Standard Surround Only
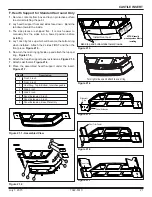
1.
Remove contents from box and lay on protective surface
to avoid scratching the paint.
2
. Lay hearth support front and sides face down. Bend the
tab down toward the inside.
3.
The side pieces are shipped fl at. It is much easier to
manually fl ex the sides into a bowed position before
installing.
4.
Lay 1 cast ring face up, which will become the bottom ring
when installed. Attach the 2 sides FIRST and then the
front piece.
Figure 21.3.
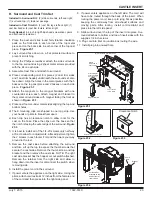
5
. Now turn the cast ring right side up and attach the top cast
ring .
Figure 21.4.
6
. Attach the hearth support panel extensions.
Figure 21.5
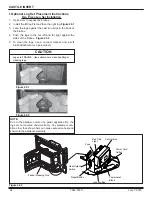
7.
Attach cast footers.
Figure 21.6.
8
. Place the assembled hearth support under the insert.
Figure 21.7.
Item
Description
1
Front, 3 inch
2
Front, 5 inch
3
Cast Ring, Top & Bottom, Interchangeable
4
Side, 5 inch
5
Side, 3 inch
6
Panel Extension, 5 inch
7
Panel Extension, 3 inch
8
Panel Extension, Base Plate Only
Figure 21.2
1
2
3
4
5
6
7
8
Figure 21.1 - Assembled View
Install Sides
First
Install Front Last
Bend top and bottom tabs toward inside
NOTE: Manually
pre-shape sides before
installing
Turn right side up and attach top cast ring
Panel Extension
Alignment
Hole
Cast Trim Footer
Panel Leg
Figure 21.3
Figure 21.4
Figure 21.5
Figure 21.6
Figure 21.7