background image

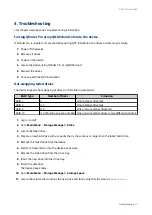
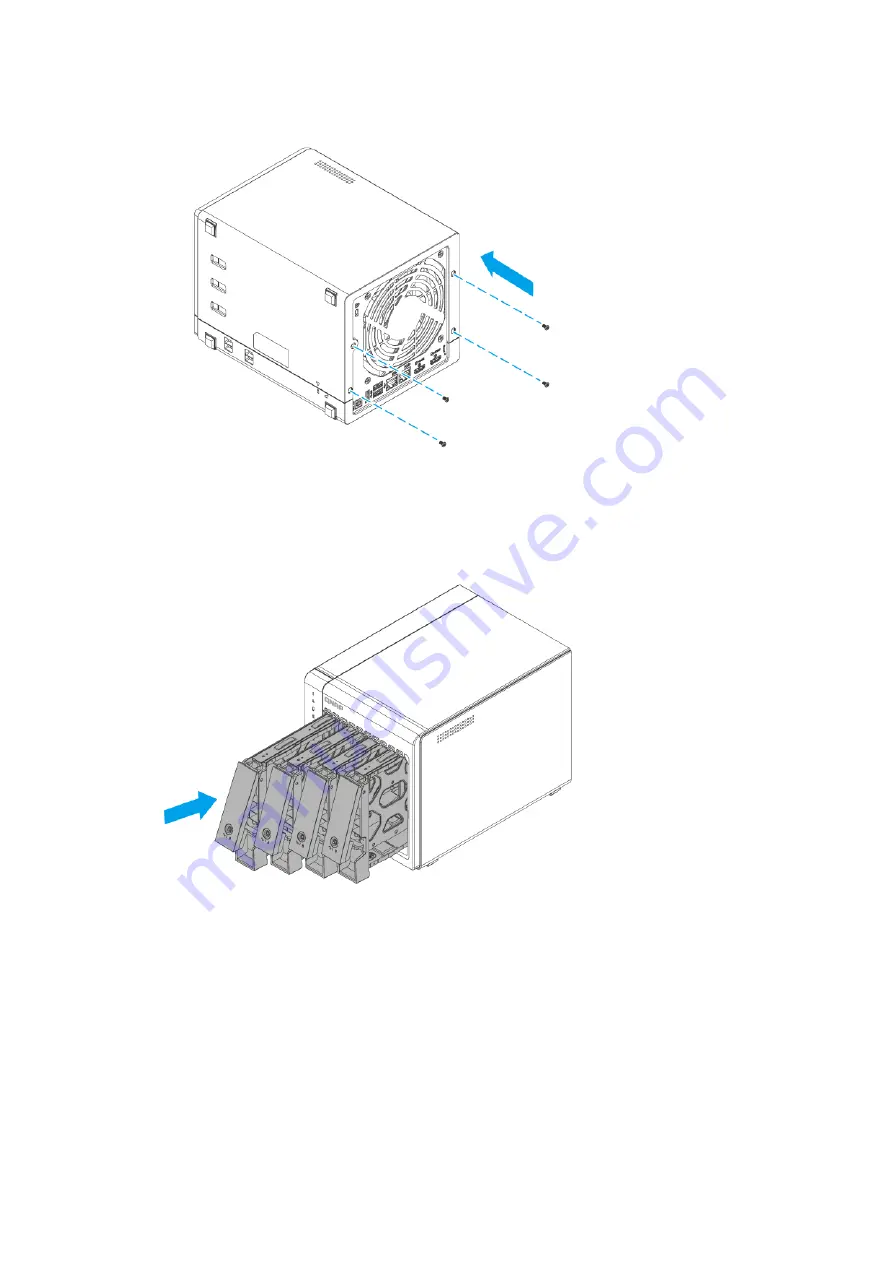
d. Place the device in its normal upright position.

e. Slide each drive tray back into the device. 

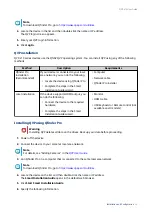
8. Connect all cables and external attachments.

9. Connect the power cord to the electrical outlet.

10. Power on the device.

Connecting the device to a computer or network

QVP-x1C series devices can be connected to a computer or local area network. For details, see the following

topics:

QVP-x1C User Guide

Installation and Configuration   

23

Summary of Contents for QVP 1C Series

Page 1: ...QVP x1C QVP 21C QVP 41C User Guide Document Version 1 19 07 2023...

Page 2: ...ing Qfinder Pro 25 Installing QVP using an HDMI connection 27 3 Basic Operations Audio alerts 28 LEDs 28 Power button 31 Reset button 31 USB One Touch Copy button 32 4 Troubleshooting Forcing Qfinder...

Page 3: ...unauthorized third party invalidates the warranty QNAP is not responsible for any damage or data loss caused by unauthorized modifications and installation of unsupported third party applications For...

Page 4: ...g drives except for the following M 2 SSDs Network 2 5 Gigabit network interface 2 x 2 5 GbE RJ45 Note The 2 5 Gigabit Ethernet RJ45 port supports the following network connectivity speeds 2 5 GbE 1 G...

Page 5: ...tery with a battery of the same type Fans System 1 x 70mm 12V DC fan System 1 x 120mm 12V DC fan Warning To avoid potential injury or damage to components do not touch the fans while the device is con...

Page 6: ...Item Quantity Screws for 2 5 inch drives QVP 21C 6 QVP 41C 12 Screws for M 2 SSDs 2 Quick Installation Guide QIG 1 Components Front panel QVP 21C QVP 41C QVP x1C User Guide Product Overview 5...

Page 7: ...on 3 USB One Touch Copy LED 7 USB One Touch Copy button 4 Drive LEDs 8 USB 3 2 Gen 2 One Touch Copy Type A port Rear panel QVP 21C QVP 41C No Component No Component 1 Reset button 7 2 5 Gigabit Ethern...

Page 8: ...hernet port 1 RJ45 10 USB 3 2 Gen 2 Type A port 5 2 5 Gigabit Ethernet port 2 RJ45 11 Power input 6 2 5 Gigabit Ethernet activity LED 12 Kensington security slot Top panel QVP 21C QVP 41C No Component...

Page 9: ...on General Instructions The device should be stored in a secure location with restricted access controlled through the use of a tool lock and key or any means of security Only qualified skilled and au...

Page 10: ...battery can cause severe or fatal injuries within 2 hours Keep batteries out of reach of children If you think batteries may have been swallowed or placed inside any part of the body seek immediate m...

Page 11: ...e Qfinder Pro installer If installing QVP using an HDMI connection the following are also required Monitor HDMI cable USB keyboard or Remote control not available on all models Tools Phillips 1 or 2 s...

Page 12: ...lity 3 Power on the device For details see Front panel 4 Connect the device to a computer or network For details see Connecting the device to a computer or network 5 Install QVP For details see QVP in...

Page 13: ...M 2 solid state drives Installing 2 5 inch solid state drives on 3 5 inch trays Warning Installing a drive deletes all data on the drive Observe electrostatic discharge ESD procedures to avoid damage...

Page 14: ...drive trays come unlocked b Pull the handle to release the tray c Pull the tray out 3 Install a drive on the tray a Remove the right fastening panel from the drive tray QVP x1C User Guide Installation...

Page 15: ...so that the holes on the sides of the drive are aligned with the holes on the sides of the tray c Attach the screws 4 Load the tray into the bay a Insert the tray into the bay QVP x1C User Guide Inst...

Page 16: ...he device Installing 3 5 inch hard drives on 3 5 inch trays Warning Installing a drive deletes all data on the drive Observe electrostatic discharge ESD procedures to avoid damage to components QVP x1...

Page 17: ...s Keep your hands and other body parts away from other moving components 1 Power off the device 2 Remove the drive tray a Optional Unlock the tray Note The preinstalled drive trays come unlocked b Pul...

Page 18: ...he sides of the drive tray b Place the drive on the tray so that the holes on the sides of the drive are aligned with the holes on the sides of the tray c Attach the fastening panels to lock the drive...

Page 19: ...d Optional Attach the screws to further secure the drive 4 Load the tray into the bay a Insert the tray into the bay b Push the handle QVP x1C User Guide Installation and Configuration 18...

Page 20: ...e device Installing M 2 solid state drives The QVP x1C has two M 2 SSD slots on the top panel For details see Top panel Warning Installing a drive deletes all data on the drive QVP x1C User Guide Inst...

Page 21: ...nts Keep your hands and other body parts away from other moving components 1 Power off the device 2 Disconnect the power cord from the electrical outlet 3 Disconnect all cables and external attachment...

Page 22: ...he cover back e Lift the cover until it is completely detached from the chassis 5 Install the M 2 SSD a Insert the M 2 SSD into the slot b Attach the screw QVP x1C User Guide Installation and Configur...

Page 23: ...nal Install an additional M 2 SSD 7 Attach the case cover a Place the cover on the device b Slide the cover forward c Attach the screws on the rear panel QVP x1C User Guide Installation and Configurat...

Page 24: ...es and external attachments 9 Connect the power cord to the electrical outlet 10 Power on the device Connecting the device to a computer or network QVP x1C series devices can be connected to a compute...

Page 25: ...onnect an Ethernet cable to the device b Connect the Ethernet cable to a Gigabit Ethernet port on the computer 3 Verify that the device is recognized by the computer a Open Qfinder Pro on the host com...

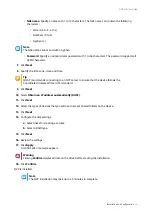
Page 26: ...output you can do the following Connect the device to the required hardware Complete the steps in the Smart Installation Guide wizard Monitor HDMI cable USB keyboard or Remote control not available on...

Page 27: ...e Coordinated Universal Time UTC standard 9 Click Next 10 Select Obtain an IP address automatically DHCP 11 Click Next 12 Select the types of devices that you will use to access shared folders on the...

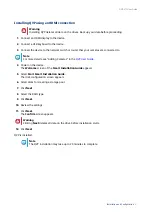
Page 28: ...er Guide 4 Power on the device The Welcome screen of the Smart Installation Guide appears 5 Select Start Smart Installation Guide The disk configuration screen appears 6 Select disks for creating a st...

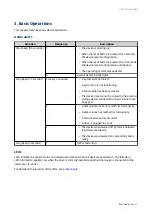
Page 29: ...ata cannot be copied to the external storage device connected to the USB One Touch Copy port 2 A disk volume is about to reach its full capacity A disk volume has reached its full capacity A volume st...

Page 30: ...ing An error occurred when accessing read write the data A bad sector is detected on the hard drive The device is in degraded read only mode two member drives failed in RAID 5 or RAID 6 but the data c...

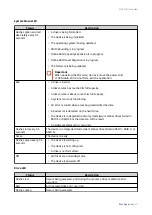
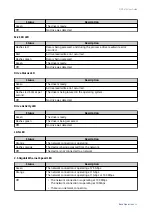
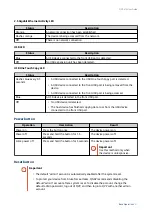
Page 31: ...rive was detected Drive Activity LED Status Description Green The drive is ready Flashes green The drive is being accessed Off No drive was detected LAN LED Status Description Orange The network conne...

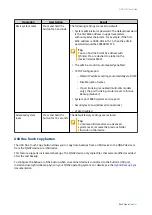
Page 32: ...in the front USB port Off No USB device is detected The host device has finished copying data to or from the USB device connected to the front USB port Power button Operation User Action Result Power...

Page 33: ...t to Active Backup Failover System port 8080 system service port Security level Low Allow all connections VLAN Disabled Advanced system reset Press and hold the button for 15 seconds The default facto...

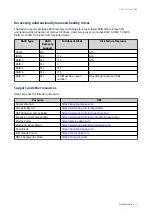
Page 34: ...drive fails RAID 5 3 One member drive fails RAID 6 4 One or two member drives fail RAID 10 4 Must be an even number One or two member drives in two different pairs fail 1 Log on to QVP 2 Go to Main Me...

Page 35: ...RAID 6 Yes 4 2 RAID 10 Yes 4 Must be an even number One disk per subgroup fails Support and other resources QNAP provides the following resources Resource URL Documentation https download qnap com Com...

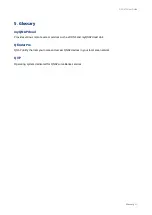
Page 36: ...ote access services such as DDNS and myQNAPcloud Link Qfinder Pro QNAP utility that lets you locate and access QNAP devices in your local area network QVP Operating system dedicated for QNAP surveilla...

Page 37: ...consequential damages resulting from the use of the product its accompanying software or its documentation QNAP makes no warranty or representation expressed implied or statutory with respect to its...

Page 38: ...received You must make sure that they too receive or can get the source code And you must show them these terms so they know their rights Developers that use the GNU GPL protect your rights with two s...

Page 39: ...in the normal form of packaging a Major Component but which is not part of that Major Component and b serves only to enable use of the work with that Major Component or to implement a Standard Interfa...

Page 40: ...ing Modified Source Versions You may convey a work based on the Program or the modifications to produce it from the Program in the form of source code under the terms of section 4 provided that you al...

Page 41: ...Library need not be included in conveying the object code work A User Product is either 1 a consumer product which means any tangible personal property which is normally used for personal family or h...

Page 42: ...ble ways as different from the original version or d Limiting the use for publicity purposes of names of licensors or authors of the material or e Declining to grant rights under trademark law for use...

Page 43: ...with reasonable efforts You may not impose any further restrictions on the exercise of the rights granted or affirmed under this License For example you may not impose a license fee royalty or other...

Page 44: ...other pertinent obligations then as a consequence you may not convey it at all For example if you agree to terms that obligate you to collect a royalty for further conveying from those to whom you con...

Page 45: ...G RENDERED INACCURATE OR LOSSES SUSTAINED BY YOU OR THIRD PARTIES OR A FAILURE OF THE PROGRAM TO OPERATE WITH ANY OTHER PROGRAMS EVEN IF SUCH HOLDER OR OTHER PARTY HAS BEEN ADVISED OF THE POSSIBILITY...

Page 46: ...guarantee that interference will not occur in a particular installation If this equipment does cause harmful interference to radio or television reception which can be determined by turning the equipm...

Page 47: ...11364 2006 RoHS RoHS Pb Hg Cd CR VI PBB PBDE 0 0 0 0 0 0 0 0 0 0 0 0 0 0 0 0 0 0 0 0 0 0 0 0 0 0 0 0 0 0 0 0 0 0 0 0 0 0 0 0 0 0 0 0 0 0 0 0 O SJ T11363 2006 X SJ T11363 2006 QVP x1C User Guide Notice...

Reviews: